


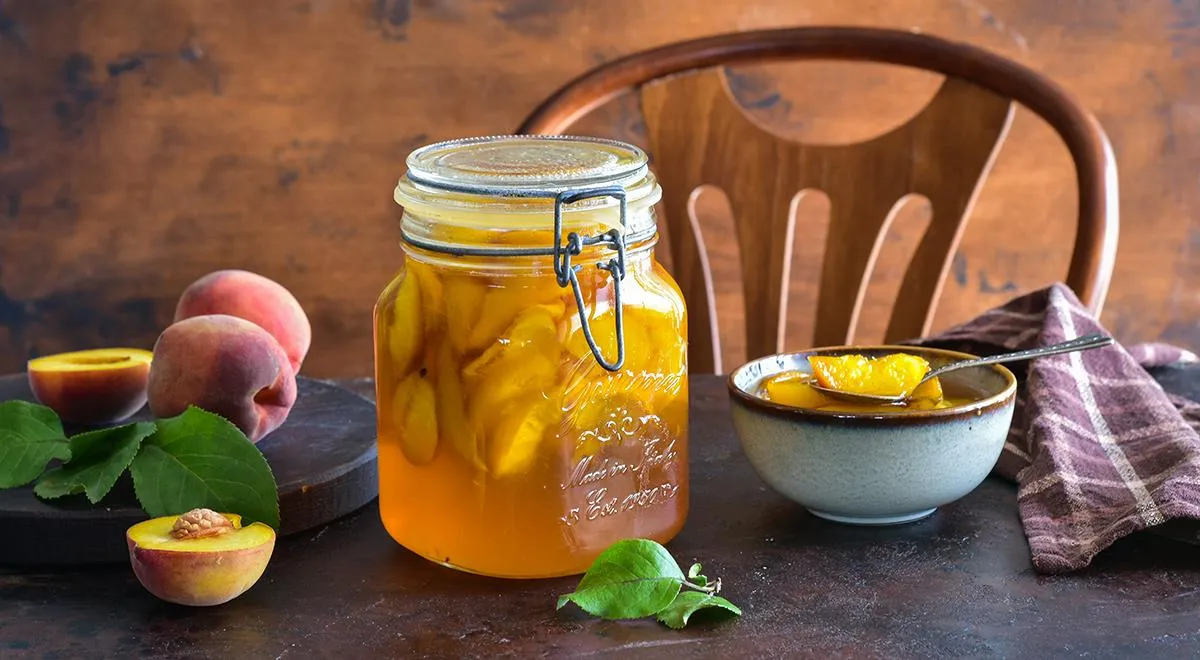
There is something magical about capturing the essence of summer in a jar. Peach preserves with slices, known in Russian as varenye iz persikov dolkami, offer a delicate balance of sweetness and bright fruitiness. Unlike jam, this preserve keeps the fruit intact, allowing each slice to shimmer like amber when held up to the light. This recipe, passed down through generations, yields a luscious syrup and tender, translucent peach pieces perfect for spooning over pancakes, layering on toast, or pairing with cheese. If you have ever wondered how to can fruit safely and beautifully, this is the place to start.
About Peach Preserves
Peach preserves have been a staple of Eastern European pantries for centuries, offering a taste of sunshine during long winters. The key to success lies in selecting perfectly ripe yet firm peaches and treating them gently so they retain their shape. This particular version uses a multiple-heating technique that draws out natural pectin and creates a crystal-clear syrup without the need for added thickeners. The result is a sophisticated preserve that elevates everything from morning porridge to afternoon tea. For a deeper dive into kitchen tools that help achieve consistent results, our reviews offer practical guidance.

Ingredients
- 1.5 kg ripe but firm peaches
- 900 g granulated sugar
- Juice of 1/4 lemon (about 1 tablespoon)
The ratio of fruit to sugar is crucial: slightly less sugar than fruit ensures the preserves are not cloying, while the lemon juice adds brightness and helps preserve color. For those who prefer a lower sugar option, consider air fryer techniques for dehydrating fruit as an alternative way to enjoy peach slices year‑round.
Step-by-Step Instructions
Follow these carefully timed steps to achieve perfect peach preserves with distinct slices.
Step 1: Prepare the peaches
Wash the peaches thoroughly. In a large pot, bring water to a rolling boil. Drop the peaches in for exactly 30 seconds, then transfer them to a colander. This simple blanching loosens the skins.

Step 2: Peel and slice
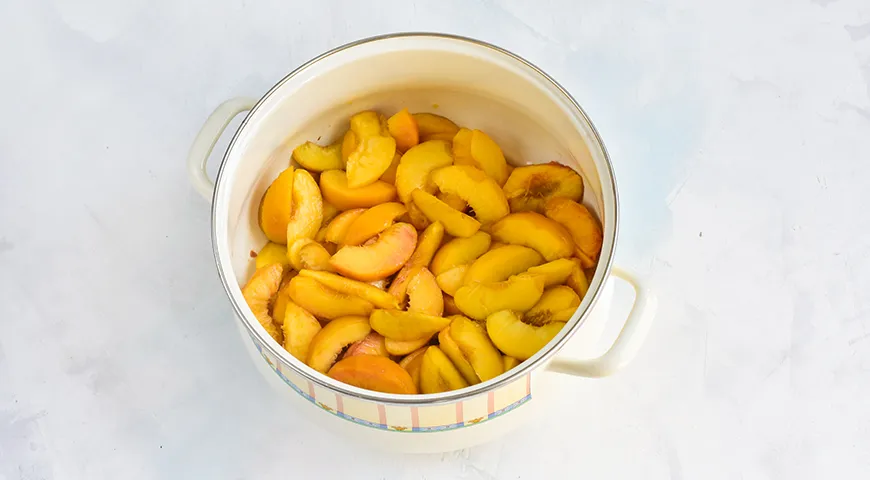
Once cool enough to handle, peel off the skins. Cut each peach in half, remove the pit, and slice the flesh into even wedges about 1‑2 cm thick. Place slices in a wide enameled pot or basin.
Step 3: Macerate in sugar
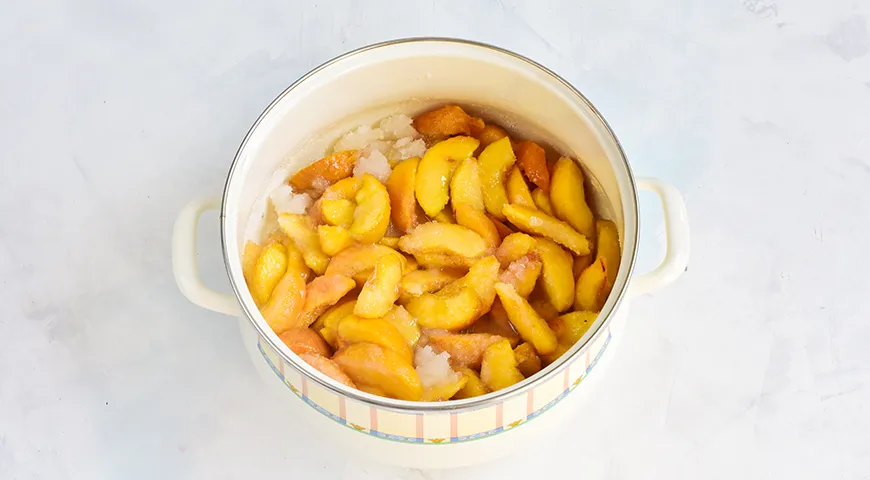
Sprinkle the sugar evenly over the peach slices. Cover the pot with double‑layered cheesecloth or a clean kitchen towel. Let stand at room temperature for 4 hours. During this time, the peaches will release their juice, forming a natural syrup.
Step 4: First heating
Gently shake the pot to redistribute the sugar. Place on the lowest possible heat and, stirring very carefully, bring just to a boil. Do not crush the fruit.

Step 5: First rest
Remove from heat and allow the preserves to cool completely. This initial rest lets the fruit absorb the syrup and become translucent.

Step 6: Second heating and cooling
Return the pot to the heat and bring to a boil again. Cook for exactly 5 minutes. Remove from heat and cool completely once more.

Step 7: Final cooking
Bring the preserves to a boil for the third time. Cook over medium heat for 10 minutes, occasionally shaking the pot (do not stir vigorously). Add the lemon juice and cook for another 5 minutes. The syrup should be thick and the slices tender but not mushy.

Step 8: Jar and seal
Ladle the hot preserves into dry sterilized jars, leaving 1 cm headspace. Seal immediately with lids. Invert the jars onto a folded towel and let cool upside down—this creates a natural vacuum seal.

Tips for Perfect Peach Preserves
Use freestone peaches for easier slicing. For the brightest color, choose fruit with no green shoulders. The multiple heating method prevents the slices from turning to mush; do not skip the resting periods. If you own a non‑toxic immersion blender, it can help skim foam if desired. Always keep your microwave pressure cooker handy for quickly sterilizing jars. For a foolproof seal, use a steam canner instead of the inversion method.
Variations
Infuse the preserves with vanilla bean, star anise, or a cinnamon stick during the final cooking. A splash of peach liqueur or bourbon adds complexity. For a lower‑sugar version, swap half the sugar for organic vodka (the alcohol cooks off) or a honey‑based syrup. Pair the preserves with chocolate‑covered raisins for an indulgent snack. The same technique works for nectarines, plums, or apricots.
Frequently Asked Questions
How long does peach preserves last?
Properly sealed jars stored in a cool, dark place will last up to one year. Once opened, refrigerate and consume within three weeks.
Can I reduce the sugar?
Yes, but the preserves may be thinner and require longer cooking to concentrate flavors. If you reduce sugar by more than 20%, consider adding a pinch of pectin (or bottled fruit pectin) to help set the syrup.
Why did my peaches turn brown?
Oxidation can occur if the fruit is not blanched quickly or if the cut surfaces are exposed to air. Adding lemon juice at the end helps maintain a golden color. For best results, use a wheatgrass juicer? Actually, no—just work fast and keep fruit submerged in syrup.
Do I have to blanch the peaches?
Blanching makes peeling effortless, but you can skip it by scoring the skins and boiling for one minute, then plunging into ice water. Alternatively, use a food processor fitted with a slicing disk for perfectly uniform slices.
Can I double the recipe?
Yes, but use a larger pot and allow extra time for the sugar to dissolve. Maintain the same fruit‑to‑sugar ratio. For large batches, a countertop convection oven on low heat can help dry jars, but for cooking, a wide heavy‑bottomed pan is best.
Conclusion
Peach preserves with slices are more than a condiment—they are a celebration of summer’s bounty. This recipe, rooted in tradition but adaptable to modern kitchens, rewards patience with jewel‑like fruit and a syrup that tastes like liquid gold. Whether you are a seasoned preserver or a curious beginner, the gentle method here guarantees success. For more inspiration on preserving and pairing, explore our guides on sweet wine pairings and oil sprayers for finishing dishes. Store a few jars for yourself, and give the rest as gifts—they will be cherished.







