


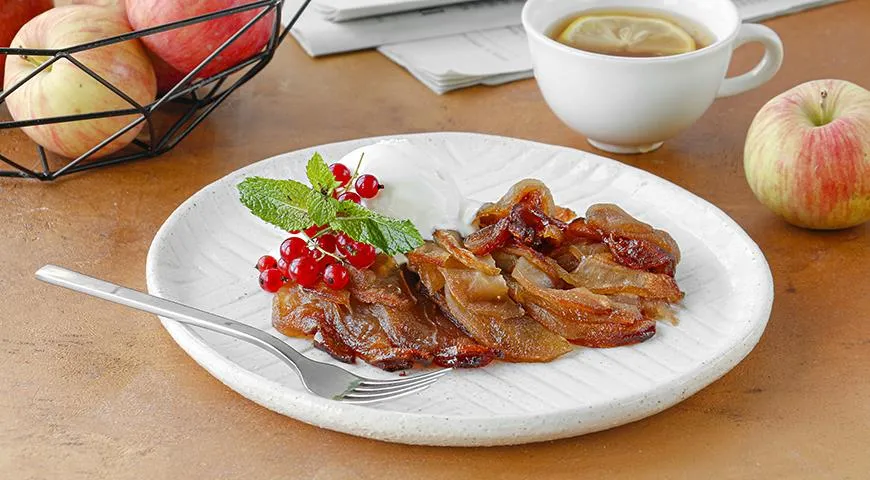
There is a quiet magic in the alchemy of slow-roasted fruit. A humble apple, when subjected to hours of gentle heat in a sealed ceramic or cast-iron vessel, transforms into something entirely unexpected—neither a simple baked apple nor a jam, but a refined, amber-hued preserve that whispers of old-world kitchens and patient hands. This is a dessert that demands time, not skill; it rewards the cook with a jewel-like confit that can be served warm or chilled, spooned over yogurt, layered into tarts, or simply savored on its own. The technique—low and slow under a lid—concentrates natural sugars while preserving a silky texture that melts on the tongue.
About the Recipe
This preparation, rooted in traditional Slavic home cooking, relies on the principle of tomlenie—a slow, prolonged simmering in a sealed pot. Unlike quick-roasted apples, which soften but retain their shape, these apples shrink dramatically as they release their juices and then reabsorb them, creating a dense, concentrated compote. As the dessert cools, it naturally gels without added pectin, achieving a spoonable yet firm consistency. The choice of apple is paramount: a tart, firm variety such as Granny Smith provides the necessary acidity to balance the caramelized sweetness. For the most lustrous color and a subtle butterscotch note, brown sugar is recommended over white. This dish is ideal for those who appreciate the art of precision equipment and the patience required for truly transformative cooking.

Ingredients
- 1 kg (about 6 medium) tart apples (e.g., Granny Smith)
- 120 g soft brown sugar (light or dark)
- Optional: 1 vanilla pod or 1 tsp natural vanilla sugar, mixed with the brown sugar
That's it. The brilliance lies in the simplicity. No butter, no spices—though a pinch of cinnamon or cardamom is never unwelcome. The apples provide everything: sweetness, structure, and a natural pectin that thickens as it cools. Ensure your baking vessel is deep enough to allow 2–3 cm of headspace, as the apples will bubble and rise during cooking. A quality refrigerator will later be essential for chilling the finished dessert.
Step-by-Step Instructions
Preheat your oven to 180°C (350°F). Prepare a ceramic, clay, or enameled cast-iron dish with a tight-fitting lid—something that can withstand long, even heat. No need to grease the dish.
Step 1: Prep the apples
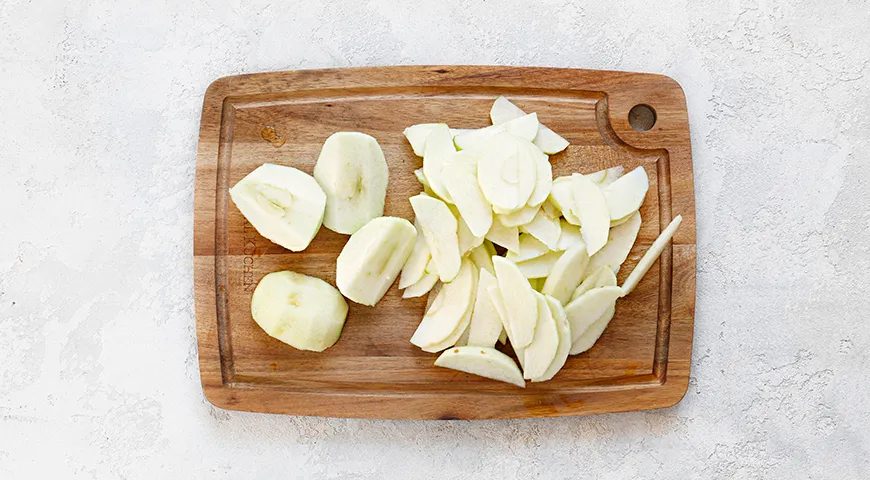
Peel the apples completely. Cut each into quarters and remove the core. Slice each quarter lengthwise into thin, even slices about 5 mm thick. Uniform slices ensure even cooking and a consistent texture. If you own a glass food processor, it can expedite this task, but a sharp knife and a steady hand work beautifully.
Step 2: Layer and sugar
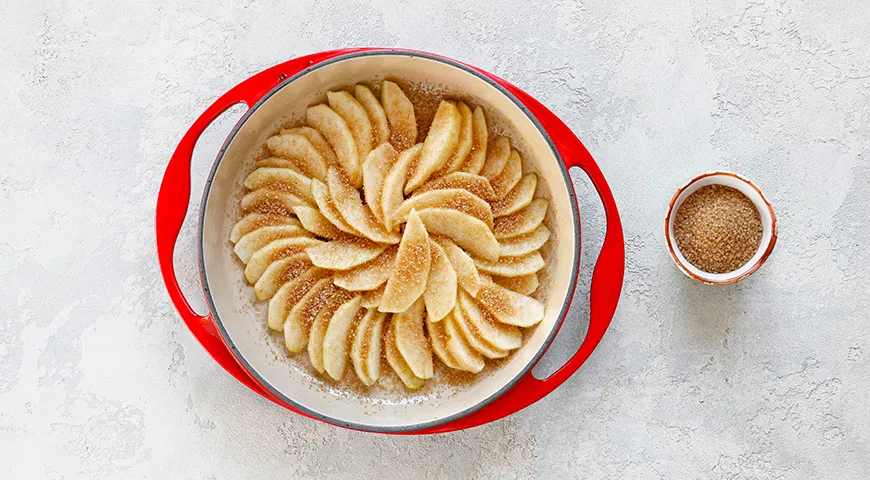
Arrange a layer of apple slices in the dish, then sprinkle evenly with a portion of the brown sugar. Repeat, building layers, until all apples and sugar are used. Press down gently to compact. Crucially, leave 2–3 cm of space between the top layer and the rim of the dish—apple juice will bubble up during baking and may overflow if packed too full. For an extra layer of aroma, stir the optional vanilla sugar into the brown sugar before layering. A microwave pressure cooker is not used here, but the concept of controlled steam release is analogous.
Step 3: Bake covered
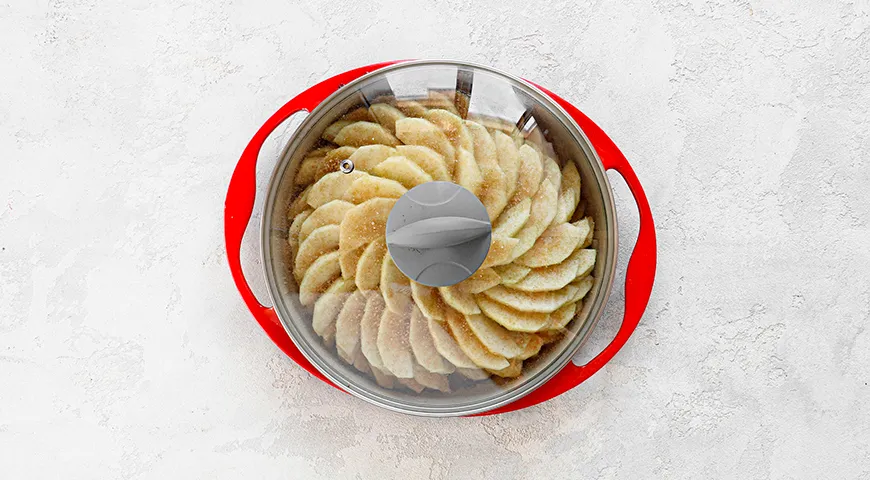
Cover the dish tightly with its lid. Transfer to the preheated oven and bake for 2 to 3 hours. The exact time depends on your oven, the apple variety, and the thickness of your slices. After 2 hours, check for a deep golden-amber color and a soft, almost translucent appearance. The apples will have shrunk considerably. If they appear too pale, continue baking, checking every 20 minutes. The fragrance alone will signal readiness. For even heat distribution, consider using a commercial countertop convection oven, which circulates air beautifully around the vessel.
Step 4: Cool and serve
Remove the dish from the oven and let it cool completely, uncovered. The apples will continue to set and gel as they cool. Serve warm as a compote over ice cream, or chill thoroughly and slice into wedges for a firmer, almost jammy dessert. The texture is wonderfully versatile. A delicate oil sprayer has no place here—this is pure fruit, no fat needed.
Tips for Perfect Results
- Choose the right apple: Firm, tart apples hold their shape and provide necessary pectin. Avoid mealy or very sweet varieties like Red Delicious.
- Don't skip the headspace: The 2–3 cm gap is non-negotiable—overflowing juice can burn and smoke.
- Use a heavy, sealed vessel: Ceramic, clay, or enameled cast iron all work; ensure the lid fits snugly. A non-toxic air fryer is not suitable for this slow-cooking method, but the principle of enclosed heat applies.
- Patience is key: The full 3 hours yields a more concentrated, caramelized result. Do not rush—your espresso machine can keep you company while you wait.
- Cool completely: The gelling happens below 40°C; refrigerate overnight for best texture.
Variations
- Spiced version: Add a cinnamon stick or ½ tsp ground cardamom between the layers.
- Citrus twist: Scatter a few strips of orange zest or a tablespoon of lemon juice for brightness.
- Poached fruit alternative: Use this same technique with pears or quince; adjust sugar to taste.
- Alcoholic accent: Splash 2 tbsp of Calvados or dark rum over the apples before baking for an adult finish.
Frequently Asked Questions
Can I use white sugar instead of brown?
Yes, but the color will be paler and the caramel notes less pronounced. Brown sugar’s molasses content deepens both flavor and appearance. For a refined alternative, try artisanal coffee syrups to complement the sweetness.
Do I need to add water or juice?
No. The apples release enough liquid during the first hour to create their own steam bath. Adding water would dilute the natural concentration.
How long will this dessert keep?
Stored in a sealed container in the refrigerator, it will keep for up to two weeks. The flavor continues to meld. A steam canner could be used for longer preservation, but refrigeration is simplest.
Can I freeze the baked apples?
Absolutely. Portion into airtight containers and freeze for up to 3 months. Thaw overnight in the refrigerator. The texture remains excellent if cooled properly before freezing.
What if my apples turn too dark?
Overcooking can push them beyond amber into a slightly scorched flavor. Check at 2 hours; if your oven runs hot, reduce temperature to 170°C. For consistent results, consider using a wall oven microwave combo with precise temperature control.
Can I add nuts or dried fruit?
Certainly. Walnut halves or raisins can be layered in, but add them halfway through to prevent burning. The chocolate-covered raisins from our store make a decadent topping post-baking.
Is this dessert suitable for a sugar-free diet?
You can reduce sugar by half or use a natural sweetener like erythritol, but the gelling texture may be less firm. For a guide on sugar alternatives, our organic vodka pairing article discusses complementary flavor profiles.
This slow-roasted apple creation is a testament to how time, not complexity, builds flavor. Whether you serve it as a rustic dessert or an elegant topping, each spoonful carries the essence of autumn—concentrated, golden, unforgettable.







