


In the world of Russian cuisine, few dishes evoke the warmth of home and the artistry of tradition quite like blini. These delicate, lacy pancakes are not merely food; they are a canvas for seasonal ingredients, a celebration of life’s small pleasures. Our recipe for hot water blini—known in Russian as blinchiki na kipyatke—takes the classic to new heights, infusing boiling water into the batter for an impossibly tender, airy crumb. As noted in the original Gastronom.ru post, authentic blini are baked, not fried, a vestige of the era when they were cooked in a Russian pech oven. This method yields a distinctly aromatic pancake with a subtly bronzed top crust. We honor that spirit here, using modern techniques to replicate the magic of the hearth.
About This Recipe
Traditional blini recipes often rely on yeast or buttermilk for lift, but our hot water approach is both faster and more forgiving. The key is incorporating boiling water—kipyatok—into the batter after mixing, which instantly gelatinizes the starches, creating a silky, elastic dough. This technique, beloved across Russian households, guarantees thin, tender pancakes with those coveted tiny holes that soak up sour cream or butter. The original recipe’s simplicity—just flour, eggs, milk, water, oil, salt, and sugar—makes it accessible to beginners, yet the results rival those of a seasoned pancake artist. For a deeper dive into batter consistency, consider using a non-toxic immersion blender to achieve flawless smoothness every time.

Ingredients
- 140 g wheat flour
- 2 tsp sugar
- ½ tsp salt
- 2 tbsp neutral vegetable oil (plus extra for greasing)
- 2 large eggs
- 125 ml boiling water
- 125 ml drinking water
- 125 ml milk (preferably whole)
- Pork fat or oil for the pan
All measurements are metric, confirming with global baking standards. The balance of milk and water keeps the crumb light, while the oil enriches without heaviness. For the best flavor, opt for pasture-raised eggs and organic milk—your palate will notice the difference. If you are planning to make large batches, a planetary mixer can whisk the batter effortlessly, though a hand whisk works beautifully for this small batch.
Step-by-Step: How to Make Hot Water Blini
Follow these nine precise steps to create restaurant-worthy blini. Each image corresponds to a critical stage.
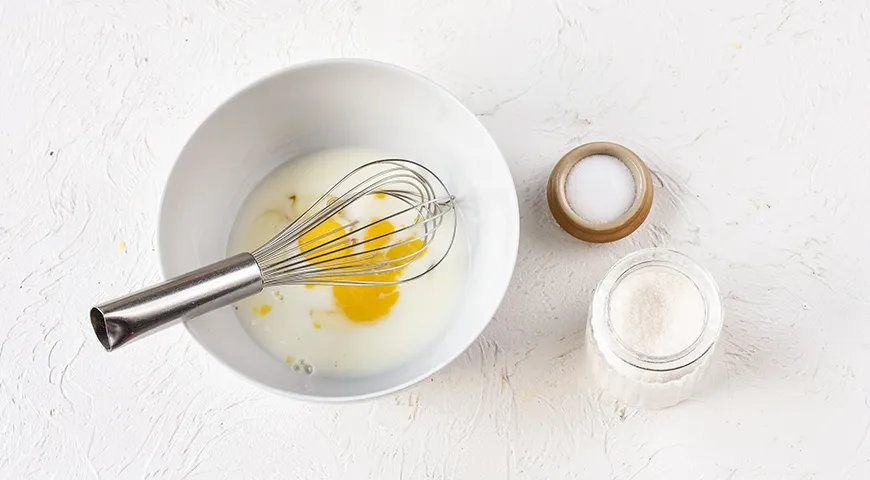
Step 1: Mix Wet Ingredients
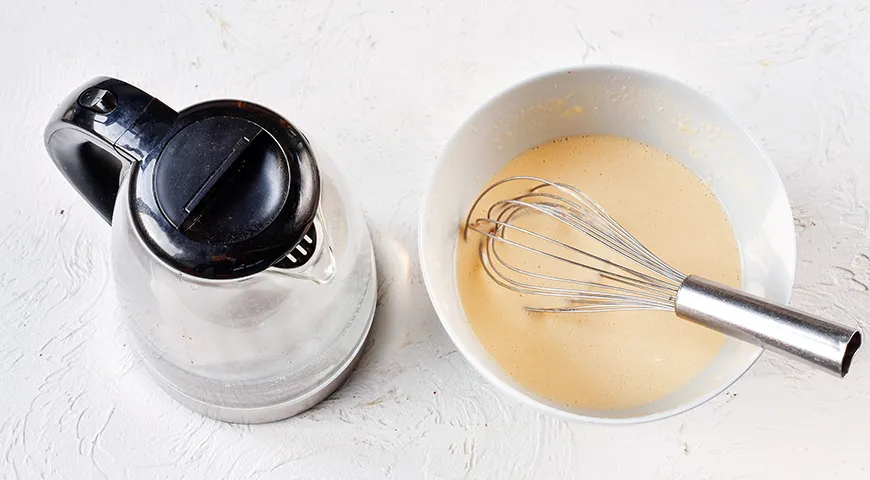
In a spacious bowl, whisk together the eggs, milk, sugar, and salt. Use gentle, sweeping strokes—no need for frothy enthusiasm. This initial blend sets the foundation for a uniform batter. If your whisk is uneven, a quality immersion blender can save time, but a simple hand whisk maintains the rustic charm.
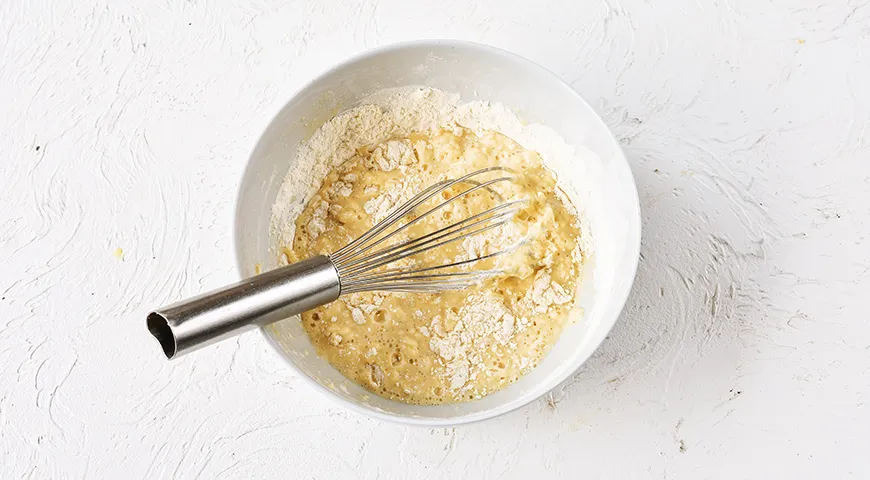
Step 2: Incorporate Flour
Add the flour to the bowl and stir with a whisk until just combined. Do not overmix—lumps are acceptable at this stage. The goal is to avoid developing gluten, which would toughen the blini. A non-toxic immersion blender can be used here for a smooth batter, but minimal effort yields the best texture.
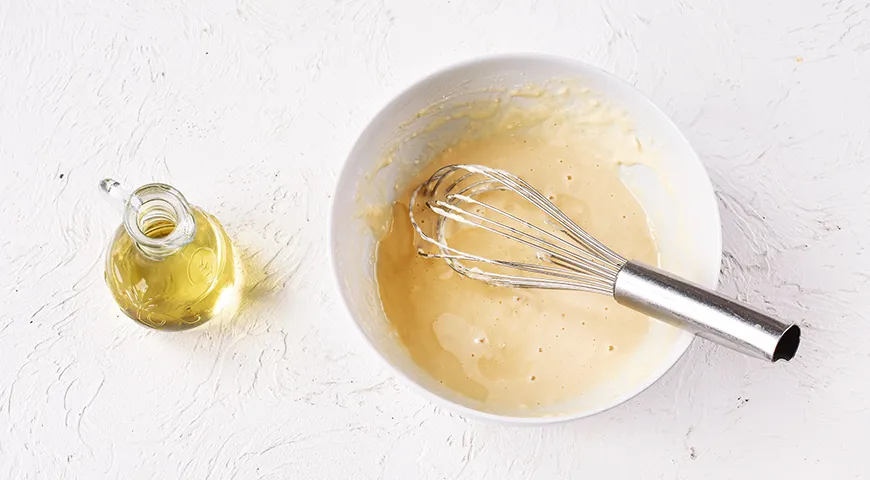
Step 3: Add Oil
Stream in the two tablespoons of vegetable oil and stir gently. The oil improves fry-ability and tenderness. For a healthier option, consider using a best oil sprayer to lightly coat the pan later.
Step 4: Pour in Boiling Water
Bring the water to a full boil and immediately pour 125 ml into the batter while stirring. The hot water will transform the consistency, making it glossy and thin. This is the moment of alchemy. Stir until homogenous; the batter should flow like heavy cream. For exact temperature control, an espresso machine isn’t needed, but a reliable kettle is invaluable.
Step 5: Heat the Pan
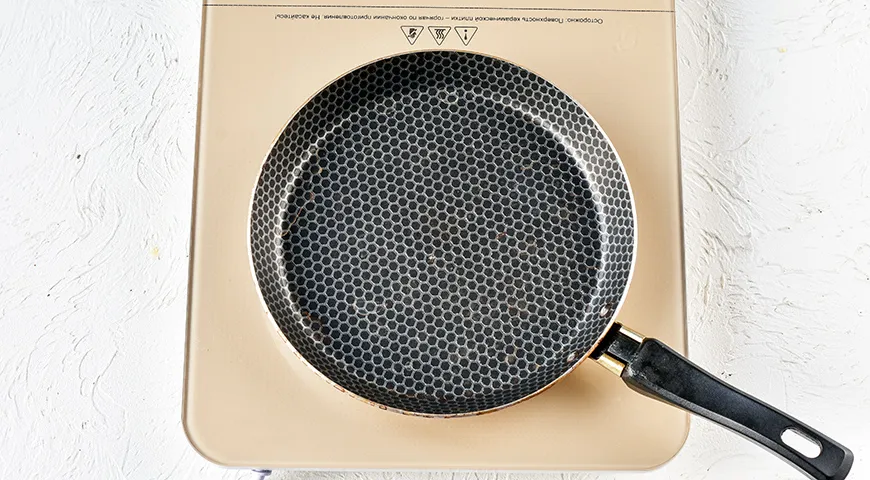
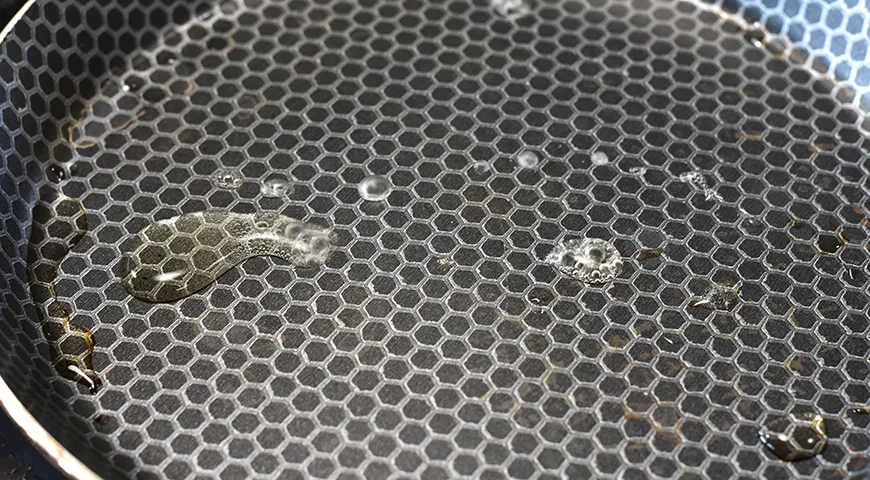
Place a non-stick or cast-iron crêpe pan over medium-high heat. The pan must be thoroughly preheated—this is non-negotiable. Test by flicking a drop of water; it should sizzle and race across the surface. If using cast iron, season it well. For even heating, a commercial countertop convection oven isn’t needed, but a quality stovetop pan is essential.
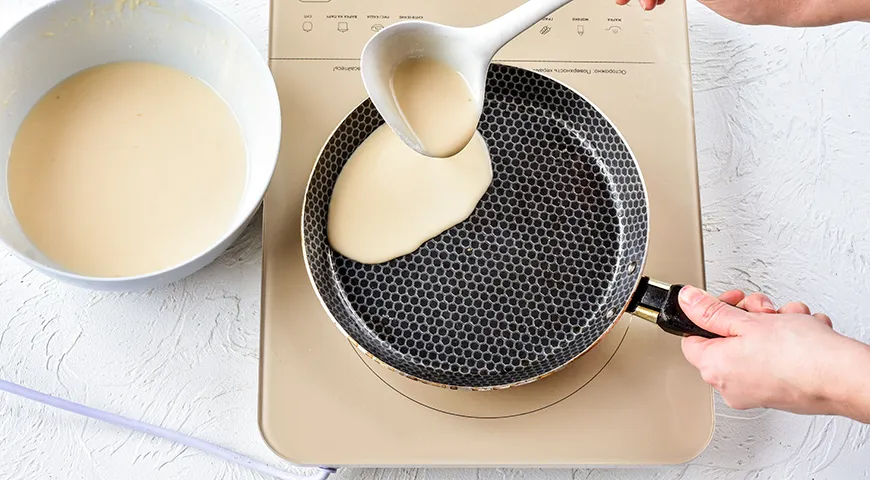
Step 6: Ladle and Swirl
Pour a scant ladleful (about ¼ cup) of batter onto the hot pan, tilting immediately to spread it thinly across the entire surface. This swift swirling motion is the hallmark of a confident crêpier. The batter should sizzle upon contact. If the pan is too cool, the blini will be dense; too hot, and they’ll burn before the second side cooks.
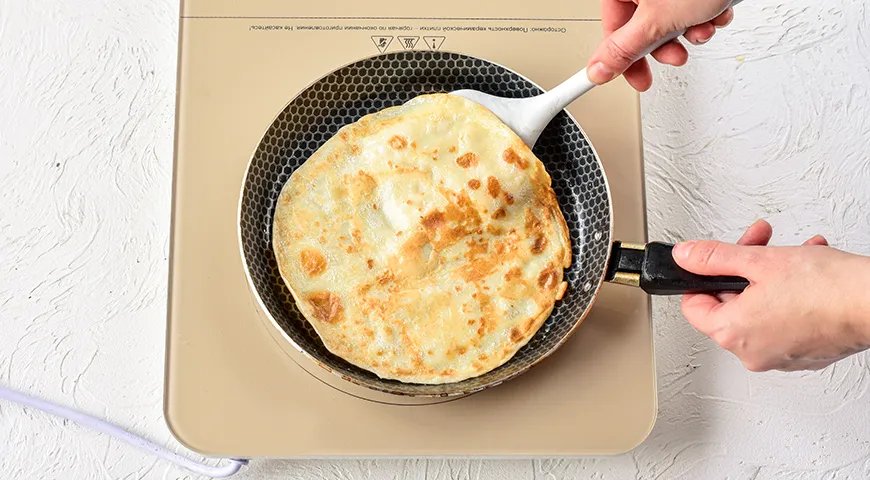
Step 7: Flip Once
When the edges begin to lift and the surface is set with golden flecks (about 45 seconds), use a thin spatula to flip. Cook the second side for 20–30 seconds until lightly spotted. Do not press down—the steam escaping creates those lovely holes. For a lighter texture, an air fryer can be used for a second batch, but stovetop remains traditional.
Step 8: Check Thickness
If your blini is thicker than desired, add a splash more boiling water—start with 2 tablespoons—and stir. The ideal blini should be thin enough to see light through, with a delicate lace network. Adjust heat as needed: too high? Lower slightly. Too low? Raise it. A microwave pressure cooker can quickly reheat any thicker leftovers, but fresh is best.
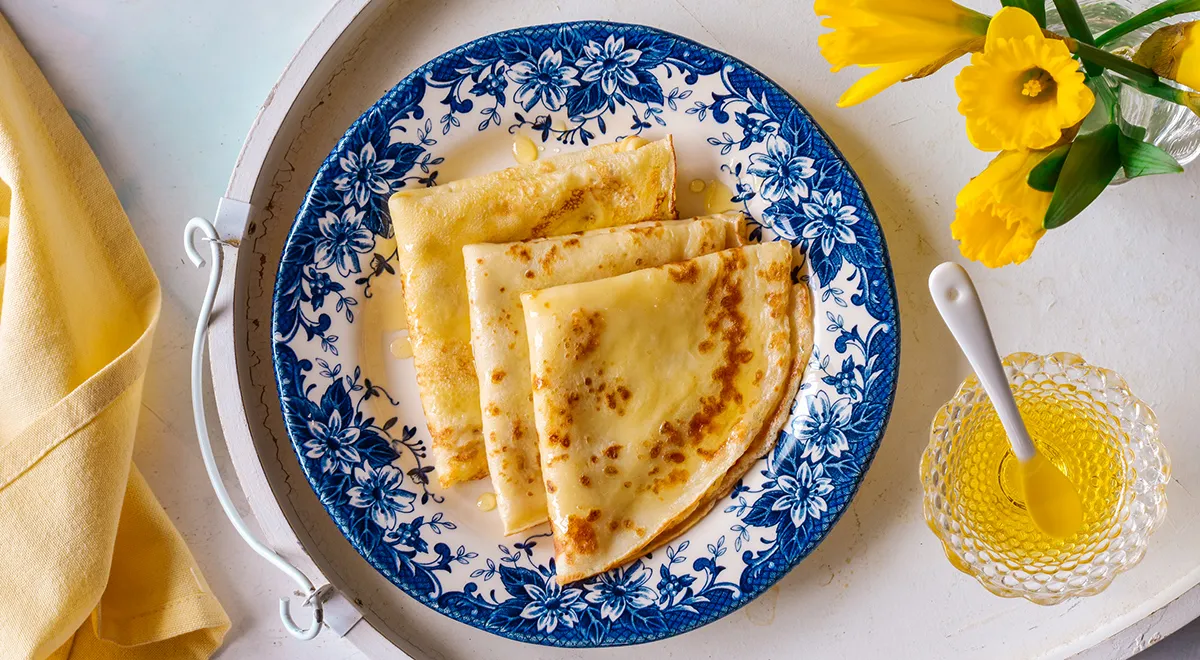
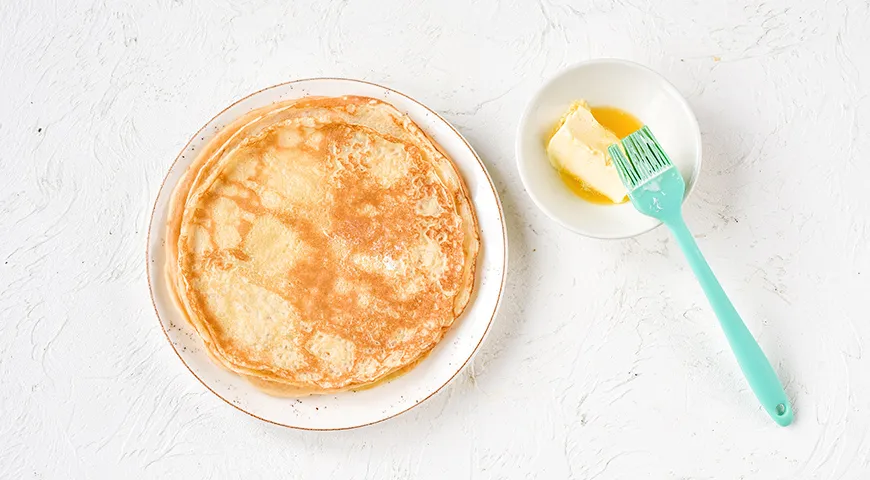
Step 9: Stack and Serve
As each blini finishes, transfer it to a warm plate and stack them, covering with a kitchen towel. If desired, brush each layer with melted butter for extra richness. Serve immediately with sour cream, jam, caviar, or honey. For a modern twist, try pairing with best chocolate-covered raisins for a sweet contrast.
Tips for Perfect Hot Water Blini
- Batter rest: Letting the batter sit for 5 minutes allows gluten to relax, yielding more tender pancakes.
- Temperature control: Keep the heat consistent. If the first blini is sticky, the pan wasn’t hot enough; if it burns, lower the flame.
- Lump-free: Sift the flour before adding to prevent dry pockets. A steam canner is unrelated, but sifting ensures airiness.
- Oil sparingly: Grease the pan once with a piece of pork fat or a paper towel dipped in oil. Too much oil makes blini greasy.
- Thickness test: The batter should coat a spoon thinly. If too thick, add 1–2 tbsp boiling water.
- For a non-stick surface, a best oil sprayer provides an even, minimal coat.
- To keep multiple blini warm, place them in a low oven (80°C) on a wire rack. A 48-inch built-in refrigerator isn’t needed for storage, but a simple warming drawer works.
Variations
Once you master the basic hot water blini, the possibilities are endless. Replace half the milk with buttermilk for a tangy twist, or add a teaspoon of vanilla extract for sweet versions. For savory fillings, fold in chopped dill and serve alongside smoked salmon. A dash of buckwheat flour (substitute 30 g) adds nutty depth, perfect for a hearty breakfast. You can even transform the batter into a larger crêpe for a dessert with Catalan sponge flavors—think orange zest and cinnamon. For a gluten-free adaptation, use a blend of rice and chickpea flour, though the texture will differ. Pair with a cup of George Howell coffee for an elegant brunch.
FAQ
Why do I need boiling water for blini?
Boiling water instantly hydrates the flour’s starches, creating a smoother batter and a more tender pancake. It also prevents the formation of large gluten strands, so blini stay delicate. This technique is similar to tangzhong in bread baking.
Can I use this batter for savory fillings?
Absolutely. The neutral flavor of these blini makes them perfect for both sweet and savory applications. Reduce the sugar to 1 teaspoon for savory versions and pair with au jus for prime rib for a decadent twist.
How do I store leftover blini?
Stack cooled blini with parchment paper between each, wrap tightly, and refrigerate for up to 3 days or freeze for 2 months. Reheat in a dry pan or microwave. A 48-inch built-in refrigerator offers ample space for bulk storage.
My blini are tearing when I flip them. Why?
This usually indicates the batter is too thin or the pan isn’t hot enough. Add a tablespoon of flour to thicken slightly, and ensure the pan is sizzling before pouring. Also, let the first side cook fully—edges should be lacy and brown.
Can I make this recipe dairy-free?
Yes. Substitute the milk with unsweetened almond or oat milk, and use a neutral oil like avocado. The boiling water step still ensures tenderness. For a richer alternative, try organic vodka in place of a tablespoon of water for extra crispness.
How do I achieve the perfect hole pattern?
The key is a very hot pan and a thin batter. The steam produced during cooking creates bubbles that burst into holes. Avoid flipping too early; let the top set until bubbly. A best refrigerant leak detector isn’t relevant here, but consistent heat is.
With this comprehensive guide, you are now equipped to create authentic, gossamer-thin hot water blini in your own kitchen. Whether served for Maslenitsa (Butter Week) or a lazy Sunday brunch, these pancakes honor a timeless Russian tradition with every delicate bite.


