


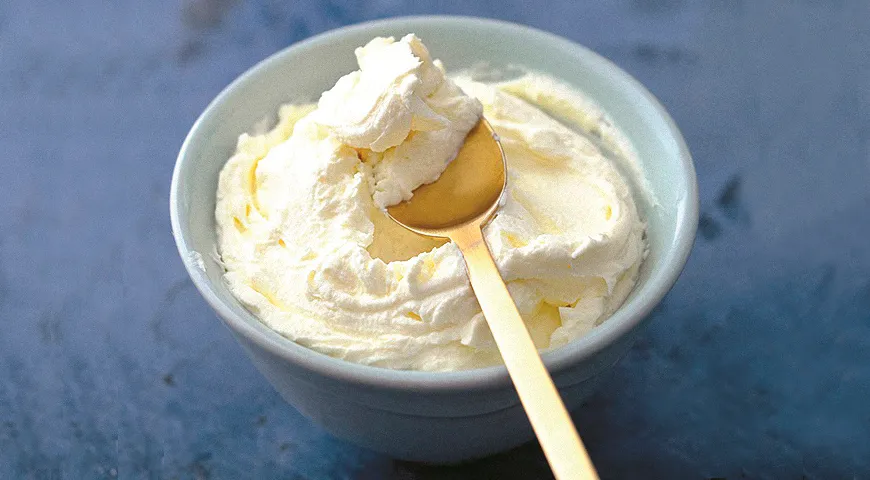
There is something deeply satisfying about a luscious, homemade cream cheese frosting that transforms an ordinary cake into an extraordinary dessert. This recipe, rooted in Russian culinary tradition, delivers a silky, tangy-sweet cream that is remarkably simple to prepare yet utterly decadent. With just three high-quality ingredients—cream cheese, heavy cream, and powdered sugar—you can create a frosting that rivals any patisserie. Whether you are layering a classic sponge, piping rosettes onto cupcakes, or simply enjoying it by the spoonful, this cream cheese frosting promises a luxurious finish. In this article, we will explore the art of making this timeless cream, from ingredient selection to troubleshooting, ensuring you achieve perfect results every time.
About the Recipe
This homemade cream cheese frosting is a staple in Russian home baking, known for its light, airy texture and balanced sweetness. Unlike buttercream, which relies heavily on butter, this cream uses heavy cream (at least 33% fat) and cream cheese to create a mousse-like consistency that pipes beautifully and pairs wonderfully with fruit cakes, chocolate layers, or delicate vanilla sponges. The technique is straightforward: whip chilled cream until stiff, incorporate powdered sugar, then gently fold in cream cheese until homogenous. The key is to keep everything cold—your mixing bowl and beaters should be chilled for the best volume. This recipe is perfect for bakers seeking a refined, not overly sweet, frosting that holds its shape without being heavy.

Ingredients
- 200 g cream cheese (full-fat, at room temperature)
- 100 g heavy cream (minimum 33% fat, well chilled)
- 130 g powdered sugar (sifted)
Step-by-Step Instructions
Step 1: Prepare the Equipment and Cream
Start by chilling your heavy cream and your mixing bowl. A cold bowl helps the cream whip to maximum volume. For best results, use a metal or glass bowl that has been in the refrigerator for at least 15 minutes. Pour the chilled heavy cream into the bowl and begin beating with a hand mixer or a stand mixer on low speed, gradually increasing to high. Whip until the cream thickens and holds soft peaks. This should take about 2-3 minutes.
Step 2: Add the Powdered Sugar
With the mixer running on low, slowly add the sifted powdered sugar, a tablespoon at a time. Continue beating until the mixture forms stiff, glossy peaks. The cream should cling firmly to the whisk or beaters. Be careful not to overwhip, or the cream may turn into butter. If you are new to whipping cream, using an immersion blender with a whisk attachment can offer great control.
Step 3: Fold in the Cream Cheese
Gently fold the room-temperature cream cheese into the whipped cream mixture using a rubber spatula. Work slowly and gently to maintain the airy texture. The final cream should be smooth, homogenous, and thick enough to spread or pipe. Your homemade cream cheese frosting is now ready to use. If you are preparing a chocolate cake, consider pairing it with high-quality chocolate-covered raisins for a delightful garnish.
Step 4: Storage and Timing
If you do not plan to use the cream immediately, transfer it to an airtight container and refrigerate. Note that this cream has a limited shelf life—only 5 to 6 hours in a cold environment—so it is best used fresh. For longer storage, you can freeze it, but the texture may change upon thawing. Keep your ingredients properly chilled with the help of a reliable refrigerator to maintain freshness.
Tips for Perfect Cream Cheese Frosting
Achieving the ideal consistency requires attention to temperature. Cream cheese should be at room temperature to blend smoothly, while heavy cream must be icy cold. If the cream starts to curdle or separate, stop whipping immediately—this often happens when the cream is too warm. Chill the bowl again and start fresh. For a stiffer frosting (ideal for piping intricate designs), add an extra 10-20 grams of powdered sugar. Using an oil sprayer to lightly grease your piping bag can prevent sticking. Also, ensure your mixer is powerful; a food processor is not recommended for this recipe as it can overheat the cream.
Variations
This basic cream cheese frosting is wonderfully versatile. For a citrus twist, add the zest of one lemon or orange. For a boozy note, a tablespoon of organic vodka or a flavored liqueur can enhance the taste without altering texture. If you desire a deeper flavor profile, incorporate a teaspoon of vanilla bean paste or a pinch of sea salt. For an elegant dessert pairing, serve this frosting alongside a slice of Catalan sponge cake. You can also fold in crumbled cookies or fresh berries for a rustic finish.
FAQ
Can I use low-fat cream cheese?
Low-fat cream cheese contains more water and less fat, which can cause the frosting to be runny and unstable. For best results, use full-fat, block-style cream cheese (not spreadable). The higher fat content ensures a stable emulsion and rich mouthfeel.
Why is my cream cheese frosting lumpy?
Lumps usually result from cream cheese that is too cold when added to the whipped cream. Ensure the cream cheese is softened to room temperature before folding. If lumps persist, briefly whip on low speed, but be careful not to deflate the cream.
How long does this frosting last in the fridge?
This cream is best used within 5-6 hours of preparation. After that, the texture may become grainy or watery due to the high moisture content. Store it in an airtight container in the coldest part of your ice maker or refrigerator.
Can I double the recipe?
Yes, you can scale the ingredients proportionally. However, when doubling, whip the cream in batches to avoid overfilling your mixer. A planetary mixer with a large bowl is ideal for bigger quantities.
What if my cream becomes too stiff or turns into butter?
If you accidentally over whip cream to the point of butter granules, you can salvage it by adding a teaspoon of cold cream and gently folding. For a completely ruined batch, start over. To avoid this, use a non-toxic immersion blender set to low speed for better control.
This homemade cream cheese frosting is a testament to the beauty of simplicity. With just three ingredients and a bit of patience, you can create a dessert topping that is both elegant and deeply satisfying. Whether you are a seasoned baker or a curious novice, this recipe will become a cherished part of your repertoire. For more inspiration, explore related creations like our sweet wine pairings or learn about espresso machines to accompany your desserts. Happy baking!







