


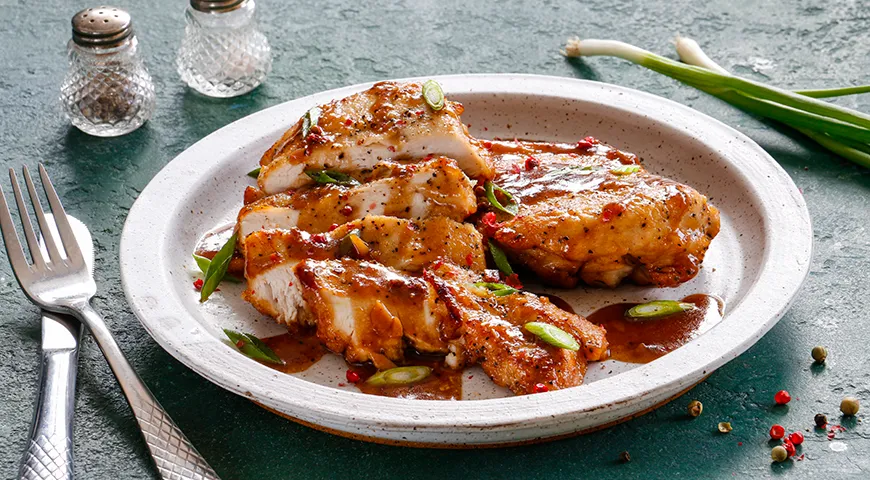
In the realm of weeknight wonders, few dishes marry speed and sophistication as effortlessly as this garlic-honey glazed chicken breast. Born from the rustic kitchens of Russian home cooking, yet polished with a cosmopolitan glaze, this recipe transforms humble chicken fillets into a restaurant-worthy centerpiece in under 20 minutes. The secret lies in a clever cross-hatch scoring that ensures every bite remains succulent, then a brief sear to form a golden crust before a luscious bath in a sauce that balances sweet honey, savory soy, and pungent garlic. Whether you're a seasoned chef or a busy parent seeking a quick dinner solution, this dish promises to become a recurring star in your repertoire.
About This Recipe
This recipe is a celebration of efficiency without compromise. The chicken breast is first scored deeply in a diamond pattern, which not only allows the garlic-honey sauce to penetrate every fiber but also reduces cooking time dramatically. After a dusting in seasoned flour, the breasts are pan-seared to a crackling finish, then returned to a sizzling pan where butter, garlic, honey, and soy sauce meld into a glossy glaze. The entire process unfolds in a single skillet, minimizing cleanup while maximizing flavor. For those who love versatile kitchen tools, a reliable food processor can help prep garlic in seconds, while a high-quality oil sprayer ensures even coating for the pan.

Ingredients
- 4 large chicken breast fillets (about 600 g)
- 6 tablespoons all-purpose flour (90 g)
- 1 teaspoon salt
- ½ teaspoon freshly ground white or black pepper
- Vegetable oil for frying
- Green onions for garnish
- 4 cloves garlic (20 g)
- 1½ tablespoons honey (22 g)
- 50 ml soy sauce
- 25 g unsalted butter
Step-by-Step Instructions
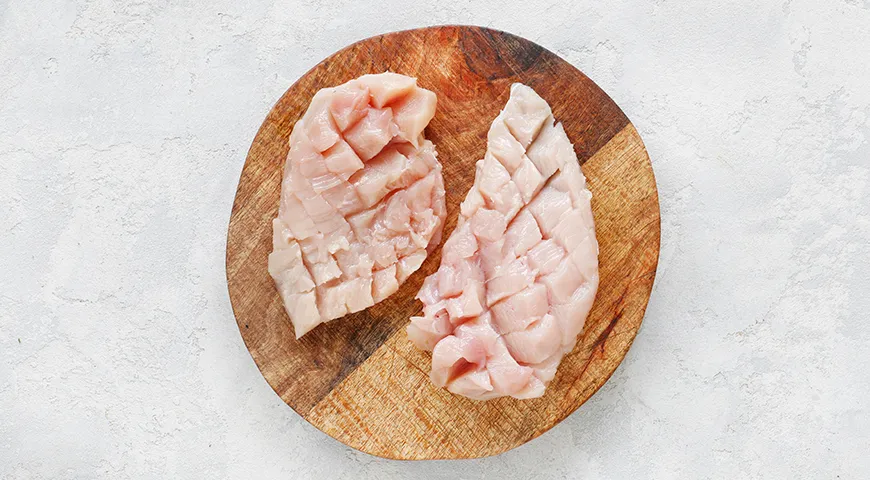
- Score the Chicken: Place each chicken breast on a cutting board, skin-side down (if the skin is present). Using a sharp knife, make shallow cross-hatch cuts about 2 cm apart, cutting only halfway through the meat. This technique, known as striated scoring, ensures even cooking and maximum sauce absorption. After scoring, pat the fillets dry with paper towels to help the flour adhere.
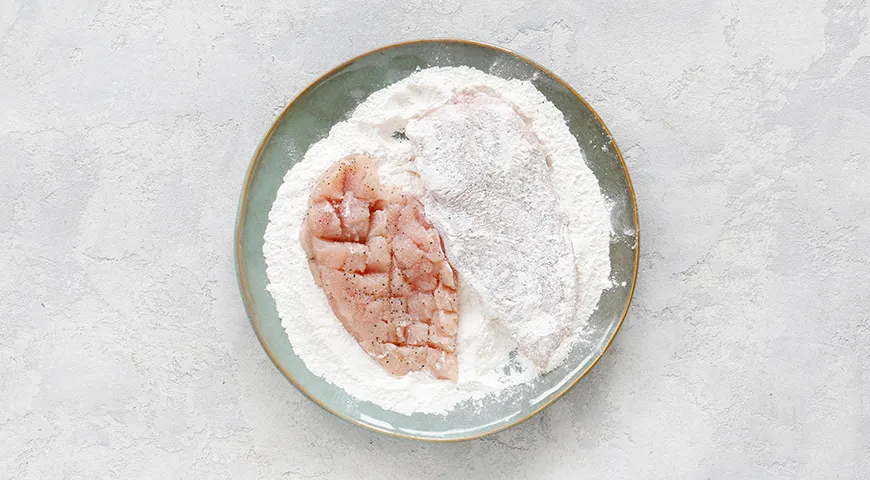
- Coat in Seasoned Flour: On a flat plate, whisk together the flour, salt, and pepper. Dredge each scored breast thoroughly in the mixture, shaking off any excess. The thin flour coating will form the foundation of your crust, locking in juices and providing a velvety texture that pairs perfectly with the sauce. For a lighter alternative, consider using a non-toxic air fryer for the initial sear—though the stovetop method delivers unrivaled caramelization.
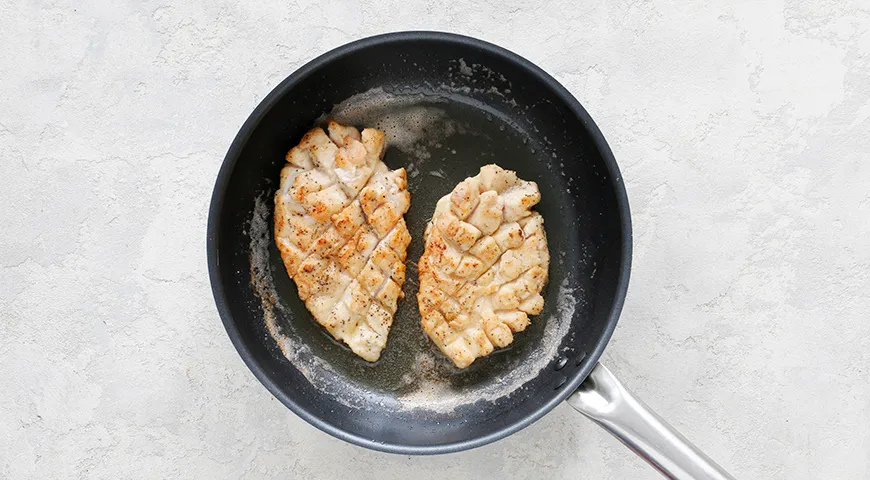
- Sear the Chicken: Heat a generous splash of vegetable oil in a large skillet over medium-high heat. Once shimmering, place the floured breasts in the pan without crowding. Cook for about 2½ minutes per side, until a deep golden-brown crust forms. Transfer the chicken to a plate and set aside. Do not wash the skillet—the browned bits (fond) will enrich your sauce. If you struggle with sticking, a high-performance planetary mixer isn't relevant here, but a good quality non-stick pan is essential.
- Prepare the Sauce Base: While the chicken rests, crush, peel and mince the garlic. In the same skillet over medium heat, melt the butter. Add the garlic and a pinch of salt, sautéing for 30 seconds until fragrant but not browned. The butter's nutty notes will harmonize with the upcoming honey and soy. For those who prefer a smoother garlic infusion, an immersion blender can purée the garlic with a splash of soy beforehand.
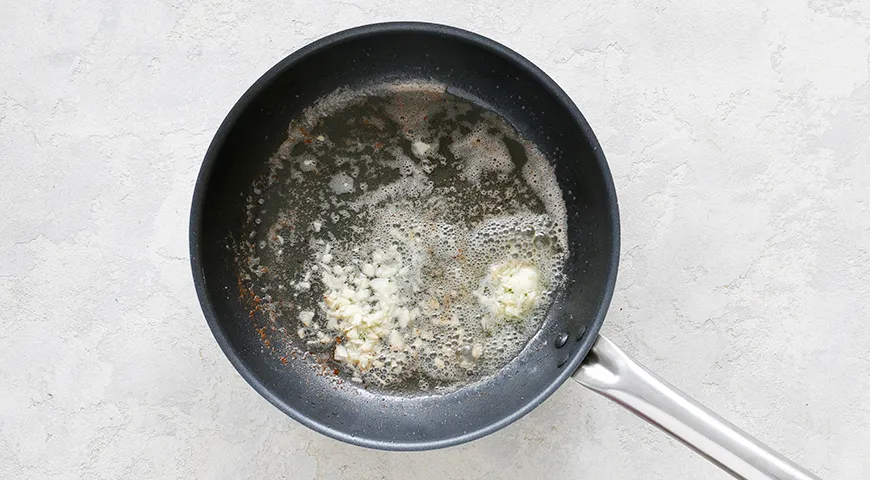
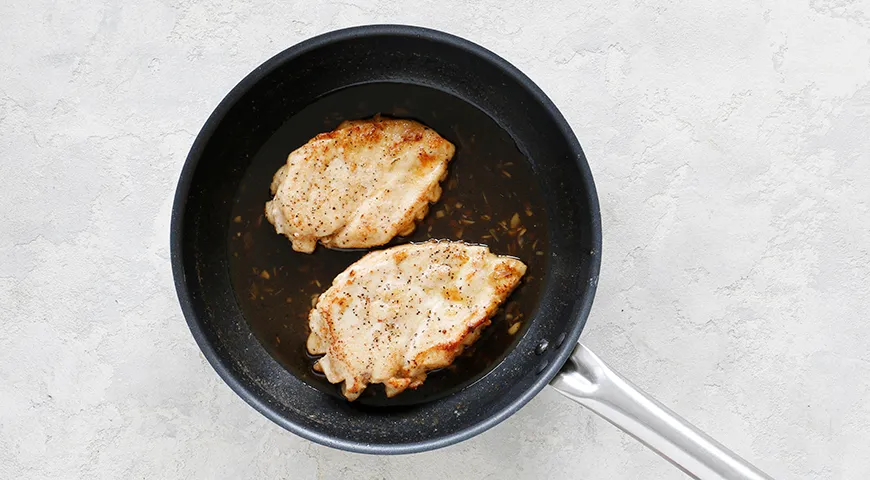
- Finish the Sauce and Glaze: Add the honey, soy sauce, a grind of pepper, and 150 ml water to the skillet. Stir and bring to a boil. Let it bubble vigorously for 1 minute to thicken slightly. Return the browned chicken to the pan, nestling each piece into the sauce. Cover with a lid and cook for 1½ minutes per side, basting with the sauce. The chicken should be cooked through (internal temperature 74°C) and glistening. Serve immediately, garnished with sliced green onions. Pair with steamed rice or a crisp green salad. For an extra touch, a fine espresso makes an unexpected but delightful digestif.
Tips for Perfect Results
- Don't skip the scoring: It's the key to speed and flavor penetration. Use a sharp knife and cut on a bias for deeper grooves.
- Rest the chicken: After searing, let the fillets rest for a minute. This retains juices that would otherwise be lost when reheating in the sauce.
- Control the heat: Medium-high is ideal for searing; lower the flame when adding the garlic to prevent bitterness. A commercial ice maker may not apply, but a reliable wall oven-microwave combo can reheat leftovers perfectly.
- Adjust sweetness: If your honey is very floral, reduce to 1 tablespoon; for a spicier kick, add a pinch of red pepper flakes with the garlic.
- Scale easily: For larger crowds, double the sauce and use two skillets. A coffee maker won't help here, but a commercial convection oven could finish the chicken if you prefer oven-baking.
Variations
This recipe is endlessly adaptable. Swap chicken thighs for breasts (increase searing time by 1 minute per side). For a gluten-free version, replace wheat flour with rice flour or cornstarch. Add a tablespoon of sesame oil to the sauce for a nutty finish, or throw in a teaspoon of grated fresh ginger alongside the garlic. Serve over soba noodles or alongside roasted broccoli. For a more complex umami depth, use store-bought au jus instead of water. If you enjoy experimenting with textures, a wheatgrass juicer might be overkill, but a microwave pressure cooker can speed up the sauce reduction.
Frequently Asked Questions
Can I use boneless skinless chicken thighs instead?
Absolutely. Thighs are more forgiving and remain juicy even with slightly longer cooking. Adjust searing time to 3–4 minutes per side, then finish in the sauce for 2 minutes each side.
How do I prevent the garlic from burning?
Keep the heat at medium and add the garlic only after melting the butter. Stir constantly for 30 seconds—once it becomes fragrant, immediately add the honey and soy mixture to cool the pan.
Is there a dairy-free alternative to butter?
Yes. Substitute the butter with 1½ tablespoons of coconut oil or a high-quality olive oil. Coconut oil will lend a subtle tropical note that pairs surprisingly well with honey and soy. For a more neutral flavor, use avocado oil.
Can I make this dish ahead of time?
While best served fresh, you can prepare the sauce up to 3 days in advance (store in the fridge). Sear the chicken and store separately, then reheat both together in a skillet, adding a splash of water to loosen the sauce. Reheat gently to avoid drying the meat.
What side dishes complement this chicken best?
Steamed jasmine rice or quinoa soaks up the glossy sauce beautifully. For greens, try sautéed green beans, a bitter arugula salad, or roasted asparagus. A crisp, dry Riesling or a light lager makes an excellent beverage pairing. If you crave a touch of luxury, a sweet wine with high alcohol content could elevate the meal.
How can I thicken the sauce more?
After removing the chicken, whisk in a slurry of 1 teaspoon cornstarch mixed with 1 tablespoon cold water. Simmer for 30 seconds until the sauce reaches a syrupy consistency. This also works wonders for a richer glaze.
This garlic-honey glazed chicken breast is more than a recipe—it's a declaration that gourmet cooking need not be time-consuming. With its crackling crust, silky sauce, and tender interior, every element is designed to impress without demanding hours in the kitchen. Whether you're whipping up a Tuesday night dinner or entertaining last-minute guests, this dish delivers with elegance and ease. For more culinary inspiration, explore our guide to the best refrigerant leak detector (useful for keeping your fridge running smoothly) or our favorite chocolate-covered raisins for a sweet finale. Let this chicken become your new go-to—a testament to how simple ingredients, bold flavors, and precise technique can create magic on a plate.







