


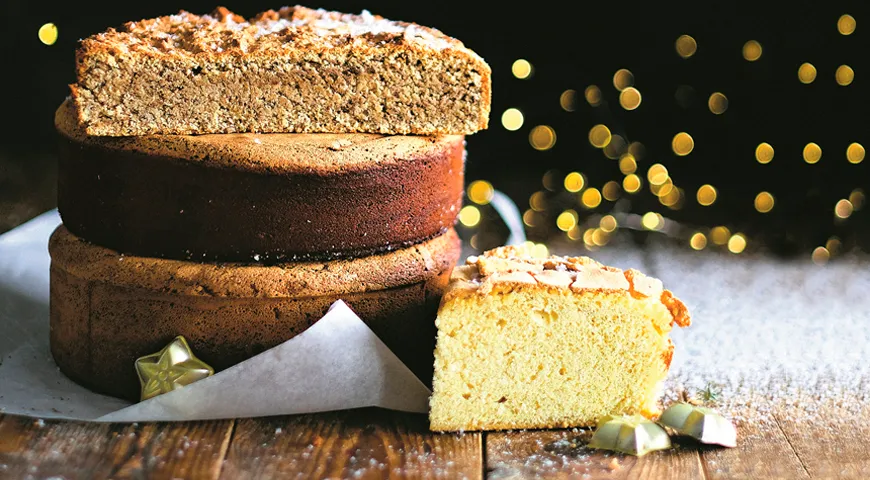
There are cakes, and then there is the biskvit—the ethereal, cloud-like sponge that forms the backbone of countless European and Russian desserts. This recipe for classic Russian sponge cake is deceptively simple: just eggs, sugar, and flour. Yet the results are anything but ordinary. A perfectly baked biskvit rises tall, boasts a tender crumb, and absorbs syrups and creams like a dream. Whether you are building a layered birthday cake or a simple teatime treat, this foolproof method delivers every time. Let's dive into the art of the perfect sponge.
About Classic Russian Biskvit
In Russia, the word biskvit refers specifically to a light, airy sponge cake made without butter or chemical leaveners. The lift comes entirely from whipped eggs—a technique that demands patience and precision. Unlike its denser American cousin, the Russian biskvit relies on very long beating times (15–20 minutes) to incorporate air and create a stable foam. The result is a cake with a fine, even crumb that is sturdy enough to hold layers yet tender enough to melt on the tongue. For a deep dive into sponge cake history, explore our guide on Catalan sponge cake traditions.

This recipe is the gold standard for home bakers. It uses a 1:1:1 ratio of eggs to sugar to flour by weight (with 6 large eggs equating roughly to 300 g of egg weight). The method is identical to the one used in professional Russian pastry kitchens. For best results, invest in a reliable best planetary mixer to handle the extended whisking without overheating.
Ingredients for Classic Sponge Cake
- 6 large eggs (room temperature)
- 300 g granulated sugar
- 300 g all-purpose flour (or cake flour for extra tenderness)
- 10 g butter (for greasing the pan)
Note: No baking powder, no vanilla extract—the pure, clean flavor lets the egg and sugar shine. If you like, you can add a pinch of salt or a splash of vanilla after beating, but it's not traditional.
Step-by-Step: How to Make Russian Sponge Cake
Follow these steps exactly for a tall, even biskvit that will impress even the most discerning babushka.
Step 1: Beat Eggs and Sugar
Place the eggs and sugar in the bowl of a stand mixer fitted with the whisk attachment. Beat on high speed for 15–20 minutes. The mixture should become thick, pale, and tripled in volume. It should leave a ribbon trail when you lift the whisk (the famous "ribbon stage"). A non-toxic immersion blender won't work for this—stick with a sturdy stand mixer or a hand mixer.
Step 2: Fold in Flour
Gently sift the flour over the egg foam. Using a silicone spatula, fold in the flour with a cut-and-lift motion. Do not stir or beat—you want to preserve as much air as possible. Stop as soon as no streaks of flour remain. A food processor isn't needed here; hand folding is best.
Step 3: Preheat and Prepare the Pan
Preheat your oven to 170°C (338°F). Grease a round baking pan (22–24 cm diameter) with the 10 g of butter. You can line the bottom with parchment paper for easier release. Avoid using a springform pan—the batter is thin and may leak. For more tips on choosing bakeware, see our best wall oven microwave combo guide.
Step 4: Bake the Sponge
Pour the batter into the prepared pan and gently smooth the top. Bake for 35–40 minutes, until the cake is golden brown and springs back when lightly pressed. A skewer inserted in the center should come out clean. Avoid opening the oven door during the first 20 minutes to prevent collapse. If your oven runs hot, consider using a commercial countertop convection oven for even heat.
Step 5: Cool Upside Down
Immediately after baking, remove the cake from the pan and invert it onto a wire rack. Let it cool completely upside down. This prevents the sponge from sinking and ensures a flat top. Once cool, wrap the biskvit in plastic wrap and refrigerate overnight—it will be easier to slice and less crumbly.
For alternative cooling methods, check out oil sprayer tips for greasing the rack.
Tips for a Perfect Biskvit Every Time
- Weigh your ingredients: Volume measurements are inconsistent. Use a digital scale for accuracy. A built-in refrigerator is great for storing eggs at stable temperature.
- Eggs at room temperature: Cold eggs won't whip to full volume. Let them sit out for 30 minutes, or place them in warm water for 5 minutes.
- No fat in the batter: Butter or oil would deflate the foam. That's why only a trace of butter is used for the pan.
- Bake immediately: The batter starts losing air the moment it sits. Get it into the oven as soon as the flour is incorporated.
- Use a cake strip: Wrap a damp strip around the pan to prevent a dome and promote even baking. For more on temperature control, see refrigerant leak detector reviews.
Variations on the Classic Sponge
Once you master the basic biskvit, you can adapt it in endless ways:
- Chocolate sponge: Replace 30 g of flour with 30 g of unsweetened cocoa powder.
- Citrus sponge: Add the zest of one lemon or orange to the egg-sugar mixture.
- Vanilla sponge: Fold in 1 teaspoon of vanilla extract or the seeds of one vanilla bean.
- Nut sponge: Replace 50 g of flour with finely ground almonds or hazelnuts.
For layered cakes, soak each layer with a simple syrup (equal parts sugar and water, boiled) and fill with buttercream, pastry cream, or fruit. A light syrup pairs beautifully with sweet wine for an adult twist.
Frequently Asked Questions (FAQ)
Why did my sponge cake collapse after baking?
Collapse usually happens when the eggs are under-whipped or the oven door was opened too early. Make sure you beat the eggs to the ribbon stage (thick and pale) and avoid opening the oven for the first 20 minutes. A stable foam needs gentle handling.
Can I use cake flour instead of all-purpose flour?
Yes! Cake flour (lower protein) will produce an even more tender crumb. Use the same weight (300 g). Sift it twice for extra lightness. For more flour tips, see best chocolate-covered raisins (a fun pairing for sponge cake).
How do I store classic biskvit?
Wrap tightly in plastic wrap and store at room temperature for up to 2 days, or refrigerate for up to 5 days. The cake actually improves after a day—the moisture redistributes. You can also freeze it (unfilled) for up to 3 months. For long-term storage, a undercounter ice maker helps keep your freezer organized.
Can I make this recipe without a stand mixer?
Absolutely. A hand mixer works fine, but you'll need to beat for the full 15–20 minutes. A balloon whisk by hand is possible but requires serious arm strength and patience. If you're planning to bake often, consider a best espresso machine under 2000 for morning coffee alongside your cake.
Why is my sponge dry?
Overbaking is the most common culprit. Check the cake at 35 minutes; it should be just set. Also, make sure your oven temperature is accurate—an oven thermometer is cheap insurance. Another cause could be too much flour: always spoon and level if using cups. A non-toxic air fryer can be used to test small sponge portions.
Can I add oil or butter for a richer sponge?
Traditional Russian biskvit is fat-free. Adding fat would weigh down the foam and change the texture. If you want a richer cake, make a separate genoise (which includes melted butter) rather than modifying this recipe. For a different approach, see our organic vodka pairing for a boozy dessert soak.
Final Thoughts
Classic Russian sponge cake is a testament to the beauty of simplicity. With only three ingredients, you can create a dessert that feels luxurious. Whether you serve it plain with a dusting of powdered sugar or layer it with clouds of cream, this biskvit will become your go-to recipe for celebrations and quiet afternoons alike. Pair it with a George Howell coffee for a perfect afternoon treat.
For more baking inspiration, explore our Catalan sponge cake recipe or learn about steam canning to preserve seasonal fruits for fillings. Happy baking!







