


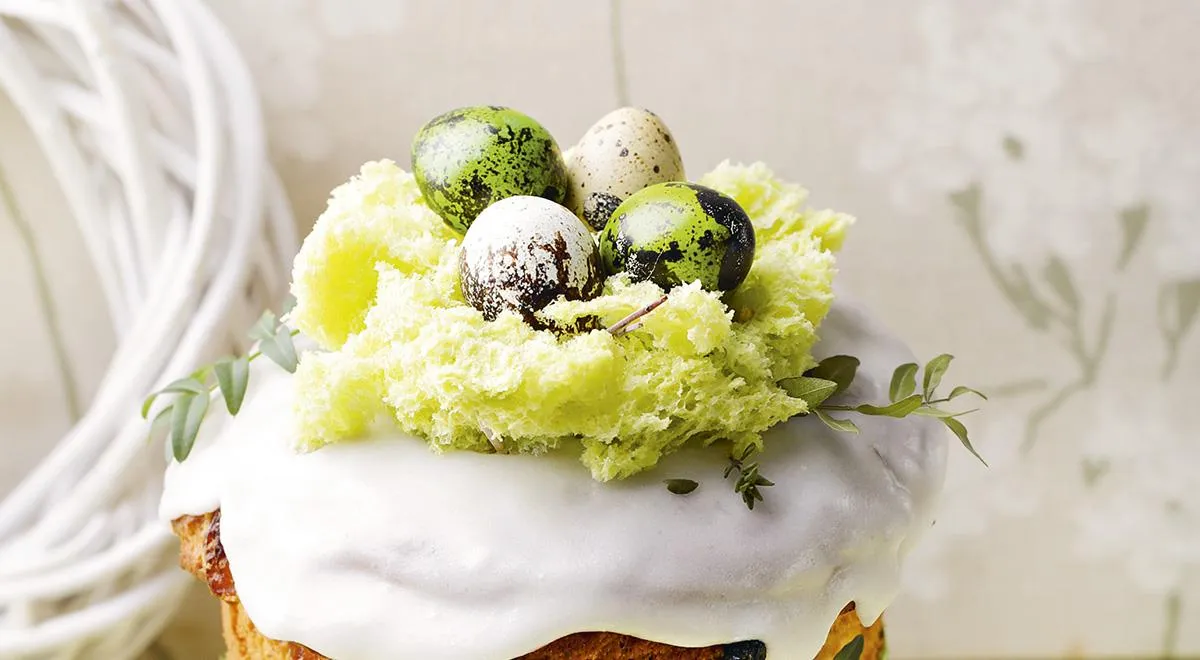
Imagine a cake or Easter kulich adorned with delicate, moss-like clusters of sponge—each piece airy, honey-kissed, and painted in pastel or forest hues. This Biscuit Moss (бисквитный мох) is the darling of modern dessert decoration: a whimsical, edible landscape that transforms humble ingredients into high-art confectionery. In just minutes, using a handful of pantry staples and a microwave, you can create vivid, textured moss to crown your baked creations. Whether you're a professional pastry chef or a home baker seeking Instagram‑worthy results, this technique is as simple as it is striking.
About the Recipe
Originating from the resourceful Russian home‑baking community, biscuit moss was born from the desire for quick, impact‑driven decoration without the fuss of piping, molding, or long cooling times. The recipe leverages the power of the microwave to produce a light, honey‑flavored sponge that crumbles into organic shapes resembling forest moss. By varying food coloring—emerald green for a fresh woodland look, dusty pink for a romantic cake, or charcoal for a dramatic, modern dessert—you can match any theme. This technique is a perfect example of how sponge cake foundations can be repurposed for artistic ends.

Ingredients
The beauty of this recipe lies in its economy: only five core ingredients, plus optional gel food coloring. Here's the precise metric breakdown for a single batch (yields enough moss to top a 20‑cm cake or 6–8 small cupcakes):
- 25 g all‑purpose flour
- 5 g baking powder
- 1 large egg (about 50 g)
- 15 g granulated sugar
- 30 g liquid honey (preferably mild‑flavored, such as acacia or clover)
- Gel food coloring (a few drops; start with 1 drop and adjust)
For the best results, use ingredients at room temperature to ensure even emulsification. The honey not only sweetens but also lends moisture and a subtle floral note that pairs beautifully with vanilla or citrus cakes.
Essential Tools & Equipment
While the recipe is minimalist, the right tools ensure success:
- A planetary mixer or hand whisk – for aerating the egg mixture to a foam.
- Two disposable cups (180–200 ml capacity) – they must be microwave‑safe.
- A microwave (900 W) – the exact power is crucial for the 80‑second cooking time.
- A fine‑mesh sieve – for sifting the flour and baking powder onto the batter.
- A silicone spatula – for gentle folding without deflating the foam.
- A cooling rack – to prevent steam from making the sponge soggy.
If you're experimenting with multiple colors, having a small food processor can speed up mixing separate batches, though a whisk works fine.
Step‑by‑Step Instructions
Step 1: Combine Dry Ingredients
In a small bowl, whisk together the flour and baking powder until fully blended. This ensures even leavening.
Step 2: Whisk Wet Ingredients with Color
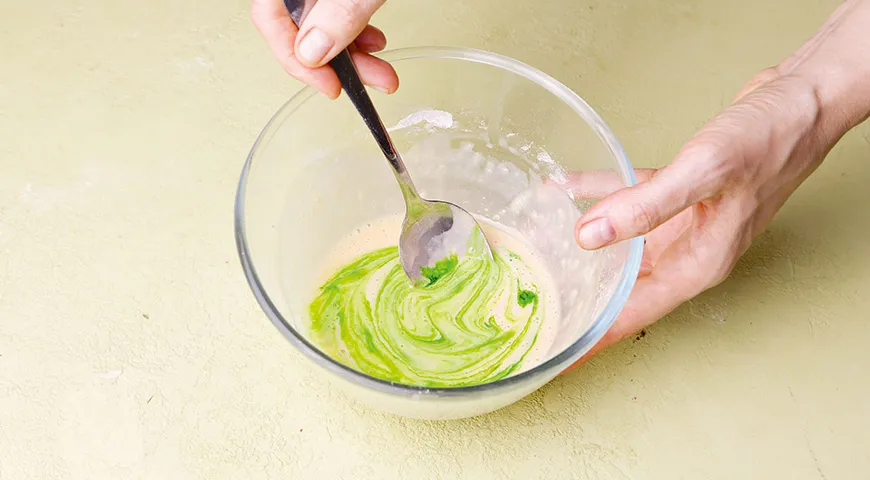
In a separate, larger bowl, combine the egg, sugar, and liquid honey. Whisk vigorously (or use an immersion blender) until the mixture is smooth and slightly thickened. Add the gel food coloring drop by drop, stirring until you achieve the desired hue. For a natural moss tone, aim for a deep olive or emerald green.
Step 3: Foam and Fold
Continue whisking the egg mixture until it becomes light and foamy—about 1–2 minutes. Then, sift the flour‑baking powder mixture over the surface. Using a silicone spatula, fold gently in a J‑shape motion, scraping the bottom and sides, until no dry streaks remain. Do not overmix; the batter should be fluffy.
Step 4: Portion into Cups
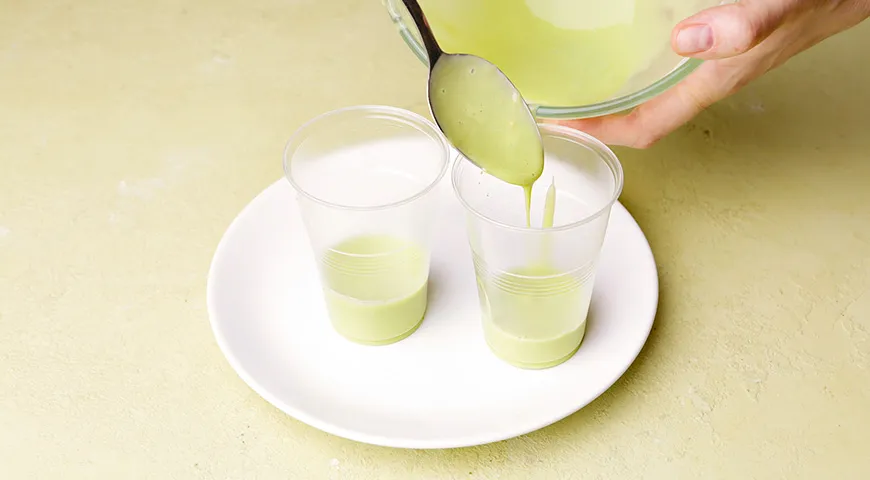
Divide the batter evenly into two disposable cups (180–200 ml capacity). Do not fill more than two‑thirds full, as the sponge will rise.
Step 5: Microwave at 900 W for 80 Seconds
Place both cups side by side in the microwave. Cook on high power (900 W) for exactly 80 seconds. The sponge will puff dramatically and spring back when touched lightly.
Crucial note: Microwaves vary. If your appliance is 800 W, add 10–15 seconds; if 1000 W, reduce to 70 seconds. The goal is a firm, dry sponge without any wet spots.
Step 6: Cool and Unmold
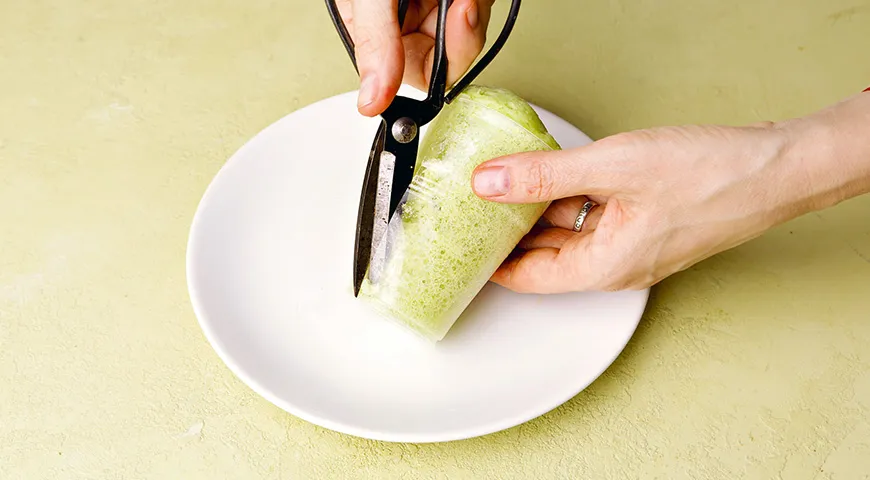
Carefully remove the cups (they will be hot). Immediately invert them onto a wire rack. Let cool completely—about 10–15 minutes. Once cool, use scissors to cut away the plastic cup, or gently squeeze the sides to release the sponge. The sponge should be firm but tender.
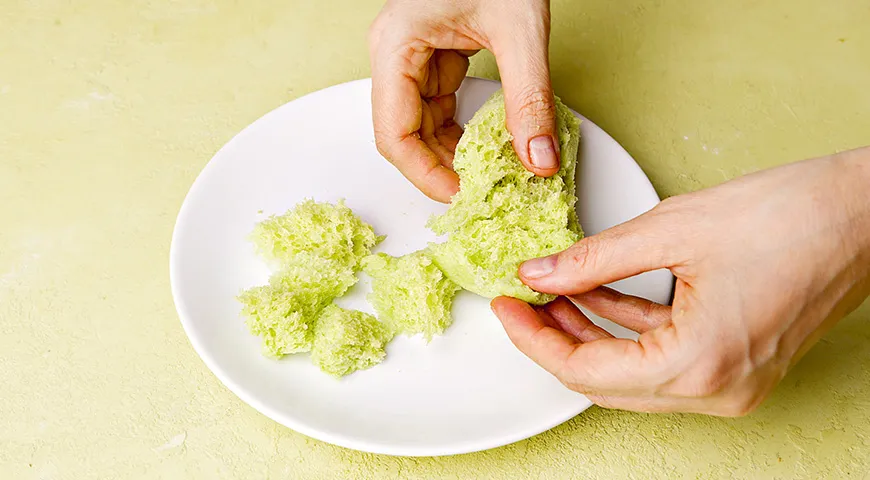
Step 7: Break into Moss Clusters
Using your fingers, break the sponge into irregular, bite‑sized pieces. Aim for organic, non‑uniform shapes that mimic moss clumps. If you want a finer texture, crumble some pieces into smaller bits. The processed moss can be stored in an airtight container for up to 3 days.
For a glistening effect, lightly brush the pieces with a neutral oil spray and dust with matcha powder or cocoa—this also deepens the color.
Pro Tips for Perfect Moss
- Color depth: Gel colors are more concentrated than liquid; add them drop by drop. For a realistic forest moss, combine green with a tiny drop of brown or yellow.
- Honey quality: Use a runny honey that hasn’t crystallized. If your honey is thick, warm it gently (do not boil) before mixing.
- Microwave safety: Ensure cups are labeled microwave‑safe. Avoid metal twist ties or foil lids.
- Texture control: For airier moss with larger bubbles, beat the egg mixture longer (until it triples in volume). For denser, more compact moss, fold the flour more thoroughly.
- Scaling up: This recipe is for two small cups. To make larger quantities, multiply ingredients proportionally and cook in batches—do not overload the microwave.
- Moisture management: Moss should be dry to the touch. If your sponge seems wet after microwaving, cook an additional 10 seconds at a time until set.
If you're a fan of non‑toxic cooking methods, the microwave approach is quick and energy‑efficient.
Creative Variations
The canvas of biscuit moss invites endless experimentation:
- Seasonal hues: Pastel pink for Valentine’s Day, deep purple for Halloween, or gold‑edible glitter for a New Year’s Eve cake.
- Flavor infusions: Replace honey with maple syrup for a deeper flavor, or add 1/4 tsp of vanilla extract, almond extract, or citrus zest.
- Herbal accents: Fold in finely chopped fresh rosemary or thyme (1 tsp) for a savory‑sweet moss that pairs with olive oil cakes.
- Matcha moss: Replace 5 g of flour with matcha powder for a natural green tint and earthy flavor.
- Chocolate version: Substitute 5 g of flour with Dutch‑processed cocoa powder and use dark honey for a deep, moody moss.
- Crunch element: Mix in crushed freeze‑dried raspberries or chopped pistachios after breaking the sponge.
For those who prefer a sweet‑savory balance, a pinch of salt or a dusting of flaky sea salt brightens the honey notes.
Frequently Asked Questions
Can I make biscuit moss without a microwave?
Yes. Bake the batter in a lightly greased 20×20 cm pan at 180°C (350°F) for 8–10 minutes, until golden and springy. The texture will be slightly denser, but crumbling still works. Use an oven thermometer to ensure accurate temperature.
How long does biscuit moss last?
Stored in an airtight container at room temperature, it stays fresh for 3–4 days. In the refrigerator, up to a week, but the texture may soften slightly. Do not freeze, as thawing produces condensation that ruins the moss effect.
What if my sponge is too dense or flat?
Overmixing the batter after adding flour deflates the air bubbles. Next time, fold gently and stop as soon as the flour disappears. Also check your baking powder—it should be less than six months old. Consider using a pressure cooker for steaming if you consistently struggle with density.
Can I make this recipe gluten‑free or dairy‑free?
Absolutely. Substitute the all‑purpose flour with a 1:1 gluten‑free baking blend (ensure it contains xanthan gum). The recipe contains no dairy by default. For egg‑free moss, use a commercial egg replacer or a mixture of 1 tbsp flax meal + 3 tbsp water, but note the texture will be more crumbly.
How do I attach the moss to a cake?
Use a thin layer of buttercream, ganache, or edible glue (a mixture of gum arabic and water). Press the moss pieces gently into the frosting while it’s still tacky. For vertical surfaces, allow the moss to hang slightly to create a cascading effect.
Is this technique safe for people with honey allergies?
Honey is a core ingredient for structure and flavor. For a honey‑free version, use agave nectar or light corn syrup (30 g), and add 1/4 tsp of sugar to balance sweetness. The texture will be similar, though the flavor profile changes.
Why did my moss turn out too dark or burnt in the microwave?
Microwave hotspots can cause uneven cooking. Rotate the cups halfway through the 80 seconds if your microwave doesn’t have a turntable. Also, reduce power to 800 W and cook for 90 seconds. Burnt spots can be trimmed away with scissors after cooling.
Can I use natural food coloring?
Yes. Spinach powder or matcha gives green; beetroot powder yields pink; turmeric offers yellow. Be aware that natural colors may fade during microwaving. To preserve vibrancy, add them after whisking the egg mixture rather than before.
Conclusion
Biscuit moss is a testament to the magic of simple ingredients transformed by technique. In under five minutes, you can create a decoration that elevates a humble pound cake into a conversation piece. Whether you’re prepping for Easter kulich, a birthday cake, or a pastry display, this recipe is a tool every baker should have in their repertoire. Experiment with color, flavor, and scale—and watch your desserts come to life with the texture of the forest floor.
For more sponge‑based creations, explore our guide to Catalan sponge cake. And if you're looking to upgrade your kitchen equipment, remember that precision matters—even for something as whimsical as moss.







