


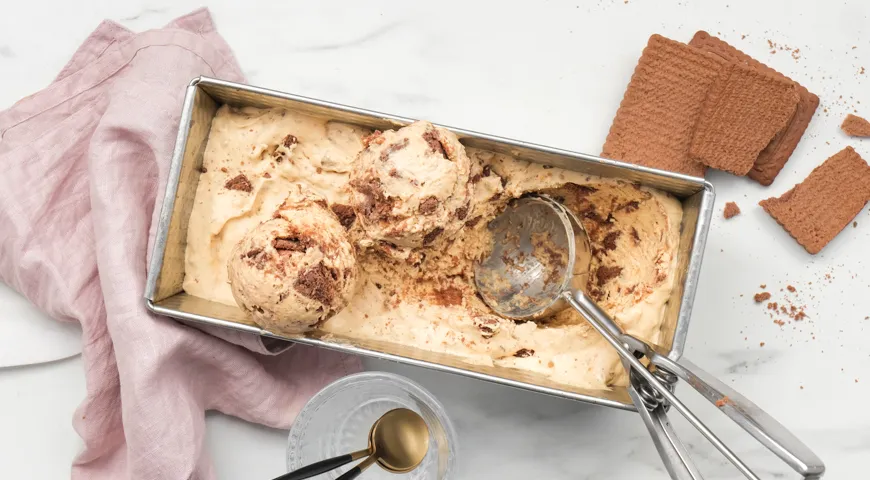
There is something profoundly comforting about the marriage of creamy frozen custard and crunchy chocolate cookies. This no-churn caramel cookie ice cream elevates that nostalgia into a refined dessert, where the deep caramel notes of boiled condensed milk mingle with rich dark chocolate. Inspired by the beloved Russian treat known as krem-bryule (crème brûlée ice cream), this recipe uses only a handful of simple ingredients yet delivers a texture and flavor that rivals any artisanal gelato. The secret lies in the varenoe sgushchennoe moloko (boiled condensed milk), which you can either purchase ready-made or prepare at home. For an extra layer of complexity, a splash of cream liqueur adds a subtle warmth—though it can be omitted for a family-friendly version. Whether you are a seasoned home cook or a curious beginner, this guide will walk you through each step, ensuring a silky, scoopable result every time.
About This Recipe
Russian home cooks have long prized the magic of boiled condensed milk, transforming ordinary sweetened milk into a thick, caramel-like spread. When whipped with whole milk and a touch of vanilla, it becomes the base for an exceptionally creamy ice cream that requires no ice cream maker. The addition of broken chocolate cookies creates delightful pockets of crunch, while grated dark chocolate on top adds elegance. This recipe is a wonderful way to use leftover cookies or to impress guests with a homemade dessert that tastes like a gourmet indulgence. For more inspiration on creating frozen treats, explore our guide to best ice cream makers for those times you want to churn.

Ingredients
- 400 g boiled condensed milk (store-bought or homemade)
- 400 ml whole milk (3.2% fat; can substitute with heavy cream for extra richness)
- 15 g vanilla extract (or the seeds of one vanilla bean)
- 100 g dark chocolate (for garnish)
- 150 g chocolate cookies (such as Oreo or similar crisp chocolate biscuits)
- 30 ml cream liqueur (optional; omit for alcohol-free version)
For the optional homemade boiled condensed milk, you will need one 400 g can of sweetened condensed milk and enough water to cover it in a pot. The slow simmer transforms the milk into a deep golden caramel.
Step-by-Step Instructions
Step 1: Prepare the Boiled Condensed Milk (if using homemade)
If you don't have ready-made boiled condensed milk, make it yourself. Remove the label from a can of sweetened condensed milk, wash the can, and place it in a deep saucepan. Cover completely with cold water and bring to a boil. Reduce heat to the lowest setting and simmer for at least 2 to 2.5 hours, ensuring the can is always submerged. Top up with water as needed. Carefully remove the can with tongs and let it cool completely before opening. This slow cooking creates the iconic caramel flavor. For a faster method, consider using a best steam canner to achieve consistent results.
Step 2: Blend the Base
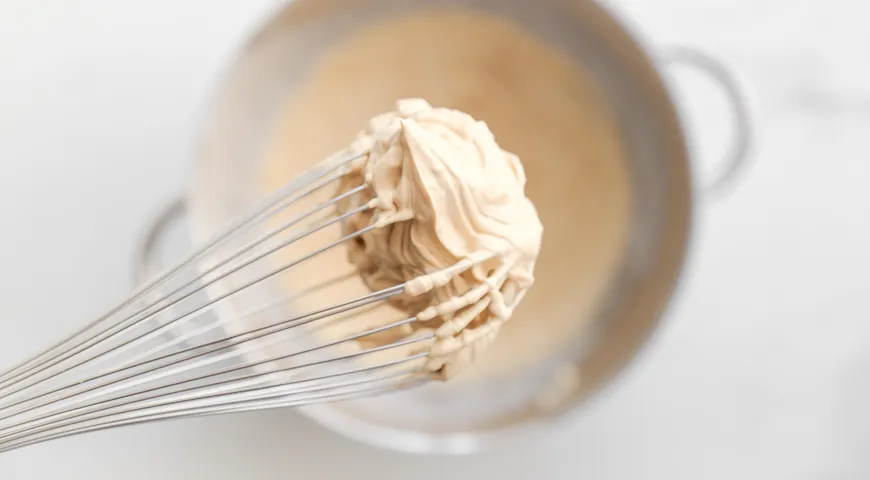
In a blender or mixer bowl, combine the boiled condensed milk, vanilla extract, and whole milk. Using a high-powered non-toxic immersion blender or a stand mixer ensures a smooth, lump-free mixture. Blend on medium speed for 2–3 minutes until the mixture is homogeneous and slightly thickened. The milk fat is crucial here: whole milk with at least 3.2% fat gives a creamier texture, but if you are not watching calories, replace the milk with heavy cream for an even richer result.
Step 3: Incorporate the Cookies
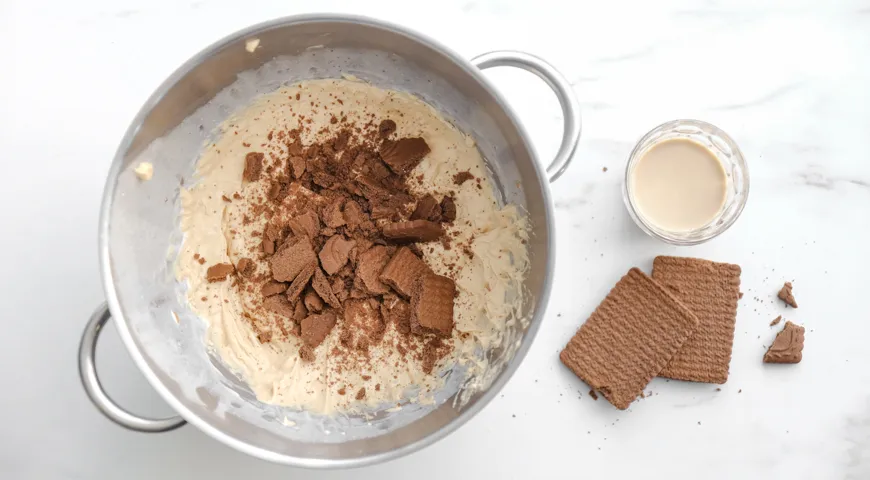
Break the chocolate cookies into large chunks—either by hand or by placing them in a ziplock bag and rolling with a rolling pin. Fold the cookie pieces into the cream mixture along with the optional cream liqueur. Stir gently to distribute. The liqueur adds a sophisticated note, but if you prefer an alcohol-free dessert, simply omit it. For the best texture, use a best planetary mixer with a paddle attachment for even mixing.
Step 4: Freeze the Mixture
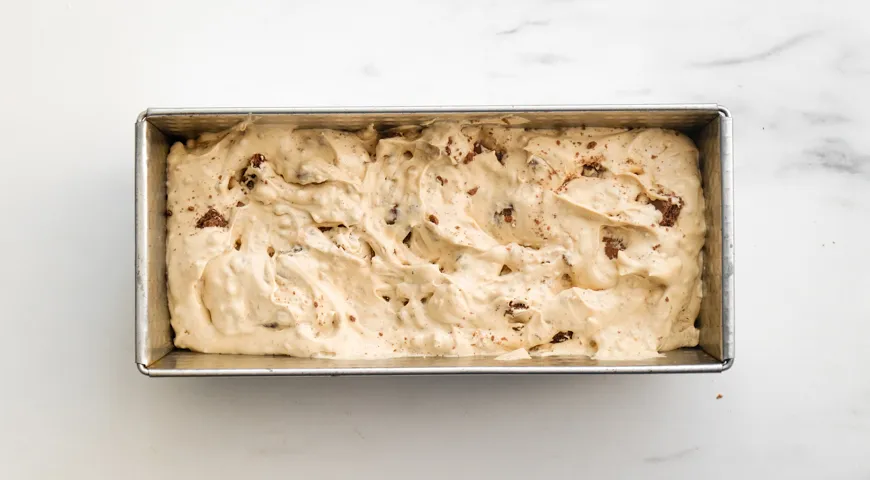
Pour the cookie-laden cream into a clean, dry freezer-safe container. Cover tightly with a lid or plastic wrap to prevent ice crystals from forming. Place in the freezer for 3–4 hours, or until firm. For best results, ensure your freezer is at a consistent temperature; a best 48-inch built-in refrigerator with a reliable freezer compartment can make all the difference.
Step 5: Serve and Garnish
Remove the ice cream from the freezer and let it sit at room temperature for 10–15 minutes to soften slightly. This makes scooping easier. Spoon into serving bowls or elegant coupe glasses. Grate the dark chocolate over the top using a coarse grater for a dramatic finish. The chocolate shards provide a bitter contrast to the sweet caramel base. Pair with a glass of best sweet wine with high alcohol content for an adult after-dinner treat.
Tips for Perfect Ice Cream
- Use high-quality boiled condensed milk: Homemade yields the best flavor, but store-bought works well. If boiling yourself, be patient—the longer simmer deepens the caramel.
- Don't skip the vanilla: Pure vanilla extract or bean seeds enhance the caramel notes. For a floral twist, try a drop of rose water.
- Choose sturdy cookies: Crisp chocolate biscuits hold their texture better than soft ones. Oreos or similar are ideal.
- Freeze in a shallow container: A wider, flatter container freezes faster and more evenly, reducing iciness.
- Stir once during freezing: After 1 hour, give the mixture a quick stir to break up any ice crystals and ensure a smoother texture.
- For an extra velvety finish, use a best immersion blender to re-blend the ice cream after it has set for a couple of hours.
Variations
This base recipe is endlessly adaptable. Swap the chocolate cookies for best chocolate-covered raisins for a chewy surprise. Replace the cream liqueur with best organic vodka for a boozy kick—just reduce the amount to 2 tablespoons to avoid over-alcoholizing the ice cream. For a nutty twist, fold in toasted almonds or hazelnuts. If you prefer a dairy-free version, use coconut milk and a vegan condensed milk alternative, though note the texture will differ. Experiment with different cookie flavors: speculoos, gingerbread, or even best lava flavors for a surprising molten core.
Frequently Asked Questions (FAQ)
Can I make this ice cream without an ice cream maker?
Absolutely! This is a no-churn recipe. The high sugar content of the boiled condensed milk naturally inhibits large ice crystals, so you don't need any special equipment. Just freeze and stir occasionally for the first hour.
How long does the ice cream keep in the freezer?
Store in an airtight container for up to 2 weeks. After that, it may become too hard or develop ice crystals. To revive, let it soften at room temperature for 10–15 minutes before serving.
Is the cream liqueur necessary?
No, it's optional. It adds a subtle boozy warmth and a smoother texture due to the alcohol content lowering the freezing point. For a kid-friendly version, skip it entirely or replace with a splash of vanilla extract.
Can I use skim milk?
Whole milk or heavy cream is recommended for creamiest results. Skim milk will yield a thinner, icier texture. If you must use low-fat, consider adding a tablespoon of cornstarch to improve mouthfeel.
How do I prevent the cookies from becoming soggy?
Add the cookie chunks after the base is blended and just before freezing. Avoid over-mixing; gently fold them in. Storing the ice cream in a shallow container also helps keep the cookies crisp.
Can I use a different type of condensed milk?
Only sweetened condensed milk works—regular evaporated milk lacks the sugar and thickness needed. For a vegan alternative, use a plant-based sweetened condensed milk and simmer it similarly.
Conclusion
This no-churn caramel cookie ice cream is a celebration of simplicity and nostalgia. With just a few pantry staples, you can recreate a frozen dessert that rivals the best French patisserie. The rich caramel base, studded with chocolate cookie chunks and topped with dark chocolate shavings, is a guaranteed crowd-pleaser. Whether you serve it at a summer barbecue or as a cozy winter treat, it never fails to delight. For more creative frozen dessert ideas, check out our collection of best chocolate-covered raisins recipes and discover how to elevate everyday ingredients into extraordinary sweets.
Note: This article contains affiliate links. We may earn a small commission on purchases made through them, at no extra cost to you.







