


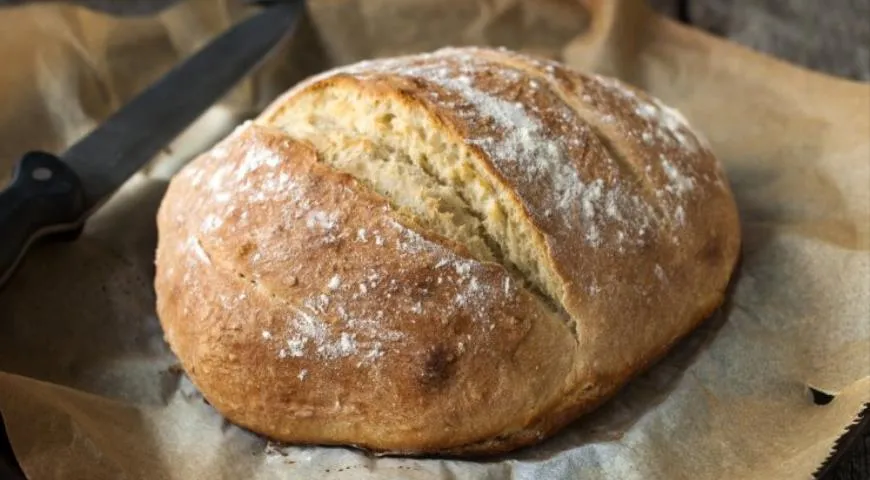
There is bread, and then there is this bread. The secret? You will not need to knead it—not once, not ever. The only challenge you will face is the irresistible compulsion to bake it again and again, and the patience required to let it cool before tearing into its crackling, golden crust. This no-knead bread, baked in a conventional oven, transforms humble ingredients into an artisan loaf that rivals any boulangerie. It is a celebration of time over effort—a slow fermentation that builds deep, wheaty flavour and an ethereal crumb structure.
About the Recipe
This recipe is a modern classic, championed by home bakers and professional chefs alike for its almost magical simplicity. The dough is wet, sticky, and intentionally slack—no kneading required. A long, room-temperature fermentation of at least ten hours develops gluten and flavour while you sleep or go about your day. The final baking process, which starts under a hot cover to trap steam, creates a shatteringly crisp crust and a tender, airy interior. The result is a loaf that demands to be sliced warm, slathered with butter, and devoured immediately.

Ingredients
- 500 g bread flour (or all-purpose flour for a softer crumb)
- 400 ml water, lukewarm (about 30–35°C)
- 1/4 teaspoon active dry yeast (or 1 g fresh yeast)
- 1 1/2 teaspoons fine sea salt
- Additional flour for dusting
For precise measurements, a digital scale is essential, but you can also use volume measures if careful. The water should feel barely warm to the wrist—too hot will kill the yeast, too cold will slow fermentation.
Step-by-Step Instructions
1. Prepare the Dough
Weigh all ingredients meticulously. In a large bowl, combine the yeast with the water and let it sit for a minute until dissolved. In a separate deep bowl, sift the flour, add the salt, and stir. Pour the yeasted water into the flour mixture and mix with a wooden spoon or your hands until a homogeneous, very wet and sticky dough forms. Do not be alarmed—this is correct. Cover the bowl tightly with plastic wrap and leave at room temperature for at least 10 hours (overnight is ideal).
2. Shape the Loaf
After the resting period, the dough should have doubled or tripled in volume and be dotted with bubbles. Generously dust a work surface with flour and turn the dough out onto it—it will be sticky and soft. Using lightly floured hands, fold the edges of the dough toward the centre, all around the perimeter, to create a rough ball. Flip the dough seam-side down and gently round it into a taut boule with cupped palms. Line a medium bowl with parchment paper, transfer the dough ball into it, cover with plastic, and let it proof for another 90 minutes at room temperature.
3. Preheat and Prepare
About 30 minutes before the second proof ends, place a heavy, ovenproof cast-iron pot or a heatproof bowl upside down on a baking sheet inside the oven. Preheat the oven to 250°C (482°F). The pot must be blisteringly hot. Once ready, carefully remove the hot pot using heavy oven mitts or silicone gloves. Lift the dough by the parchment edges and lower it onto the hot baking sheet (or directly into the pot if using a lidded Dutch oven). Immediately cover with the hot bowl or lid.
4. Bake and Finish
Bake covered for 15 minutes—this traps steam to create a glossy, crisp crust. Then remove the cover and continue baking for another 20–25 minutes, until the loaf is deep golden brown and sounds hollow when tapped on the bottom. Transfer to a wire rack and listen to the mesmerizing crackling song of the crust as it cools. Resist slicing for at least 30 minutes—the interior continues to set. Pro tip: mix the dough in the evening to bake in the morning, or start early morning for a dinner-time loaf. For alternative cooking methods, a non-toxic air fryer can produce a smaller version, but nothing beats the oven method.
Tips for Perfect No-Knead Bread
- Use a kitchen scale. Weight measurements are far more reliable than cups. A planetary mixer is not needed here, but a scale is essential.
- Do not skip the long fermentation. The minimum 10 hours builds flavour and structure; 12–18 hours is even better.
- Keep the dough wet. Resist the urge to add extra flour—stickiness ensures an open crumb.
- Use a hot oven and steam. The covered initial stage is non-negotiable for the crackling crust.
- Cool completely. Slicing too early ruins the texture. If you must have warm bread, let it rest at least 20 minutes.
For those with sensitive digestion, consider using organic flour and filtered water.
Variations to Inspire You
Once you master the base recipe, explore endless possibilities. Fold in 100 g of chopped olives and a tablespoon of rosemary before shaping. Substitute 100 g of the bread flour with whole wheat or rye for a nuttier profile. Add 50 g of pumpkin seeds or sunflower kernels for crunch. For a sweet twist, incorporate 80 g of dark chocolate chips and a pinch of sea salt. If you prefer a softer crust, brush the loaf with butter immediately after baking. To recreate a classic Italian pane, add 2 teaspoons of dried oregano and 50 g of grated Parmesan to the flour. The dough also makes excellent flatbreads if you roll it thinner and bake on a hot stone.
Frequently Asked Questions (FAQ)
Why is my dough so wet and sticky? Is that normal?
Yes, completely normal. This high-hydration dough (80% water to flour) is the secret to the airy crumb. Do not add extra flour.
Can I use instant yeast instead of active dry?
Yes, use the same amount (1/4 teaspoon). Mix it directly with the flour, then add water. No proofing needed.
How do I store leftover bread?
Wrap the cooled loaf in a clean kitchen towel and store at room temperature for up to 2 days. For longer storage, slice and freeze in an airtight bag. Toast slices directly from frozen.
What if I don’t have a cast-iron pot?
Use a stainless steel bowl or an ovenproof skillet covered with another heatproof bowl. Alternatively, place a tray of water on the bottom rack to create steam. A commercial-grade oven handles steam well, but any oven works.
Why did my bread collapse or spread out flat?
This usually means the dough was over-proofed or under-floured during shaping. Ensure the second proof is only 90 minutes, and use enough flour on the work surface to handle the sticky dough without tearing it.
Can I add whole grains or seeds?
Absolutely. Replace up to 30% of the bread flour with whole wheat or rye, or mix in 50 g of seeds like flax, sesame, or poppy. You may need to add a few extra tablespoons of water.
Is it possible to make this bread in a bread machine?
Not directly, because the dough is too wet. But you can use a food processor to mix the ingredients in just 10 seconds—great for a quick start.
Final Thoughts
This no-knead bread is more than a recipe—it is a ritual. It teaches patience, rewards simplicity, and fills your kitchen with the most primal, comforting aroma. Whether you pair it with a hearty soup, a cheese board, or just a smear of salted butter, each slice is a testament to the alchemy of flour, water, time, and heat. For the best results, use fresh ingredients and trust the process. And when your family asks for the recipe, smile—they will think you are a bread genius.
For more baking inspiration, explore our guide on the best coffee makers to accompany your bread, or discover how to use leftover slices in a Catalan sponge cake recipe. Happy baking!
Note: This recipe has been adapted from a traditional Russian home-baking method. For accuracy, always refer to the original source.
This article contains affiliate links. As an Amazon Associate, we earn from qualifying purchases.


