


There is something utterly satisfying about a piece of perfectly fried fish: a crackling, golden shell giving way to tender, flaky flesh. This Russian classic, Zharenaya Treska v Klyare, elevates humble cod into a dish of quiet elegance. The secret lies in a light, herb-flecked batter that crisps up without absorbing excess oil, and a careful, patient approach to thawing and seasoning the fish. Whether served as a main course with mashed potatoes and a dollop of sour cream, or as a sharing plate alongside a crisp green salad, this recipe delivers restaurant-quality results from your home kitchen.
About This Recipe – The Art of Fried Cod in Batter
Cod has long been a favorite in Russian cuisine, prized for its mild flavor and firm texture that holds up beautifully to frying. This particular preparation draws on the European tradition of fritto misto but adds a distinctly Russian touch: fresh dill in the batter and a squeeze of lemon right on the fish before cooking. The result is a dish that is both nostalgic and refined. For those looking to explore more classic fish recipes, our guide to non-toxic air fryers offers a healthier alternative for achieving a similar crunch. And if you are passionate about perfecting your frying technique, consider investing in a quality oil sprayer for even coverage.

Ingredients – Everything You Need
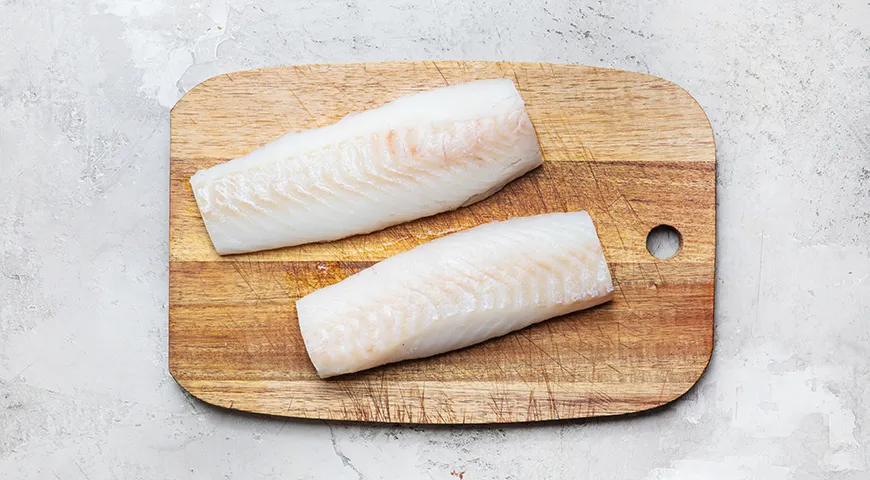
- 800 g cod fillet (skinless, boneless)
- 2 large eggs
- 150 ml milk (whole or 2%)
- 1.5 tbsp all-purpose flour
- 1 sprig fresh dill
- 1 tbsp lemon juice
- Refined vegetable oil (for deep frying; enough to create a 2 cm layer in the pan)
- Salt, to taste
- Freshly ground black pepper, to taste
The simplicity of the ingredient list belies the careful technique behind it. Using a food processor can help you finely chop the dill for a uniform batter, though a sharp knife works perfectly.
Step-by-Step Instructions – How to Achieve Crispy Perfection
Step 1: Thaw the Cod Properly
Thaw the cod fillet in advance – ideally eight hours before serving. Place the frozen fillet in the refrigerator (not on the counter) to defrost slowly. This ensures the fish retains its natural juices, resulting in a more succulent final dish. If you are short on time, a microwave pressure cooker can speed up defrosting while preserving moisture.
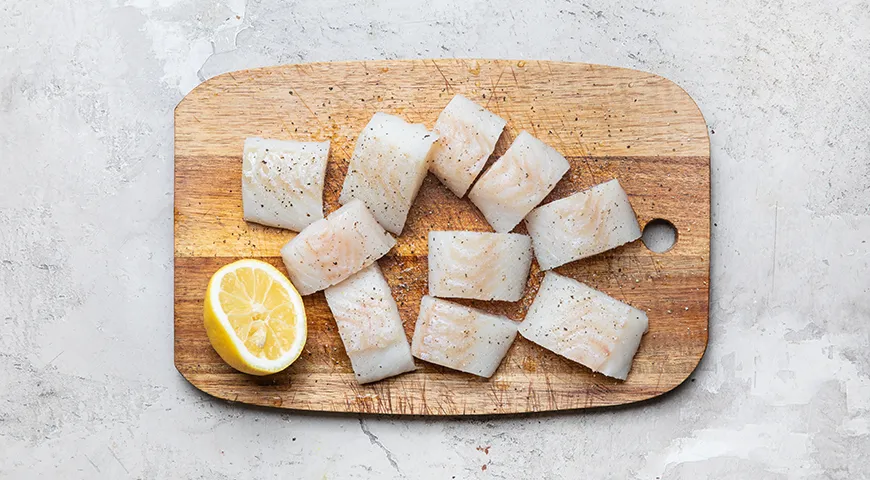
Step 2: Cut and Season the Fish
Slice the cod fillet into medium-sized pieces – about 5 cm long and 3 cm wide. Lay them on a board, season with salt and pepper, and drizzle with lemon juice. Let them rest for at least 10 minutes. This brief marination helps firm the flesh and balances the richness of the batter. For a more pronounced citrus note, consider using a sweet wine with high alcohol content in place of lemon juice for a unique twist.
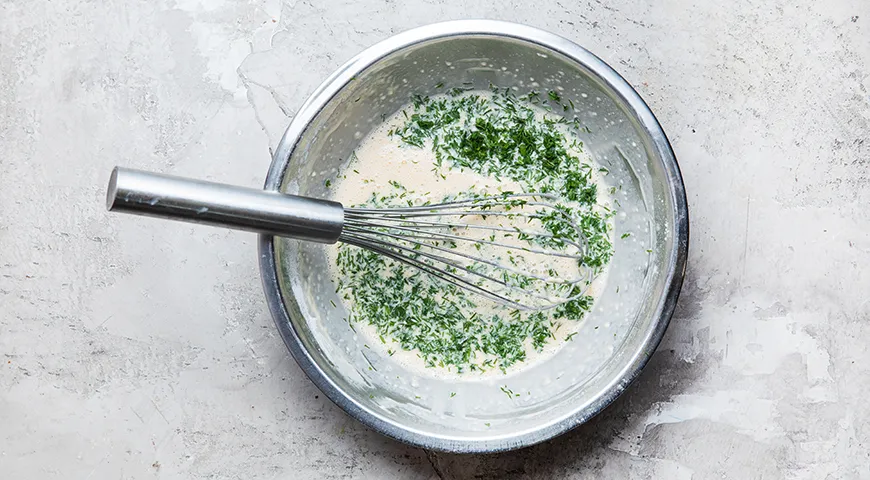
Step 3: Prepare the Batter
In a deep bowl, whisk together the eggs and milk with a hand whisk or an immersion blender for a silky texture. Gradually add the flour, stirring until smooth. Finely chop the dill leaves (discard the tough stems) and fold into the batter. The batter should be thin enough to coat the fish without clumping – if it seems too thick, add a splash more milk. For an even lighter crust, you can incorporate a teaspoon of sparkling water.
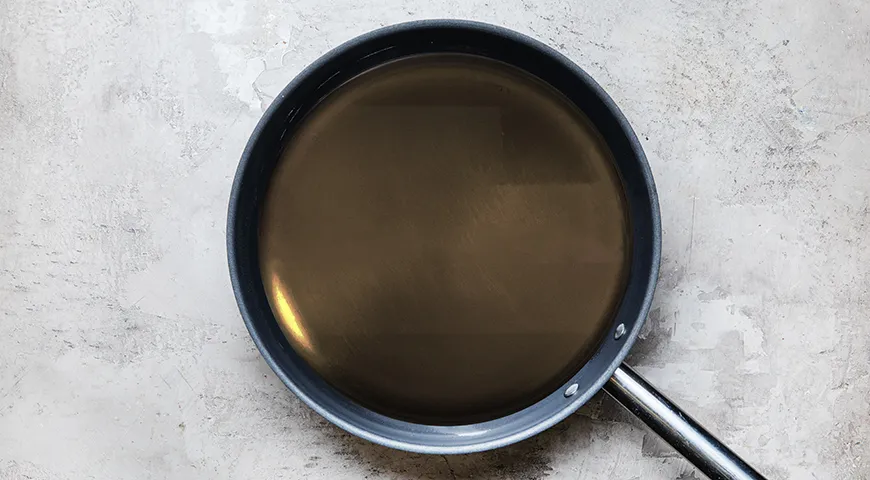
Step 4: Heat the Oil
Choose a deep skillet or heavy-bottomed pan, ideally 26 cm in diameter. Fill it with refined vegetable oil to a depth of about 2 cm. Heat over medium-high heat until the oil shimmers – a wooden spoon dipped in should bubble steadily. Maintaining the right temperature is crucial; if it is too low, the batter will absorb oil; if too high, the outside burns before the fish cooks. A refrigerant leak detector may seem unrelated, but it helps ensure your fridge and freezer are working optimally for storing fresh fish.
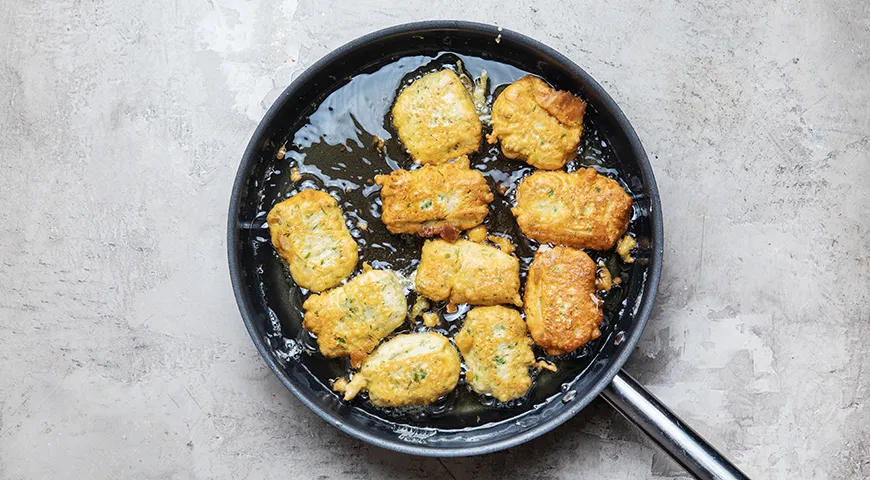
Step 5: Fry and Drain
Using a fork, spear each piece of cod and dip it into the batter, letting excess drip off. Carefully lower into the hot oil. Fry in batches without overcrowding – the temperature will drop if too much fish is added. Cook for 2–3 minutes per side, turning once, until deeply golden and crisp. Transfer to a plate lined with two or three layers of paper towels to absorb any residual oil. Keep warm in a low oven while you finish the rest. For an extra-crispy finish, you can finish them in a wall oven microwave combo with air fryer for a minute.
Tips for Perfect Fried Cod in Batter
- Cold batter, warm oil: Chilling the batter for 15 minutes before frying helps create a lighter, puffier crust.
- Don’t skip the lemon: The acid balances the richness and prevents the fish from tasting flat.
- Double drain: After paper towels, transfer to a wire rack set over a baking sheet – this prevents soggy bottoms.
- Season immediately: A pinch of flaky sea salt right out of the oil enhances the flavor.
- If you prefer a gluten-free version, substitute rice flour or a gluten-free all-purpose blend. A planetary mixer can whip up a smooth gluten-free batter effortlessly.
Variations to Explore
While classic dill batter is sublime, you can vary the herbs: try parsley, chives, or even a pinch of smoked paprika for a different character. For a spicier kick, add a dash of cayenne or a tablespoon of your favorite hot sauce to the batter. Cod fillet works wonderfully, but this batter also suits haddock, pollock, or even firm tofu for a vegetarian option. If you are entertaining, consider serving the fish with a side of pickled vegetables, which you can easily prepare using a steam canner. For a touch of indulgence, drizzle with a honey-mustard sauce.
Frequently Asked Questions (FAQ)
Can I use frozen cod directly without thawing?
We strongly recommend thawing first. Frozen fish contains excess water that will cause the batter to steam rather than crisp, and may lower the oil temperature dangerously. Thaw in the refrigerator as described in Step 1 for best results. If you must cook from frozen, pat very dry and increase cooking time by 2–3 minutes.
What is the best oil for frying cod in batter?
Refined vegetable oil (such as sunflower, canola, or peanut) is ideal because it has a high smoke point and neutral flavor. Avoid extra-virgin olive oil or butter, as they burn at the high temperatures needed. For a healthier option, an air fryer can achieve a similar crust with minimal oil.
Why did my batter fall off during frying?
This usually happens if the fish is too wet or the oil is not hot enough. Pat the cod pieces dry with paper towels after marinating, and ensure the oil reaches at least 175°C (350°F) before adding the fish. Also, let the batter cling for a few seconds before lowering into the oil.
Can I make the batter ahead of time?
Yes, you can prepare the batter up to 2 hours in advance and keep it refrigerated. Stir gently before using, as the flour may settle. Do not add the dill until just before frying to preserve its vibrant color and flavor.
How do I store and reheat leftovers?
Store fried cod in an airtight container in the refrigerator for up to 2 days. To reheat, place on a wire rack in a 190°C (375°F) oven for 5–7 minutes – this restores crispiness better than a microwave. You can also use a commercial countertop convection oven for even heat distribution.
Is it necessary to use fresh dill? Can I use dried?
Fresh dill provides a bright, grassy note that is integral to this recipe. Dried dill can be used in a pinch (use about 1 teaspoon), but it will not have the same fresh pop. If you love dill, consider growing your own – a compact kitchen garden is easy with a castor oil plant companion? Actually, dill is straightforward from seed.
Final Thoughts – Serve with Style
This Russian-style fried cod in batter is more than a weeknight dinner – it is a celebration of simple, quality ingredients treated with respect. Serve immediately with lemon wedges, a sprinkling of fresh dill, and perhaps a side of roasted potatoes or a light coleslaw. For the perfect beverage pairing, a crisp, dry white wine or a George Howell coffee iced latte can be surprisingly complementary. Whether you are a seasoned home cook or a curious beginner, this recipe promises a satisfying, golden-brown reward every time.
Explore more culinary inspirations on our blog, including a Catalan sponge cake for dessert or tips on choosing the best undercounter ice maker for your summer gatherings. Happy cooking!


