


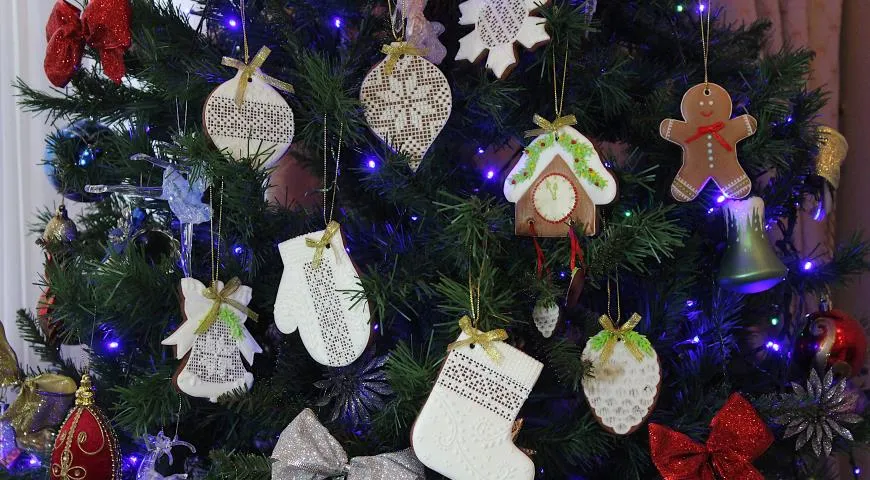
Imagine a holiday table where the centerpiece is not merely decorative but edible, aromatic, and functional—a gingerbread tea house that holds your favorite tea bags while perfuming the room with notes of honey, ginger, and warm spices. This Russian-inspired creation, known as Chaynyy Domik, transforms a simple tea service into a cherished ritual. Whether you are hosting a festive gathering or seeking a magical project with children, this gingerbread tea house promises to be the highlight of your winter celebrations. With its intricate icing lattice, customizable decorations, and the joy of finally serving tea from within its walls, this recipe is a must-try for bakers and entertainers alike. For best results, consider using a planetary mixer to achieve a flawless dough consistency.
About This Recipe
This gingerbread tea house is deeply rooted in European holiday traditions, particularly the German Lebkuchenhäuschen and the Russian love for festive gingerbread (pryaniki). The dough is enriched with honey and butter, then spiced with cinnamon, cloves, and nutmeg—though the recipe allows for personal twists. What sets this tea house apart is its dual purpose: it serves as both a stunning table decoration and a practical tea bag dispenser. The hollow interior houses an assortment of tea bags, while the roof lifts off for easy access. The icing, a simple mixture of egg white and powdered sugar, lends itself to intricate lace patterns, lettering, and flooding. This project is perfect for a snowy afternoon, and can be broken into stages over two days. For those new to gingerbread, a food processor for nut butter can also be used to grind spices fresh, though pre-ground works well too.

Ingredients
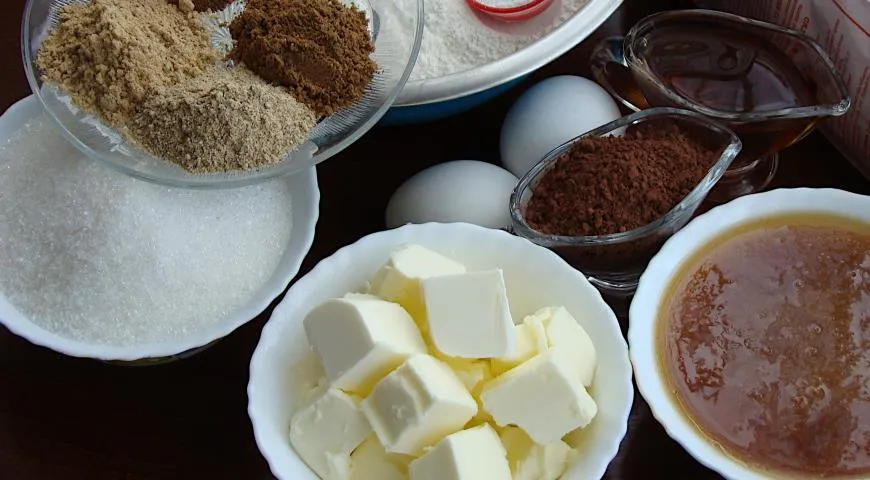
- 300 g unsalted butter
- 200 g honey (preferably light floral honey)
- 200 g granulated sugar
- 2 large eggs
- 1 tbsp cognac or brandy (optional, for depth)
- 650–700 g all-purpose flour
- 2 tsp ground ginger
- 2 tsp ground cinnamon
- 1 tsp ground cloves
- ½ tsp ground nutmeg
- 1 tsp baking soda (not baking powder)
- Pinch of salt
For the Royal Icing:
- 1 large egg white
- 250–300 g powdered sugar (sifted)
- 1 tsp fresh lemon juice
- Additional powdered sugar for stiff consistency (for outlines and letters)
- Water for thinning (for flooding)
All ingredients should be at room temperature. If you are planning to make multiple tea houses or large batches, an commercial countertop convection oven can ensure even baking.
Step-by-Step Instructions
Step 1: Prepare the Honey-Butter Base
In a small saucepan, combine the butter, honey, and sugar. Heat gently over a water bath (bain-marie) until fully melted and smooth. Do not boil. Remove from heat and allow to cool slightly.
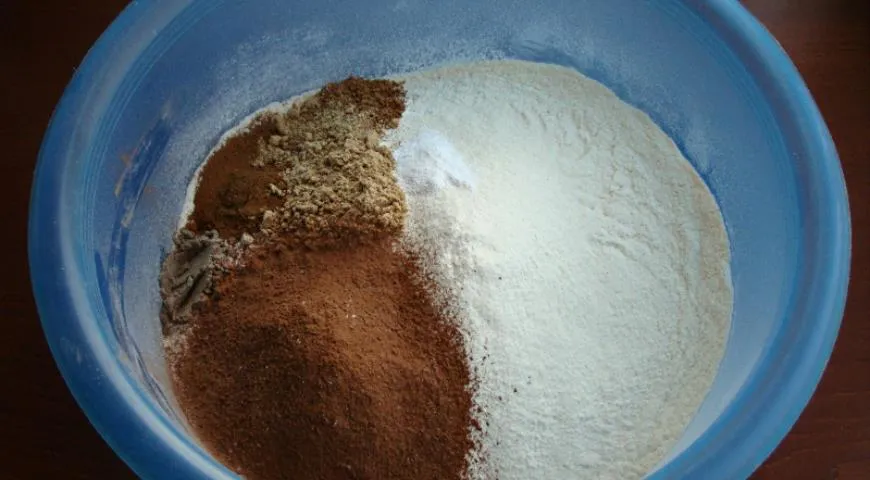
Step 2: Mix Dry Ingredients
In a large bowl, sift together the flour, ginger, cinnamon, cloves, nutmeg, and salt. Whisk to combine. Set aside.
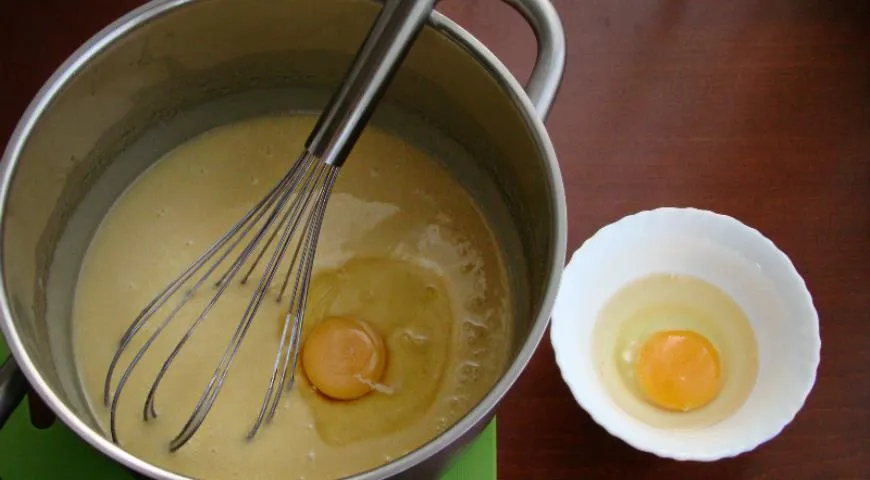
Step 3: Activate the Baking Soda
Add the baking soda to the warm honey mixture. It will fizz—this is good. Stir and let rest for 15 minutes. Then beat in the cognac and eggs one at a time, mixing well after each addition.
Step 4: Form the Dough
Pour the wet mixture into the dry ingredients. Stir with a wooden spoon until a soft, sticky dough forms. Turn out onto a floured surface and knead briefly until smooth. Do not overwork.
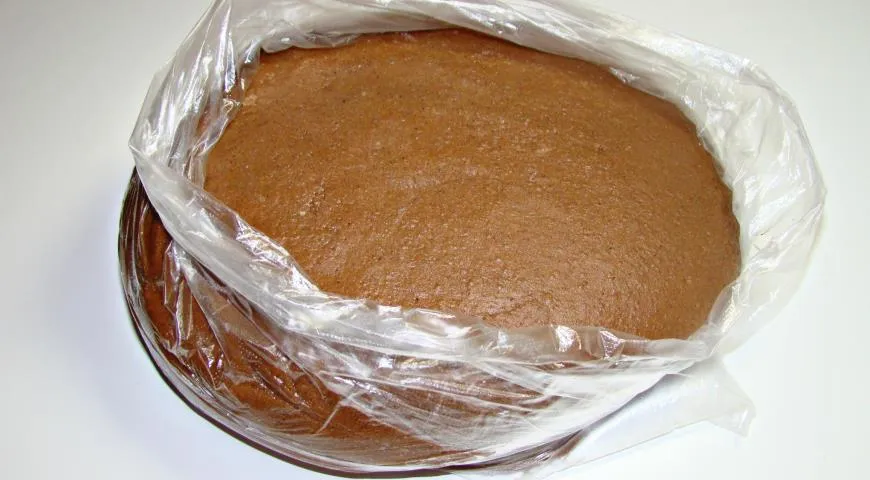
Step 5: Chill the Dough
Wrap the dough in plastic wrap and refrigerate for at least 2–3 hours, or overnight. Chilling prevents spreading during baking and makes cutting easier.
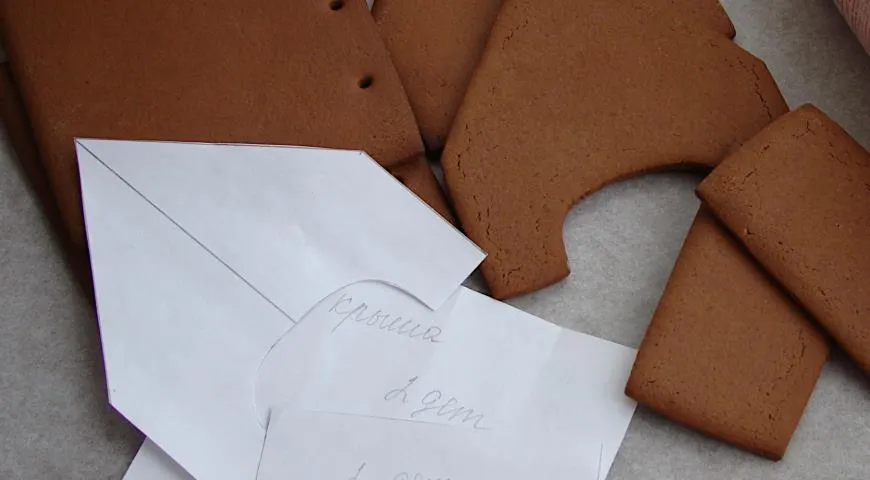
Step 6: Roll and Cut the Pieces
Preheat oven to 170–180°C (340–350°F). On a lightly floured surface, roll out the dough to about 5 mm (¼ inch) thickness. Using templates or cookie cutters, cut out the house walls, roof panels, and a base. For the tea bag slot, cut an opening about 1 cm wider than your tea bags to allow for expansion during baking. Also cut out optional tree ornaments from the same dough.
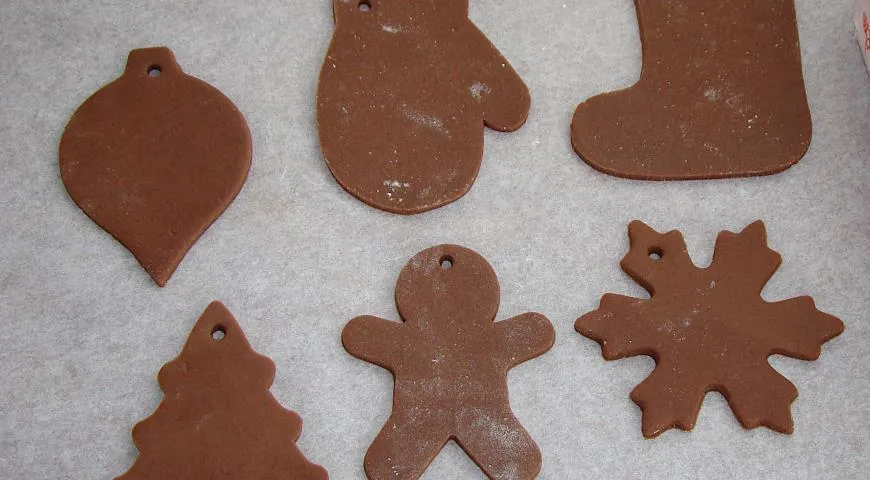
Step 7: Bake the Gingerbread
Transfer the cut pieces to parchment-lined baking sheets. Bake for 7–10 minutes, until firm and lightly browned at the edges. Baking times vary: check after 7 minutes. Allow to cool completely on wire racks for several hours.
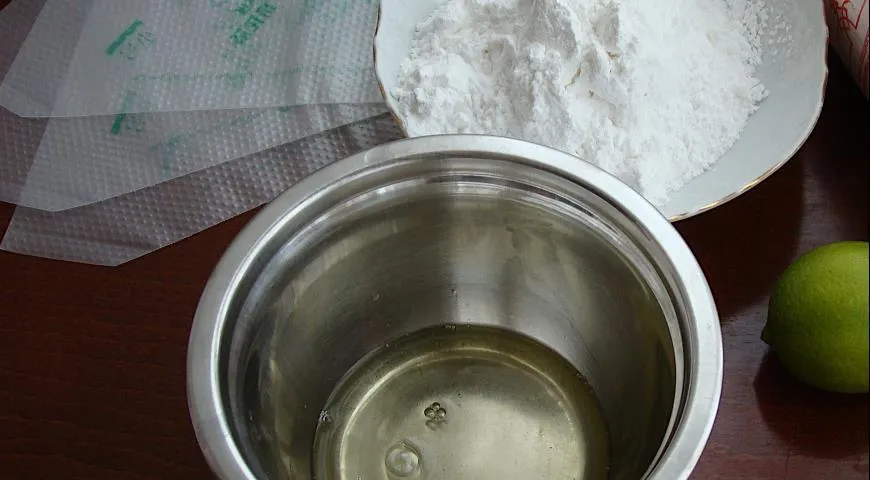
Step 8: Prepare the Royal Icing
In a clean bowl, beat the egg white with a non-toxic immersion blender or mixer until frothy. Gradually add the powdered sugar, beating until stiff peaks form. Add lemon juice and beat until glossy. For outlines, add extra sugar to stiffen; for flooding, thin with a few drops of water.

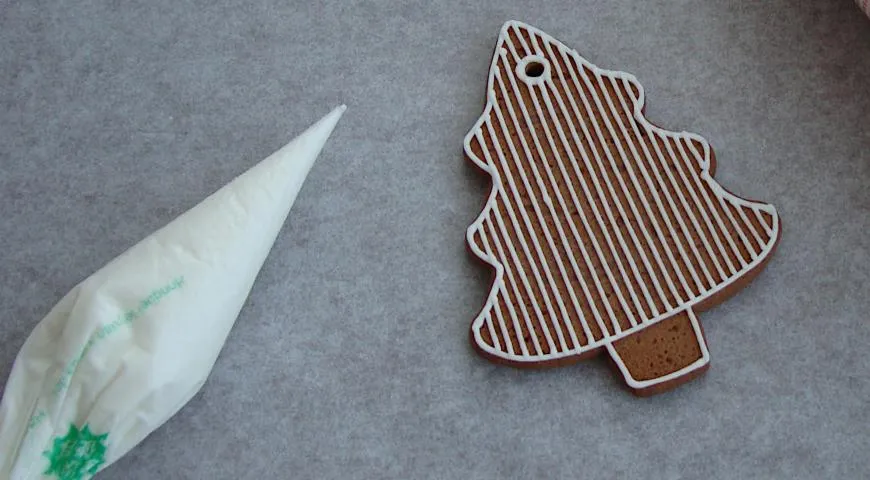
Step 9: Create Lace Patterns – Base Grid
Using a piping bag with a fine tip, pipe parallel lines 3–4 mm apart in one direction on a cooled gingerbread piece. Then pipe perpendicular lines to form a grid. Let the grid dry slightly.
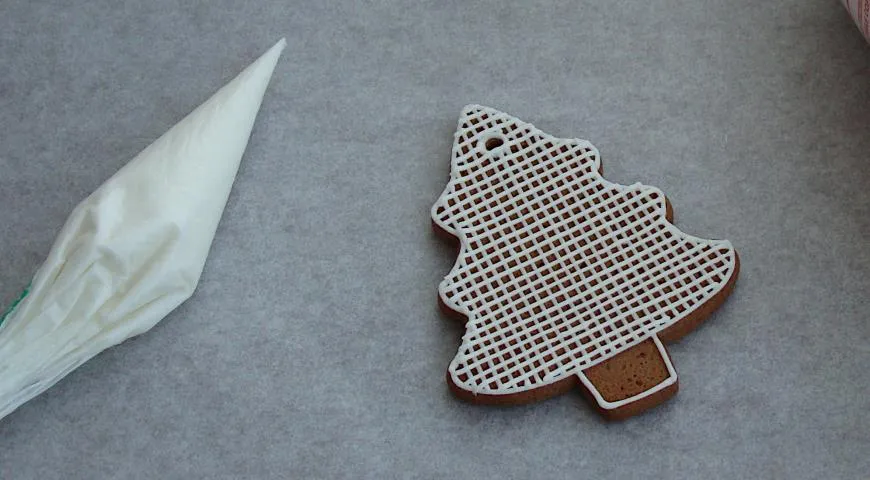
Step 10: Add Decorative Icing Details
Once the grid is dry, pipe additional swirls, dots, and lace motifs over the top using stiff icing. For lettering (e.g., “TEA”), add extra powdered sugar to the icing to make it very stiff.
Step 11: Flood with Thinned Icing
For large areas like the roof, use thinned icing (add a few drops of water) to flood the surface evenly. Let dry for 4–5 hours until completely set.
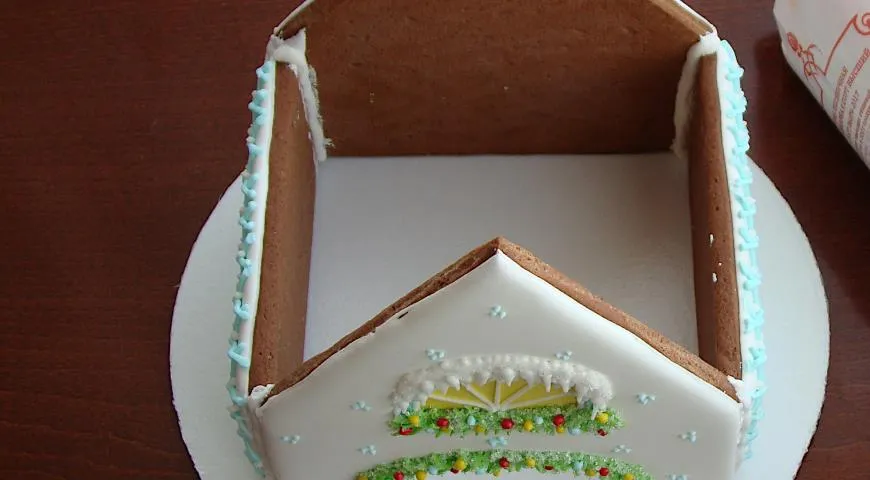
Step 12: Fit the Pieces Together
Before assembling, trim any irregular edges with a fine grater or sharp knife to ensure perfect alignment. This step is crucial for a stable house.
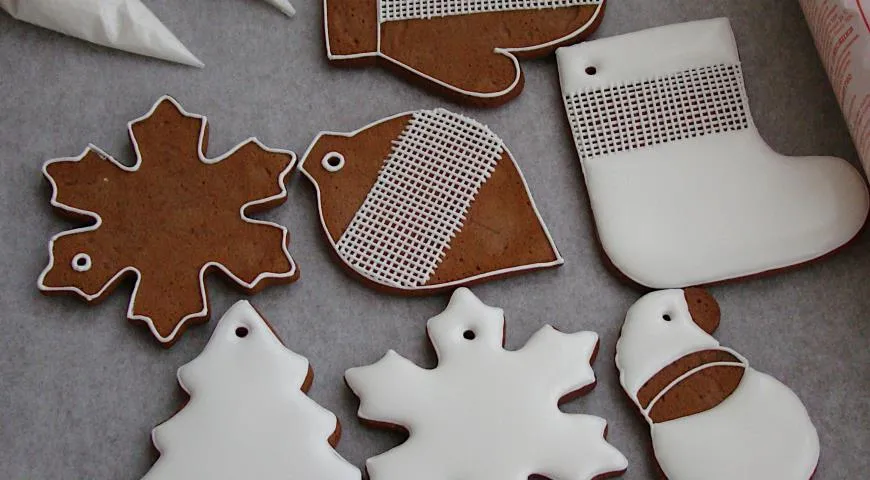
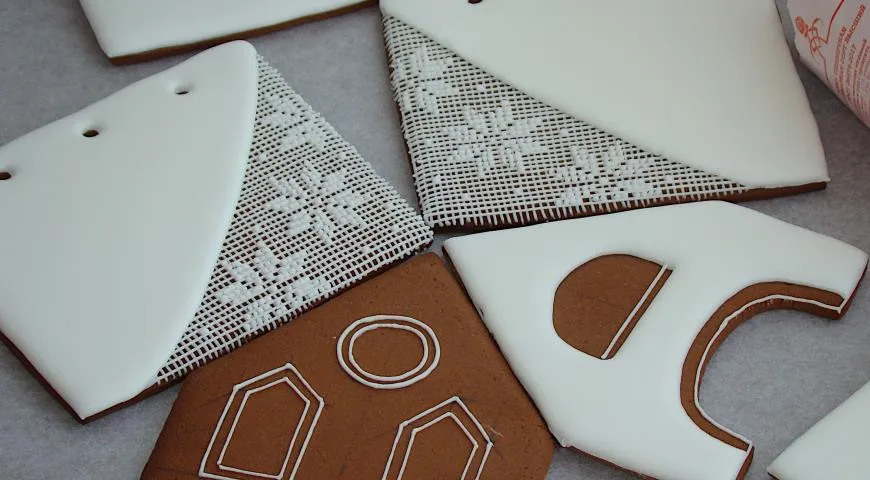
Step 13: Decorate Individual Pieces
Now is the time to fully decorate each wall and roof piece with your chosen designs: snowflakes, windows, doorways, or even mini gumdrops. Let all decorated pieces dry completely (at least 2 hours).
Step 14: Assemble the House
Use stiff icing (add extra powdered sugar) to glue the walls together. Hold each joint for 20–30 seconds until set. Attach the front and back walls first, then the side walls. Let the structure dry for 30 minutes.
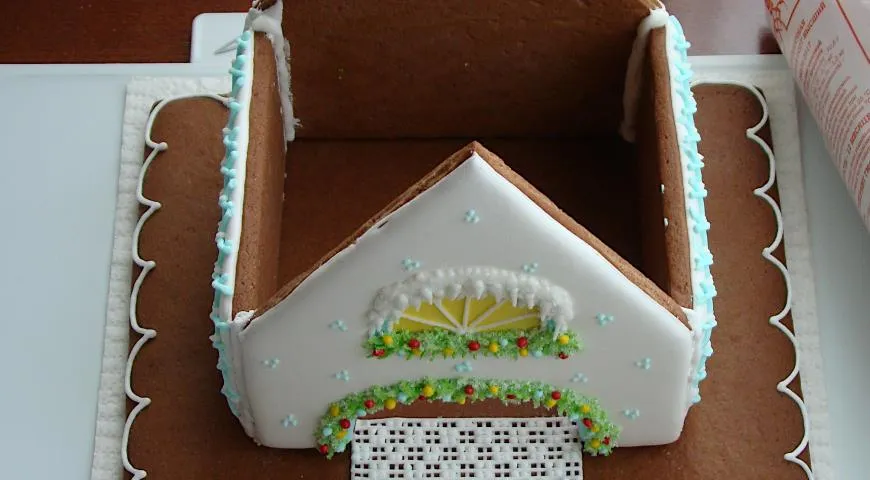
Step 15: Add the Base
Bake an extra gingerbread base piece (or use a ready-made board). Once cool, attach the assembled house to the base with stiff icing. Decorate the base with icing snow, trees, or candies.
Step 16: Fill and Attach the Roof
Place tea bags inside the house through the back opening. Then apply icing to the roof edges and set the roof panels in place. Let the entire structure dry overnight.
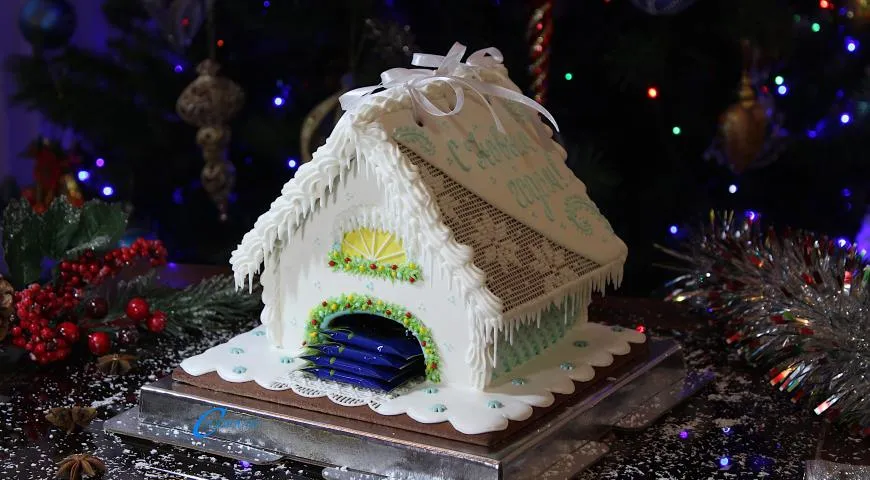
Step 17: Final Presentation
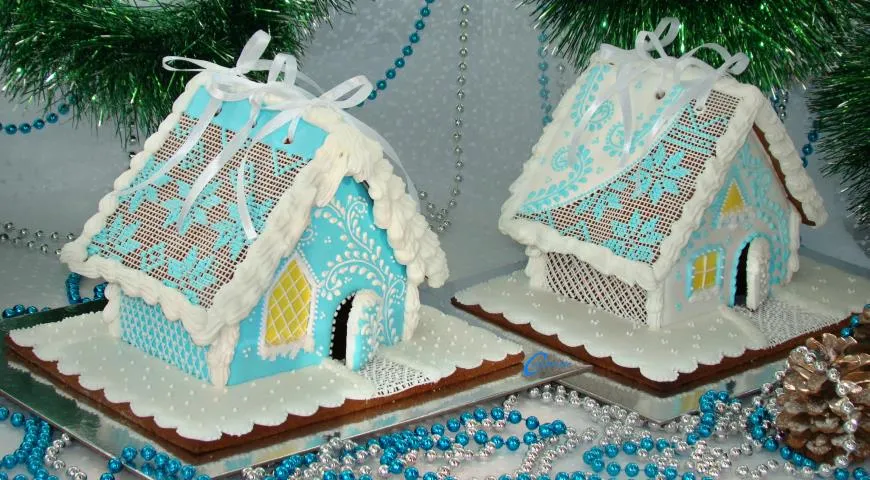
Your tea house is ready! Place it on the holiday table. The gingerbread aroma will enchant guests. To serve, simply lift the roof and invite everyone to choose a tea bag. For a festive touch, you can add a small candle inside (use a battery-operated LED for safety).
Tips for Success
- Use a non-toxic air fryer or convection setting for even baking if you prefer smaller batches.
- For consistent thickness, roll dough between two sheets of parchment paper. A food processor can help mix spices evenly.
- If the dough becomes too soft during rolling, return to the fridge for 15 minutes.
- For a glossy icing, beat the royal icing with an immersion blender for extra smoothness.
- Let the icing dry thoroughly between layers to prevent smudging.
Variations
- Spice Variation: Add cardamom or star anise for a unique flavor profile.
- Chocolate Gingerbread: Replace 50 g of flour with cocoa powder.
- Vegan Version: Use vegan butter and aquafaba (chickpea brine) instead of egg white for icing.
- Mini Tea Houses: Make smaller houses as individual favors using a undercounter ice maker to chill dough quickly.
FAQ
How long does the gingerbread tea house stay fresh?
If stored in an airtight container at room temperature, the house will stay fresh for up to two weeks. The icing may soften in humid conditions, so avoid damp areas.
Can I use this recipe for a standard gingerbread house?
Absolutely. Simply omit the tea bag slot and adjust cutouts for windows and doors. This dough works perfectly for any gingerbread creation.
What if my icing is too runny?
Add more sifted powdered sugar a tablespoon at a time until stiff. For flooding, the consistency should be like honey—smooth but thick enough to hold shape briefly.
Can I make the dough in advance?
Yes, the dough can be refrigerated for up to 5 days or frozen for 3 months. Thaw overnight in the fridge before rolling.
How do I clean a wheatgrass juicer after using it for spices?
While not directly related, a thorough rinse with warm soapy water and a brush is recommended for any juicer. For the tea house, you might instead use a dedicated spice grinder.
This enchanting gingerbread tea house will be the talk of your holiday party. Its warm spices, edible elegance, and interactive tea-serving design make it a memorable centerpiece. Pair it with a selection of fine teas from a George Howell coffee aficionado’s collection, or simply enjoy the cozy aroma. Happy baking!


