


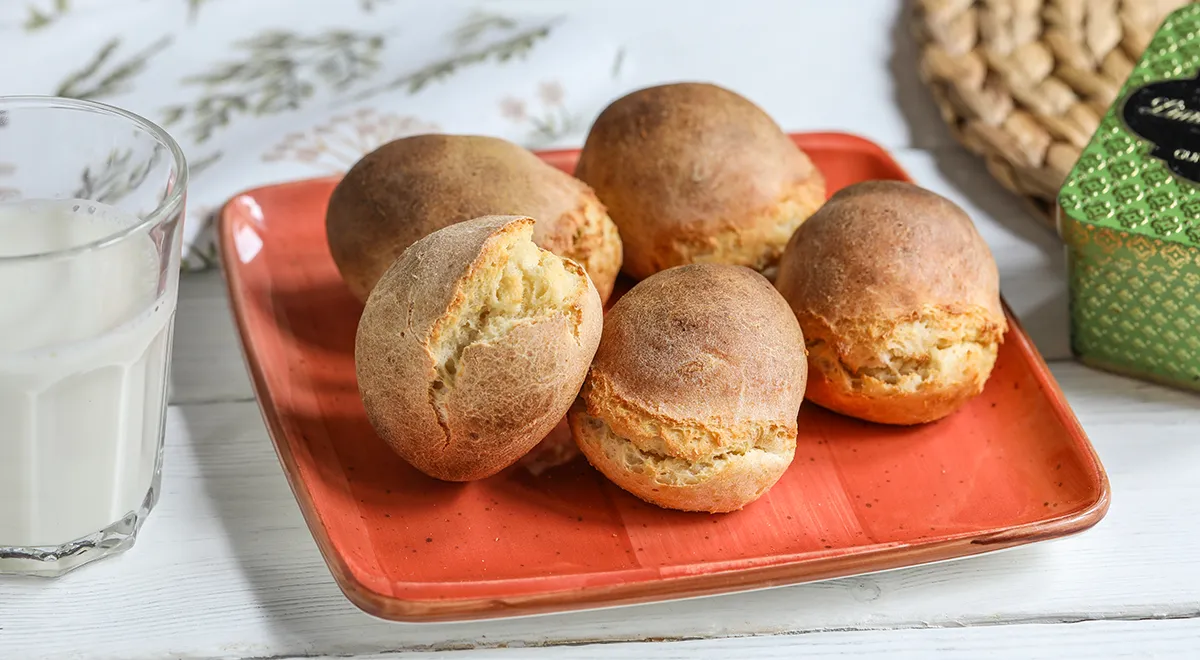
Imagine pulling a tray of golden, cloud-like buns from the oven—each one tender, subtly sweet, and packed with protein. These PP cottage cheese buns (ПП-булочки с творогом) are a revelation for anyone seeking a wholesome treat that doesn’t compromise on texture or taste. Made with creamy 8% cottage cheese and rice flour, they are naturally gluten-free and delightfully light. Whether you’re following a balanced eating plan or simply craving a nourishing snack, these buns prove that healthy can be utterly delicious.
This recipe, inspired by traditional Russian baking, uses simple ingredients to create a versatile base. The key is achieving a smooth, lump-free dough—easily done with a quick blitz in a food processor or by pressing the cottage cheese through a sieve. Once baked, the buns develop a delicate crust and a soft, cake-like interior. Serve them warm with a pat of butter, a drizzle of honey, or enjoy them plain alongside your morning coffee.

About These Healthy Cottage Cheese Buns
In the world of guilt-free baking, these PP (правильное питание—proper nutrition) buns stand out. They rely on the natural moisture and richness of full-fat cottage cheese (we recommend 8% fat) to create a tender crumb without heavy amounts of butter or oil. Rice flour, a staple in gluten-free kitchens, provides a neutral canvas that lets the vanilla and milky notes shine. A touch of refined vegetable oil keeps them pliable, while baking powder ensures a gentle rise. For a deeper dive into non-toxic kitchen appliances that make prep a breeze, check out our guide on the best non-toxic immersion blender.
These buns are also remarkably forgiving. Whether you’re a seasoned baker or a beginner, the dough comes together in minutes. The only trick is adjusting for your cottage cheese’s moisture content: drier curds need less rice flour, while wetter ones require a little more. If you love exploring nutritious baked goods, you might also enjoy our Catalan sponge cake for another light, flour-based treat.
Ingredients
- 2 goose eggs (or 3 large chicken eggs)
- 400 g cottage cheese (8% fat, preferably homogeneous)
- 2 tablespoons refined vegetable oil (e.g., sunflower or canola)
- 1 teaspoon vanilla extract
- 1 teaspoon baking powder
- A pinch of salt
- Rice flour – approximately 150–180 g (as needed for consistency)
Step-by-Step Instructions
Step 1: Preheat and Prepare
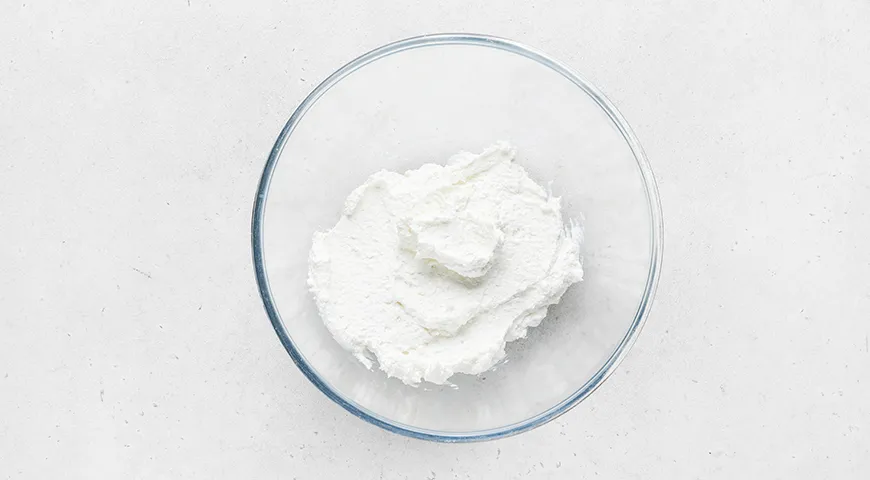
Preheat your oven to 180 °C (350 °F). Line a baking sheet with parchment paper. If your cottage cheese is coarse-grained, press it through a fine sieve or blitz it in a high-quality juicer (or simply use a blender) until completely smooth. A silky base ensures your buns have a flawless, even surface.
Step 2: Mix the Wet Ingredients
In a large bowl, combine the smooth cottage cheese with the eggs, vegetable oil, and vanilla extract. Stir vigorously until the mixture is homogenous. For best results, use a planetary mixer on low speed—this aerates the batter slightly and saves elbow grease. The goal is a creamy, lump-free liquid.
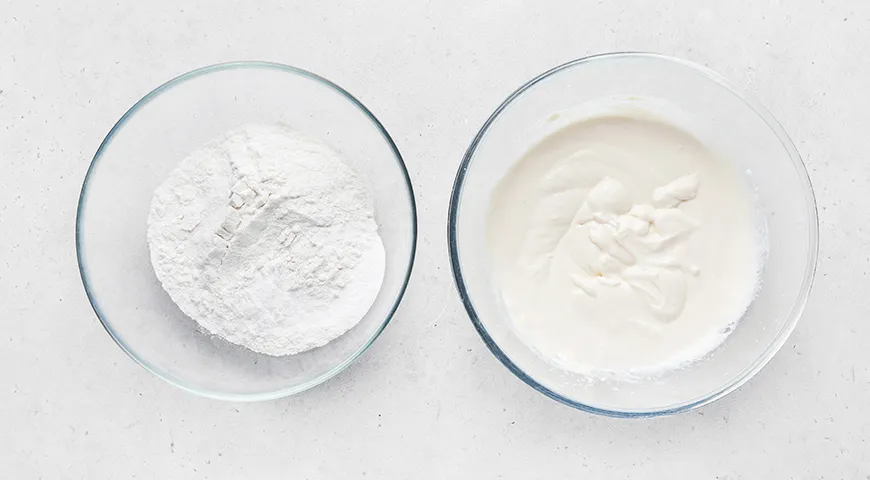
Step 3: Incorporate the Dry Ingredients
Sift together the rice flour, baking powder, and salt. Gradually add these dry ingredients to the wet mixture, stirring until a soft, slightly sticky dough forms. The dough should be firm enough to hold a shape but not stiff. If it seems too loose, add extra rice flour in small increments (up to 30 g). Remember that the moisture content of your cottage cheese affects the flour needed—full-fat cottage cheese tends to be wetter. For more tips on handling sticky doughs, read our review of the best non-toxic air fryer, which can also bake these buns in smaller batches.

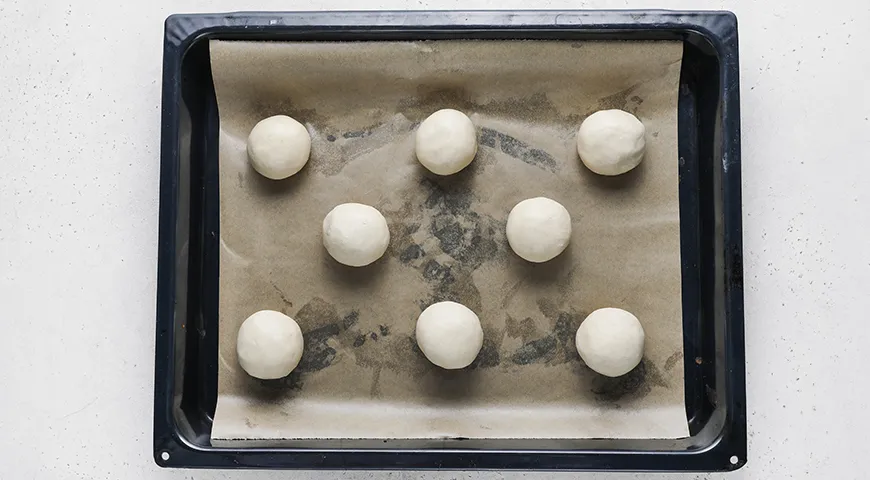
Step 4: Shape the Buns
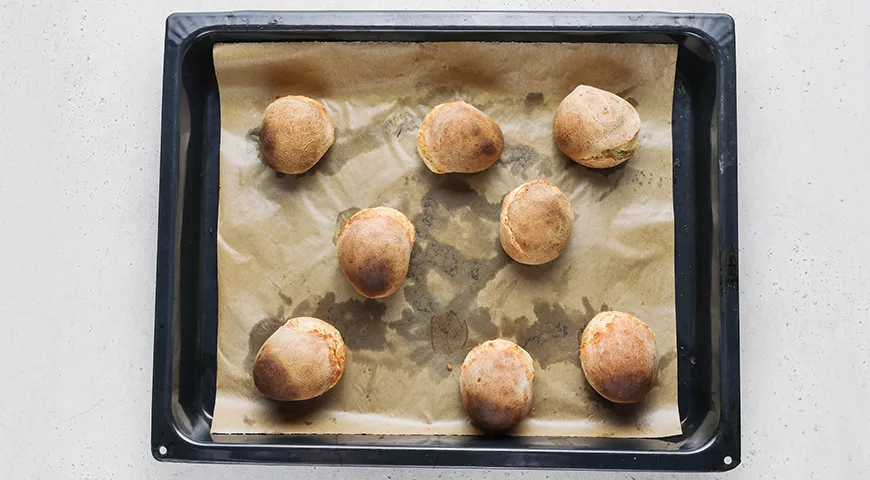
Lightly wet your hands with water or oil to prevent sticking. Scoop out portions of dough and roll them into balls the size of a small peach (about 50–60 g each). Place them on the prepared baking sheet, spacing them 3–4 cm apart—they will spread slightly during baking. This recipe yields 8–10 buns. If you prefer perfectly uniform shapes, an oil sprayer can mist your palms with oil evenly.
Step 5: Bake and Cool
Bake the buns for 30–40 minutes, or until golden brown and a wooden skewer inserted into the center comes out clean. Oven times vary, so start checking at 30 minutes. Let them cool on the baking sheet for 5 minutes, then transfer to a wire rack. They are best enjoyed warm, but also keep well for 2–3 days in an airtight container. For a crispier exterior, you can finish them under the best wall oven microwave combo with air fryer on the convection setting for the last 3 minutes.
Tips for Perfect PP Buns
- Egg swap: If goose eggs aren’t available, use 3 large chicken eggs. The buns will be slightly smaller but equally tender.
- Flour alternatives: Rice flour works best for a neutral taste, but you can substitute with oat flour or a gluten-free blend. Adjust liquid as needed.
- Sweetness boost: Add 1–2 tablespoons of erythritol or honey for a sweeter bun. For a savory version, omit the vanilla and add herbs like rosemary or sun-dried tomatoes.
- Storage: Keep in the fridge for up to 5 days. Reheat in a toaster oven or commercial countertop convection oven for 5 minutes at 160 °C to restore the crust.
Variations to Try
These buns are a fantastic blank canvas. Mix in 50 g of grated Parmesan and a pinch of garlic powder for a savoury Italian twist. For a fruity version, fold in 80 g of fresh blueberries or chopped dried apricots. You can even stuff a cube of dark chocolate into the centre of each ball before baking—just be sure to use a high-quality cocoa chocolate-covered treat inspiration. If you’re experimenting with flavours, don’t miss our guide on best lava flavors for creative dessert ideas.
Frequently Asked Questions
Can I use low-fat or fat-free cottage cheese?
Yes, but the buns will be drier and less tender. If using 0–2% fat cottage cheese, reduce the rice flour by about 20 g and consider adding a tablespoon of yogurt or sour cream for moisture. A microwave pressure cooker can help steam the cottage cheese to soften it beforehand.
Why did my buns spread too much?
This usually happens when the dough is too wet. Add more rice flour, one tablespoon at a time, until the dough no longer sticks heavily to your fingers. Also ensure your baking powder is fresh—expired leavening can cause uneven spreading.
Can I make these buns vegan?
For a vegan version, substitute the eggs with a flax egg (2 tablespoons ground flaxseed + 6 tablespoons water) and use a plant-based cottage cheese alternative, though the texture will be quite different. Consider using organic vodka in a pinch for a quick gluten-free pizza crust instead.
How do I get a golden top without overbaking?
Brush the tops with a little milk or egg wash before baking. If they brown too quickly, tent with foil halfway through. For a non-toxic option, use a silicone brush—check our best oil sprayer reviews for precise application.
Can I freeze these buns?
Absolutely. Cool completely, then wrap individually in plastic wrap and place in a freezer-safe bag. Freeze for up to 3 months. Thaw at room temperature or reheat directly in a coffee maker? Actually, try an air fryer or toaster oven for best results.
Are these buns suitable for a gluten-free diet?
Yes, as long as you use certified gluten-free rice flour and baking powder. Many people with gluten sensitivities find these buns easy to digest. For more gluten-free baking tips, explore our best steam canner guide for preserving fresh produce to pair with your buns.
These PP cottage cheese buns are more than a recipe—they’re a celebration of simple, wholesome ingredients. With their delicate crumb, mild sweetness, and incredible versatility, they earn a permanent spot in any health-conscious baker’s repertoire. So go ahead, preheat that oven, and treat yourself to a batch of these golden beauties. Your taste buds (and your body) will thank you.


