


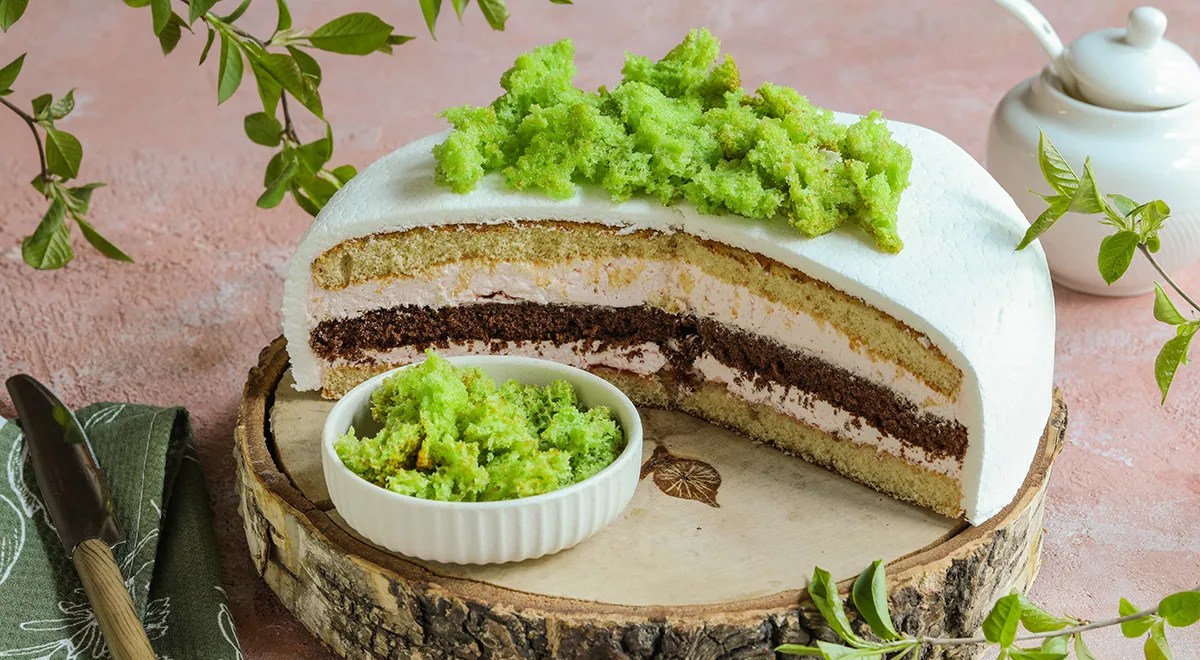
Imagine a dessert landscape where emerald-green moss clings to the surface of a cake, evoking a forest glade or a mystical grove. This delicate, airy sponge known as biscuit moss (or sponge moss) is one of the most budget-friendly and versatile decorations for cakes, cupcakes, and pastries. While many recipes call for a microwave, not every kitchen is equipped with one. That’s why we’ve perfected a method to create this enchanting decoration in a conventional oven. With just a handful of basic pantry staples and a few drops of food coloring, you can craft moss in any hue—perfect for Easter kulich, woodland-themed cakes, or whimsical birthday treats. Let the alchemy of simple ingredients transform your baking.
About This Recipe
Biscuit moss is essentially a light, foam-like sponge cake that bakes into a porous, moss-like texture. It’s traditionally made in minutes using microwave power, but oven baking offers more control and consistent results. This recipe uses a single egg, a touch of honey, a little sugar, flour, and baking powder to create a batter that rises into a delicate, edible moss. The honey not only adds a subtle sweetness but also contributes to the tender crumb. For those with honey allergies, a glucose syrup can be substituted. The key is to whip the egg and sugar to a stiff, voluminous foam—this ensures the moss will be light and full of tiny air pockets. Once baked and cooled, the moss can be tinted in multiple colors or left natural for a more subtle effect. It’s a technique that elevates any dessert from simple to spectacular.

Ingredients
- 1 large egg (chicken egg)
- 30 g honey (or glucose syrup if preferred)
- 25 g all-purpose flour
- 12 g granulated sugar
- 5 g baking powder
- Gel or powdered food coloring (as desired)
These ingredients are incredibly accessible, and you likely have them on hand. For the best results, use a high-quality kitchen scale to measure precisely, as even small deviations can affect the foam structure. The egg should be at room temperature for maximum volume when whipped.
Step-by-Step Guide
Step 1: Prep and Preheat
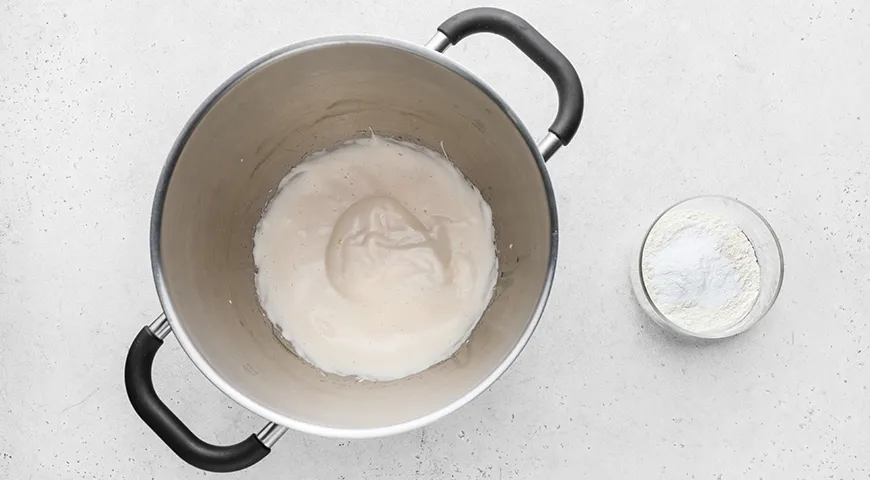
Measure all ingredients and preheat your oven to 180°C (350°F). Sift the flour together with the baking powder into a small bowl. This aeration is crucial for a light sponge. In a separate mixing bowl, begin whipping the egg and sugar. Use an electric mixer—or a trusted planetary mixer—and beat for several minutes until the mixture becomes thick, pale, and forms a dense, fluffy foam that holds a ribbon-like trail when the beaters are lifted.
Step 2: Add Honey and Color
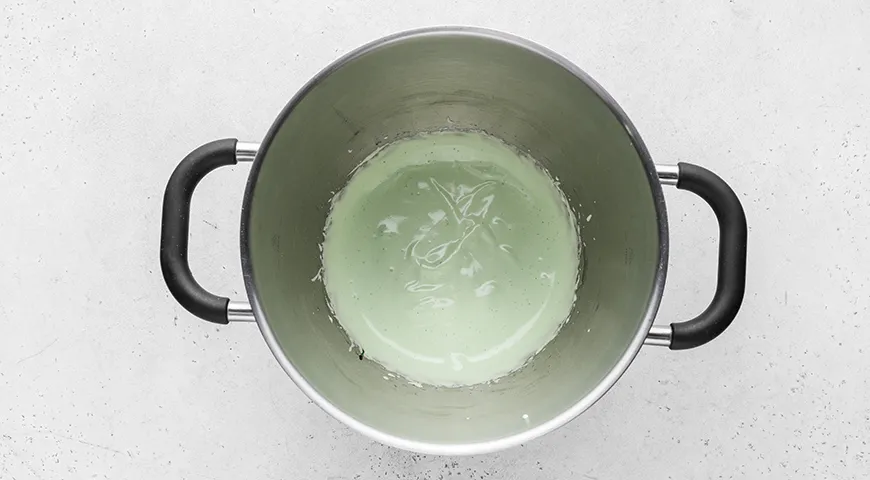
Pour in the liquid honey (or glucose syrup) and beat again briefly until combined. If you intend to make a single-colored moss, add your chosen food coloring at this stage and mix thoroughly. For multiple colors, hold off until the next step. Honey can sometimes cause the foam to deflate slightly, so work quickly but gently. A non-toxic immersion blender can also be used if you prefer a more controlled blending.
Step 3: Fold in Dry Ingredients
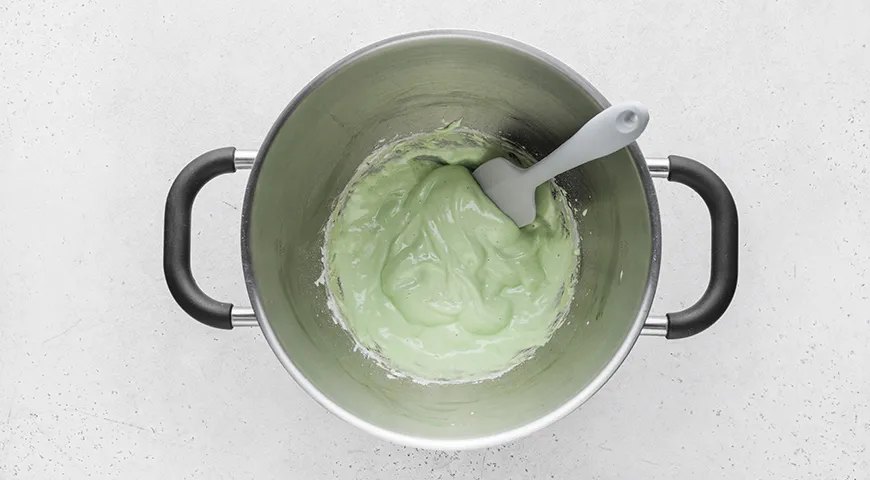
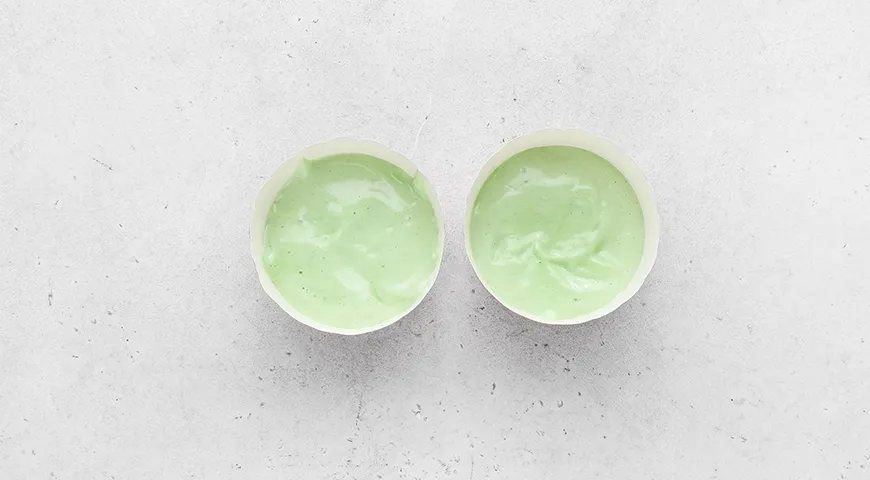
Gently sift the flour-baking powder mixture over the foam. Using a silicone spatula, fold the dry ingredients in with slow, sweeping motions from the bottom upward. Be careful not to overmix; you want to keep as much air in the batter as possible. Now, if you haven’t colored the batter yet, divide it into two or three portions (depending on how many shades of moss you desire). Add food coloring to each portion and fold until evenly distributed. The batter will be thick but still light.
Step 4: Fill and Cover
Transfer the batter to small paper cups (or a single cup if using one color), filling each no more than halfway—the moss will rise significantly. Cover each cup tightly with aluminum foil to prevent the top from browning too quickly and to encourage even steam-baking. Place the cups in the preheated oven. Resist the urge to open the oven door during baking; the sudden change in temperature can cause the delicate structure to collapse.
Step 5: Bake and Finish
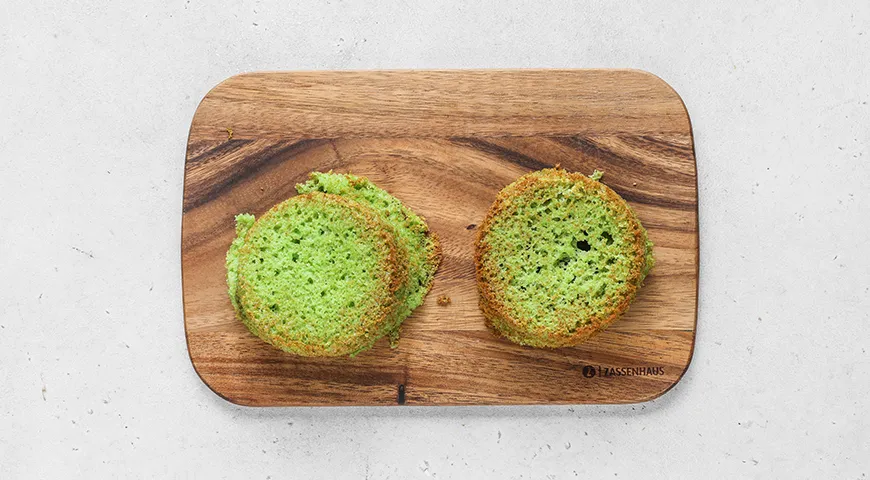
Bake the biscuit moss for 10–12 minutes. The moss should feel set but still springy to the touch. Remove the cups from the oven and let them cool for a few minutes. Using scissors or a sharp knife, cut down the side of each cup and gently peel away the paper to reveal the moss. It will be light, porous, and perfect for crumbling or placing in clumps on your dessert. Congratulations—you’ve just mastered oven-baked biscuit moss!
Tips for Perfect Biscuit Moss
- Room Temperature Eggs: Cold eggs won’t whip to the same volume. Bring yours to room temperature for best results.
- Use a Reliable Oven: An accurate temperature is key. Consider a convection oven for even heat distribution.
- Work Quickly: Once the flour is added, the clock is ticking. Overmixing will deflate the air bubbles.
- Experiment with Colors: Gel food colorings work best; liquid ones can thin the batter. For a natural approach, try matcha powder for green moss.
- Storage: Unused moss can be kept in an airtight container for up to 3 days. Revive crispiness in a non-toxic air fryer for a few minutes.
- Scale Up: Double the recipe if you need a large quantity. Use a food processor to quickly combine dry ingredients for larger batches.
Variations
Biscuit moss is remarkably adaptable. For a chocolate moss, replace 5 g of flour with unsweetened cocoa powder. For a vegan version, substitute the egg with aquafaba (chickpea brine) whipped to stiff peaks, and use agave syrup instead of honey. The baking time may need to be increased by 2–3 minutes. You can also infuse the batter with a few drops of peppermint or orange extract for a subtle flavor that complements the visual. If you’re preparing moss for a holiday cake, consider pairing it with a chocolate-covered raisin topping for extra texture. The possibilities are as endless as your imagination.
Frequently Asked Questions (FAQ)
Can I make biscuit moss without honey?
Absolutely. Replace the honey with an equal weight of glucose syrup or light corn syrup. The texture will remain similar, though the flavor will be less complex.
Why did my moss come out flat?
Flat moss usually results from undermixed egg foam or overmixing after adding flour. Ensure your egg and sugar are whipped to ribbon stage—thick enough to hold a visible trail when the whisk is lifted. Also, check your oven temperature with a reliable thermometer; a wall oven microwave combo can help maintain steady heat.
Can I use natural food colorings?
Yes! For green moss, try liquid chlorophyll or powdered matcha. For earthy tones, use turmeric (yellow), beet powder (pink), or spirulina (blue-green). Natural colorings may alter the batter’s consistency slightly, so adjust with a pinch of extra flour if needed.
How do I attach the moss to a cake?
Once the moss has cooled, it can be crumbled into small pieces and pressed onto a frosted cake using buttercream or ganache as “glue.” Alternatively, use a food-safe piping gel for a non-dairy option. The moss adheres best to a freshly frosted surface.
Can I freeze biscuit moss?
Yes. Place the cooled moss in a freezer-safe bag and freeze for up to 1 month. Thaw at room temperature for 30 minutes before using. To restore its light, crisp texture, reheat briefly in a non-toxic air fryer at 160°C (320°F) for 2–3 minutes.
What if I don’t have a mixer?
A whisk and a bit of elbow grease will work! You can also use a non-toxic immersion blender with a whisk attachment to whip the egg foam. The process will take a little longer, but the result can be just as fluffy.
Is this recipe suitable for high altitude?
At elevations above 1,500 meters (5,000 feet), cake batters can become too airy and collapse. To compensate, reduce the baking powder by about 1 g and increase the baking temperature by 5–10°C. A convection oven can help stabilize heat at altitude.
Biscuit moss is more than a decoration—it’s a celebration of simplicity and creativity. Whether you’re adorning a classic Catalan sponge cake or a modern drip cake, this oven-baked method proves that stunning bakery-style results are within reach of every home baker. Enjoy the process and the envy of your guests.


