


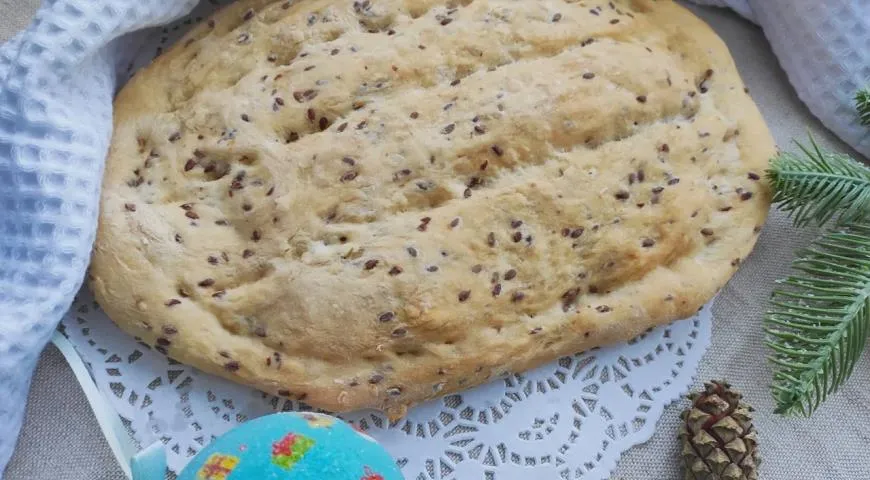
There is something profoundly satisfying about pulling a loaf of homemade bread from the oven—especially when that bread carries the soul of an ancient tradition. Armenian matnakash, with its signature oval shape, golden crust, and impossibly airy crumb, is a testament to the art of simple ingredients transformed by patience and skill. This recipe guides you through every step, from the soft, sticky dough to the final, crackling crust, ensuring that even first‑time bakers can recreate this beloved Armenian staple at home.
About Armenian Matnakash
Matnakash (Armenian: մատնաքաշ) translates literally to “pulled by the fingers,” a name that refers to the traditional method of shaping the dough by hand to create its distinctive furrowed surface. Unlike many flatbreads, matnakash is leavened, yielding a fluffy interior surrounded by a chewy, blistered crust. Historically baked in a commercial countertop convection oven or a wood‑fired tonir, the bread is a symbol of Armenian hospitality and is often served alongside stews, grilled meats, or simply with cheese and fresh herbs. The key to its character lies in the high hydration dough—sticky and soft—which is gently stretched rather than rolled, preserving the gas bubbles that create its ethereal texture.

Ingredients
- 500 g all‑purpose flour (plus extra for dusting)
- 10 g active dry yeast (or 20 g fresh yeast)
- 320 ml warm water (about 40°C)
- 1 teaspoon sugar
- 1 teaspoon salt
- 2 tablespoons vegetable oil (plus more for greasing)
- For the flour paste wash: 2 tablespoons flour, 3–4 tablespoons water, pinch each of sugar and salt
For the best results, use a planetary mixer to knead the sticky dough, though hand kneading with oil‑lubricated hands works beautifully, too.
Step-by-Step Instructions
1. Activate the Yeast
In a large bowl, combine the warm water, sugar, and yeast. Add about half of the flour (roughly 250 g) and stir until smooth. Cover the bowl with a damp towel and let it rest in a warm, draft‑free spot for 20 minutes until the mixture becomes frothy and bubbling.

2. Form the Dough
Add the salt to the remaining flour, then gradually incorporate this into the yeast mixture, mixing until a shaggy dough forms. The dough will be exceptionally soft and sticky—do not be tempted to add extra flour. This high hydration is the secret to the bread’s open, airy crumb. Lightly oil your hands and the work surface, then knead for about 5 minutes until the dough becomes smooth but still tacky.

3. First Proofing
Shape the dough into a ball and place it in a lightly oiled bowl. Cover tightly with plastic wrap and let it rise in a warm place until doubled in volume, about 1 hour (or longer if your kitchen is cool). A juicer might occupy the counter, but this dough needs undisturbed warmth.
4. Shape and Second Rest
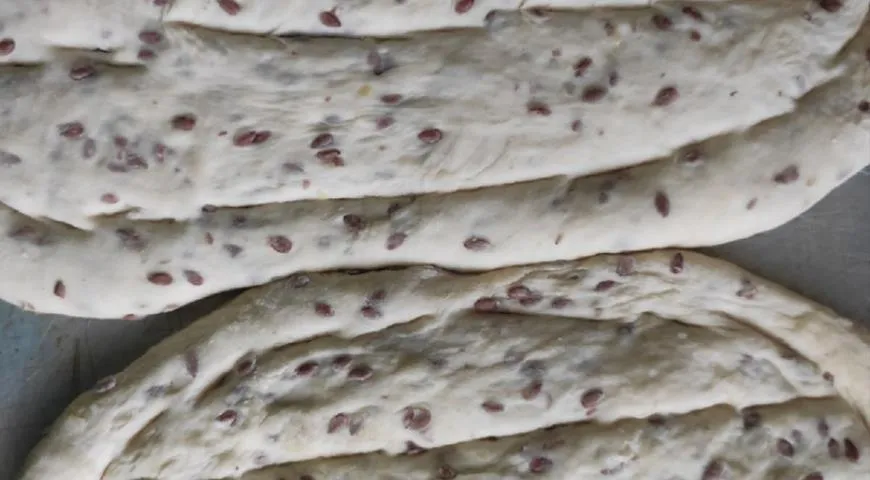
Turn the risen dough onto a parchment‑lined baking sheet that has been lightly oiled. Without degassing, gently stretch it into an oval about 1.5‑2 cm thick. Cover with plastic wrap and let rest for 15 minutes. Meanwhile, prepare the flour paste: whisk together the flour, water, sugar, and salt in a small saucepan. Heat, stirring constantly, until a thick, smooth paste forms. Set aside to cool. (You will need only 3–4 tablespoons for brushing.)
5. Create the Pattern
Using the tips of your fingers or a small knife, draw an oval about 4 cm from the edge of the dough. Inside that oval, press parallel lines lengthwise about 2 cm apart. This traditional pattern not only decorates the bread but also helps it open evenly during baking. Brush the entire surface generously with the flour paste, which will create an irresistible crunchy crust.

6. Bake with Steam
Preheat your oven to 230°C (450°F). To create steam—essential for a crackling crust—place a metal pan on the bottom rack and carefully pour 100–150 ml of boiling water into it just before closing the door. Bake the matnakash for 15–18 minutes until deep golden brown and hollow‑sounding when tapped. Let cool on a wire rack for at least 10 minutes before slicing.
Tips for Perfect Matnakash
- Embrace the sticky dough. Resist adding extra flour; the wet mixture is what gives matnakash its airy structure. Use an oil sprayer to lightly lubricate hands and surfaces.
- Steam is non‑negotiable. The burst of humidity prevents the crust from setting too quickly, allowing maximum oven spring. If you lack a steam pan, you can also spritz the oven interior with water.
- Watch the temperature. Every oven runs slightly differently; if using a wall oven microwave combo with air fryer, reduce baking time by 2–3 minutes.
- Cool completely. The interior continues to steam after baking; cutting too early will yield a gummy crumb.
Variations
Once you master the basic recipe, experiment with these twists: sprinkle black sesame seeds or nigella seeds over the flour paste before baking; add 1 tablespoon of dried oregano or za’atar to the dough; or replace 100 g of all‑purpose flour with whole wheat for a nuttier flavor. For a sweeter version, omit the salt and brush with a little honey after baking. Pair your matnakash with chocolate‑covered raisins for an indulgent breakfast.
FAQ
Can I use whole wheat flour instead of all‑purpose?
Yes, but the bread will be denser. Substitute up to 50% whole wheat and increase the water slightly, as whole wheat absorbs more moisture. Consider using a food processor for nut butter to grind your own flour from whole grains.
Why didn’t my bread get those nice blisters?
Blisters form when dough is cold and receives a blast of steam. Refrigerating the shaped loaf for 30 minutes before baking can enhance blistering. Also, make sure your oven is fully preheated and the steam is generated immediately upon loading.
Can I prepare the dough ahead of time?
Absolutely. After the first proof, punch down the dough, shape it into a ball, wrap tightly, and refrigerate overnight. The next day, let it come to room temperature (about 1 hour), then shape and bake. A large built‑in refrigerator is handy for such long cold ferments.
How do I store matnakash?
Keep it in a paper bag at room temperature for up to 2 days. To refresh, wrap in a damp kitchen towel and warm in a 180°C oven for 5 minutes. Avoid plastic, which softens the crust. For longer storage, slice and freeze in a sealed bag; toast directly from frozen.
Is matnakash the same as focaccia?
Though similar in its high‑hydration, dimpled nature, matnakash is traditionally less oily and has a crispier crust thanks to the flour paste wash. The shaping technique also differs—matnakash is stretched into an oval rather than pressed into a rectangle. For more bread‑making inspiration, browse our Catalan sponge cake recipe for another baked treat.
What can I serve with matnakash?
Matnakash is the perfect companion for au jus for prime rib or as a side for hearty stews. It also makes excellent sandwiches—try it with roasted lamb and mint yoghurt.
My dough didn’t rise. What went wrong?
Check your yeast’s expiration date. Water that is too hot (over 50°C) kills yeast, while too‑cold water slows activity. The ideal temperature is around 40°C. If your kitchen is chilly, use a microwave pressure cooker as a proofing box: heat a cup of water in the microwave for 2 minutes, then place the covered dough inside—but keep it away from the hot water.
Making Armenian matnakash at home is a rewarding journey that connects you to a centuries‑old baking tradition. With its crisp crust, airy interior, and elegant finger‑pulled pattern, this bread elevates any meal from simple to celebratory. Enjoy it warm, torn apart with friends, and remember that the best bread is always shared.


