


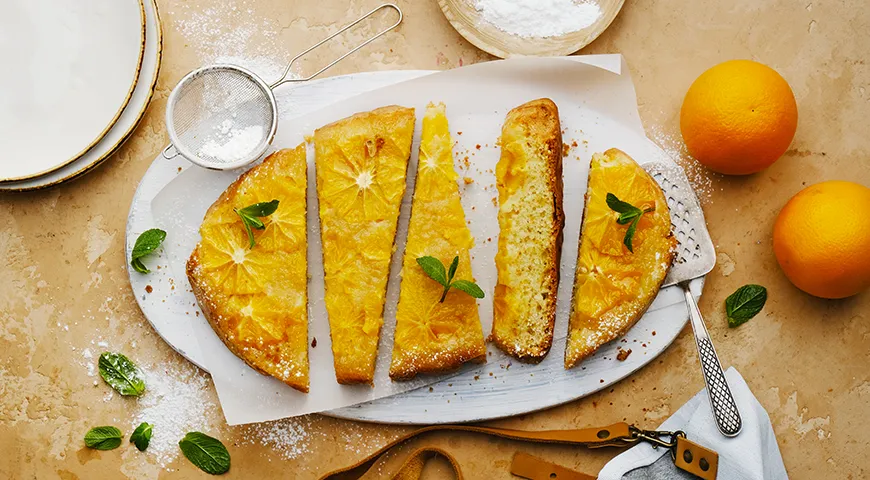
There is something utterly transformative about a cake that emerges from the oven with a glistening, caramelized top of citrus slices. This Sun-Kissed Orange Upside-Down Cake — a classic Russian zalivnoy pirog — is an embodiment of simplicity and elegance. The batter, poured over fresh orange rounds, bakes into a tender, fluffy crumb while the fruit releases its juices to create a natural syrup that caramelizes with sugar. The result is a dessert that feels both comforting and sophisticated, perfect for afternoon tea or a festive brunch. With its bright color and delicate balance of sweetness and tang, this cake is a celebration of the humble orange.
About This Recipe
Russian home baking has a long tradition of zalivnoy (poured or flooded) pies, where a thin batter is poured over fruit or vegetables. This orange version is a beloved staple because it requires no special skills or equipment — just a bowl, a whisk, and a reliable oven. The key lies in the planetary mixer for aerating the eggs to a pale, thick foam, though a hand mixer works beautifully. The citrus is left unpeeled except for the outer skin, allowing the pith to soften during baking and contribute a gentle bitterness that balances the sugar. Whether you are an experienced baker or a novice, this recipe promises a showstopper with minimal effort.

Ingredients
- 1 large orange (preferably organic)
- 3 large eggs
- 150 g granulated sugar (plus 30 g for the pan)
- 120 g all-purpose flour
- 1 tsp baking powder
- 100 g unsalted butter
- Pinch of salt (optional, to enhance flavor)
Step-by-Step Instructions
Step 1: Preheat and Melt Butter
Set your oven to 180°C (350°F) to preheat. Melt the butter in a small saucepan over low heat until just liquefied — avoid simmering or browning. Let it cool slightly while you prepare the other ingredients. A good oil sprayer can be used to grease the pan lightly if you prefer, but parchment paper will suffice.

Step 2: Prepare the Orange
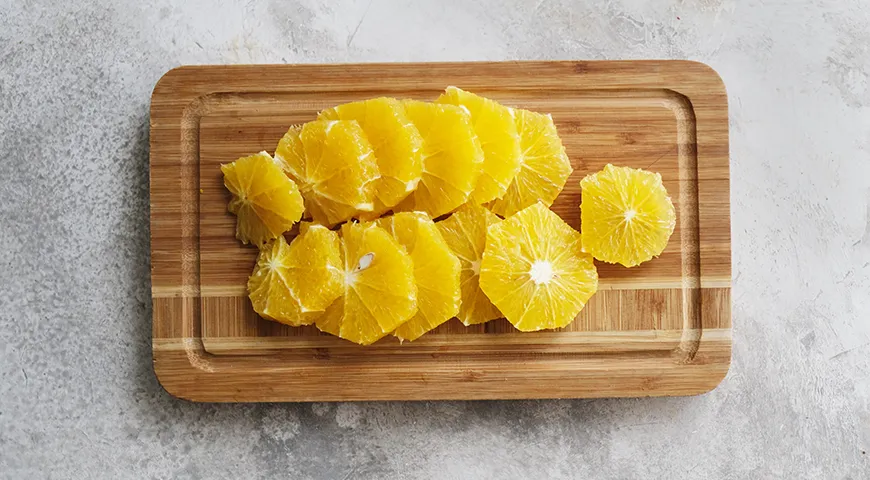
Wash the orange thoroughly with a stiff brush and mild detergent to remove any waxy coating used for transport. Pat dry. Using a fine Microplane or zester, remove the zest from the entire orange — this will add intense aroma to the cake. Then, with a sharp knife, cut off all the white pith and peel, revealing the flesh. Slice the orange into rounds about 5 mm thick; they need not be perfect, as they will soften during baking. If you own a non-toxic immersion blender, you can zest directly into the jar for easy mixing later, but manual zesting is fine.
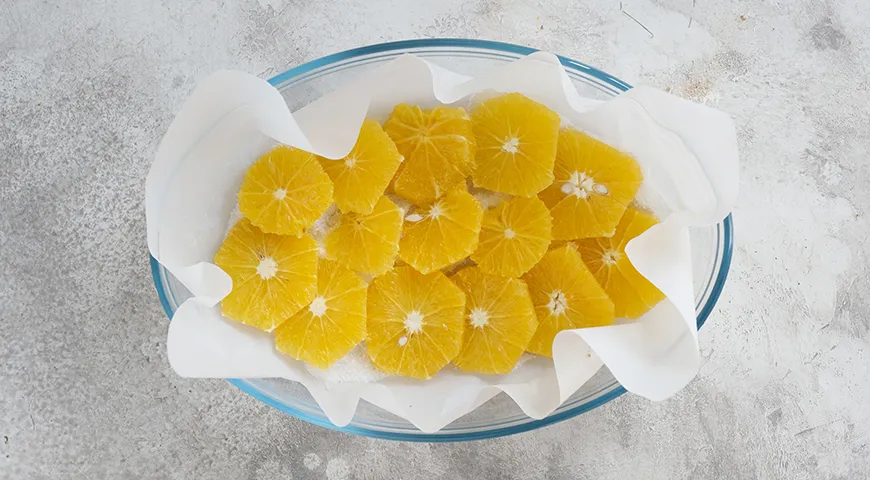
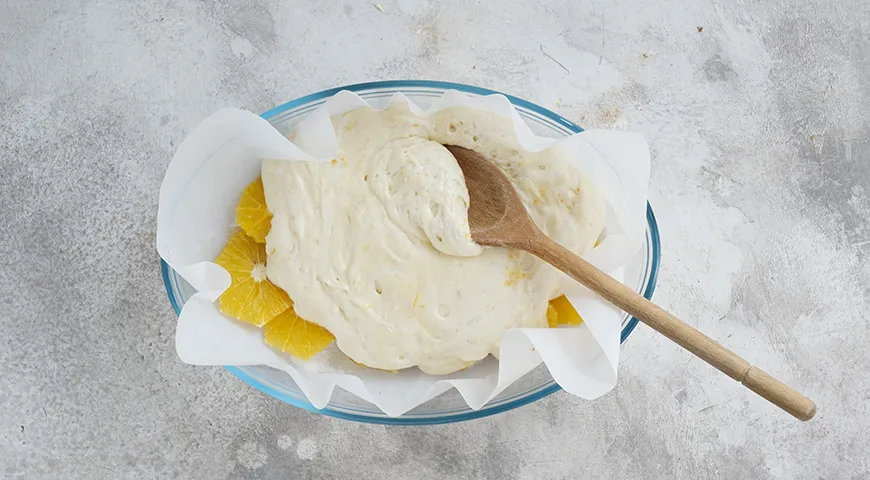
Step 3: Line the Pan and Add Sugar
Line the bottom of a 20 cm round cake pan with parchment paper. Sprinkle the 30 g of sugar evenly over the parchment. Arrange the orange slices in a single layer, overlapping slightly if necessary — they will shrink as they caramelize. The sugar will help create a sticky, amber glaze. For extra insurance against sticking, you might use castor oil on the sides, but butter and parchment work perfectly.
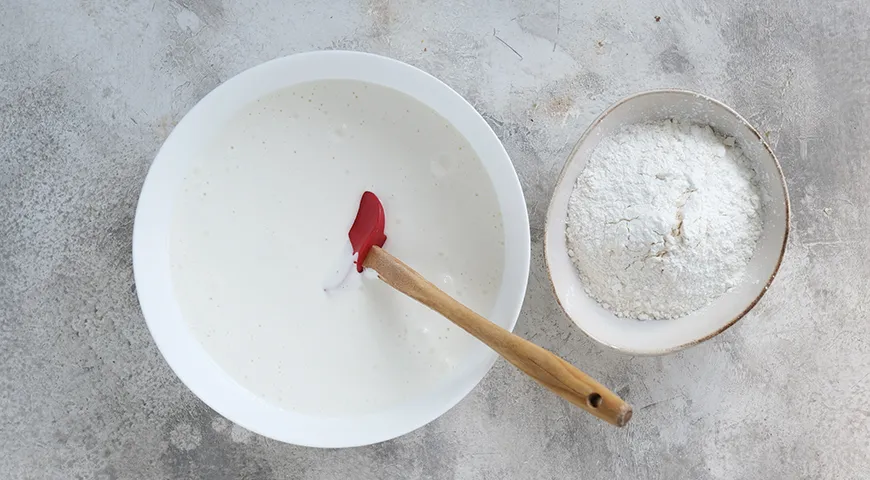
Step 4: Whisk Eggs and Sugar
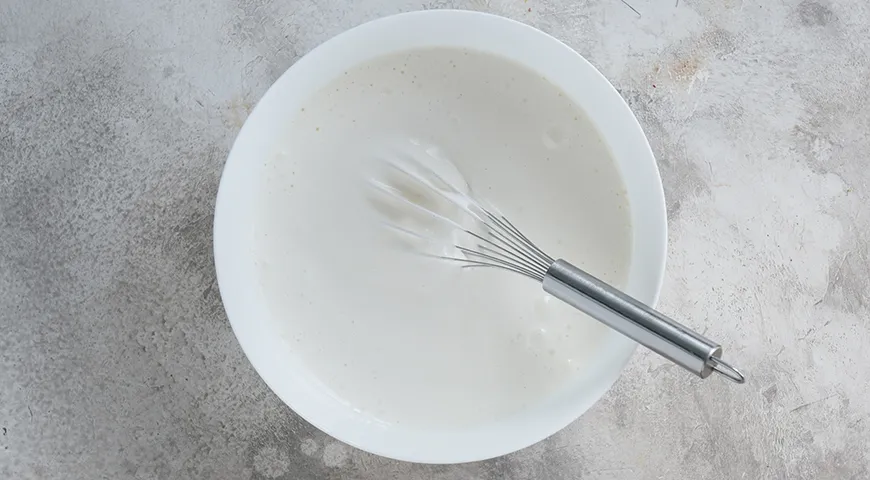
In a large bowl, beat the eggs and the remaining 150 g sugar using an electric mixer on high speed until the mixture is pale, thick, and tripled in volume — about 5–7 minutes. A planetary mixer makes this effortless, but a hand mixer works. Adding a pinch of salt at this stage enhances the sweetness without making the cake savory.
Step 5: Combine Dry Ingredients
In a separate bowl, whisk together the flour and baking powder. Gradually add the dry mixture to the egg foam in two to three additions, folding gently with a silicone spatula after each addition. Overmixing can deflate the batter, so fold just until no streaks of flour remain. The baking powder ensures a light, airy crumb — similar to how a non-toxic air fryer gives a fluffy texture to baked goods, though here we are using the oven.
Step 6: Add Melted Butter
Pour the cooled melted butter down the side of the bowl and fold it into the batter using a silicone spatula. Be gentle — you want to retain as much air as possible. The butter enriches the cake and helps the orange slices caramelize. If you prefer a dairy-free version, you can substitute with a neutral oil, but the result will be less tender. For precision, consider using a wheatgrass juicer is not needed here, but a simple spatula works.

Step 7: Bake and Invert
Pour the batter evenly over the orange slices in the pan. Bake for 40–45 minutes, or until a wooden skewer inserted into the center comes out clean. The top should be golden brown and the edges pulling away from the pan. Allow the cake to rest in the pan for 5–7 minutes, then carefully invert onto a large serving platter. If any orange slices stick, gently reposition them. Serve warm or at room temperature. A undercounter ice maker can provide ice for a refreshing side, but this cake is delicious on its own.
Tips for the Perfect Orange Upside-Down Cake
- Use organic oranges: The peel is not included in the cake, but the zest adds intense flavor. If using non-organic, scrub thoroughly.
- Don't overbake: The cake is done when the skewer comes out clean, but a minute too long can dry it out. Start checking at 35 minutes.
- Warm inversion: Let the cake rest only 5–7 minutes; if you wait too long, the caramelized sugar may harden and stick to the pan.
- Room temperature eggs: They whip up to a greater volume when at room temperature, giving a lighter crumb.
- For extra moisture: Brush the baked cake with orange liqueur or a simple syrup infused with orange zest.
Variations
This cake is wonderfully adaptable. Try using blood oranges for a dramatic red hue, or mix citrus like grapefruit and lemon for a medley. For a spiced twist, add a teaspoon of cinnamon or cardamom to the flour. If you prefer a less sweet finish, reduce the pan sugar to 20 g. A Catalan sponge cake approach using olive oil instead of butter yields a fruity, savory note. You can also incorporate ground almonds or hazelnuts into the batter for a nutty depth — just substitute 30 g of flour with nut flour.
Frequently Asked Questions
Can I make this cake gluten-free?
Yes, substitute the all-purpose flour with a gluten-free blend that includes xanthan gum. Use the same weight. The texture will be slightly denser but still delicious. Check our guide on best food processor for nut butter if you want to grind your own nut flours.
How should I store leftovers?
Keep the cake in an airtight container at room temperature for up to 2 days, or refrigerate for up to 5 days. The orange slices may weep a bit, so pat them dry before serving. For longer storage, freeze the unglazed cake for up to 3 months.
Can I use canned oranges?
Fresh oranges are strongly recommended because canned ones are too soft and lack the necessary pectin for caramelization. However, if you are in a pinch, drain them well and pat dry before using. For inspiration, explore our best chocolate-covered raisins to see how dried fruit can be incorporated.
Why did my cake stick to the pan?
This usually happens if the cake was not allowed to rest long enough after baking, or if the sugar caramelized too deeply. Ensure you line the pan with parchment and let the cake sit for exactly 5–7 minutes before inverting. A built-in refrigerator can help chill the pan slightly if you're in a warm kitchen, but it's not necessary.
Can I double the recipe?
Absolutely. Use a 9×13 inch pan and increase baking time to 50–55 minutes. You may need to arrange the orange slices in two rows. For larger batches, a commercial countertop convection oven ensures even baking.
Is there a vegan version?
Try replacing eggs with a flax egg (1 tbsp ground flaxseed + 3 tbsp water per egg) and use a plant-based butter. The texture will be more dense, but the flavor remains bright. Pair with a organic vodka for a sophisticated adult dessert option — just brush a little over the warm cake.


