


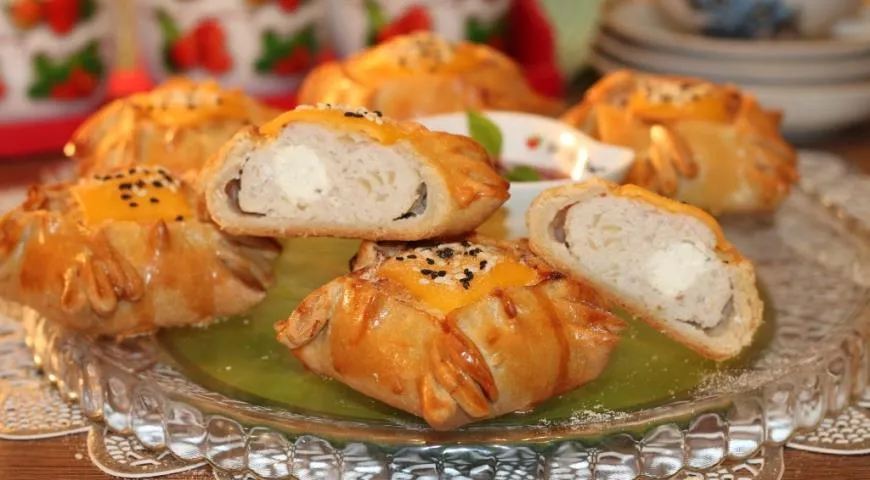
When winter whispers its magic, few dishes capture its spirit quite like these exquisite Snowflake Pies with Meat and Cream Cheese. Originating from the heart of Russian home baking, these five-pointed star-shaped pies—delicately snipped at the edges to form intricate snowflake patterns—are a feast for both the eyes and the soul. Beneath the golden, crackling crust lies a double-layered filling: succulent minced pork blended with potato and onion, hiding a surprise core of creamy cheese that melts into a luscious heart. This recipe is not merely about sustenance; it is a celebration of winter's beauty, crafted with love and precision for those who appreciate the art of pastry.
About This Recipe: A Winter Wonderland in Every Bite
These Snowflake Pies—known in Russian as Pirozhki Snezhinki—are a testament to the ingenuity of home cooks who turn humble ingredients into edible art. The dough is enriched with butter and sour cream, yielding a tender, pliable base that holds its shape beautifully. The filling combines the heartiness of minced pork with the subtle sweetness of potato and the piquancy of garlic, while a hidden dollop of cream cheese provides a counterpoint of silky richness. The signature star shape, achieved by cutting the edges with scissors, not only makes them visually stunning but also ensures even baking and a satisfyingly crisp edge. Perfect for holiday gatherings, cozy winter dinners, or simply as a show-stopping weekend project, these pies are a true labor of love.

Ingredients
- For the dough: 250 g all-purpose flour, 125 ml milk, 100 g unsalted butter, 1 heaped tablespoon sour cream, 1 egg, ½ teaspoon salt, 1 teaspoon baking powder
- For the filling: 350 g pork (shoulder or belly), 1 medium potato, 1 onion, 2 cloves garlic, 1 egg white, ½ teaspoon salt, ½ teaspoon ground black pepper or your preferred spice blend
- For the hidden core: 6 teaspoons cream cheese (or any soft spreadable cheese)
- For brushing: 2 tablespoons sour cream or milk, 1 egg yolk (for final glaze)
- Optional garnish: processed cheese slices, toasted sesame seeds, fresh herbs, spicy sauce
Step-by-Step Instructions
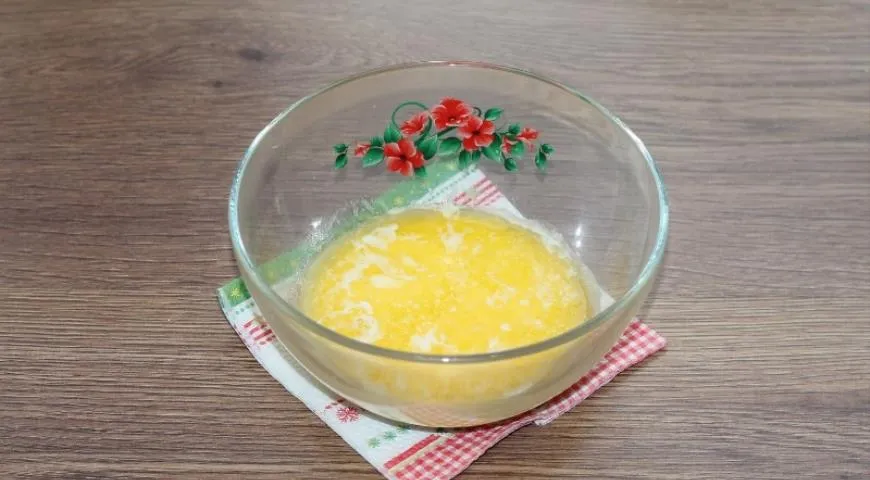
1. Prepare the Dough: Warm the Milk and Melt the Butter
In a small saucepan, heat the milk until warm (not boiling) and melt the butter. Set aside.
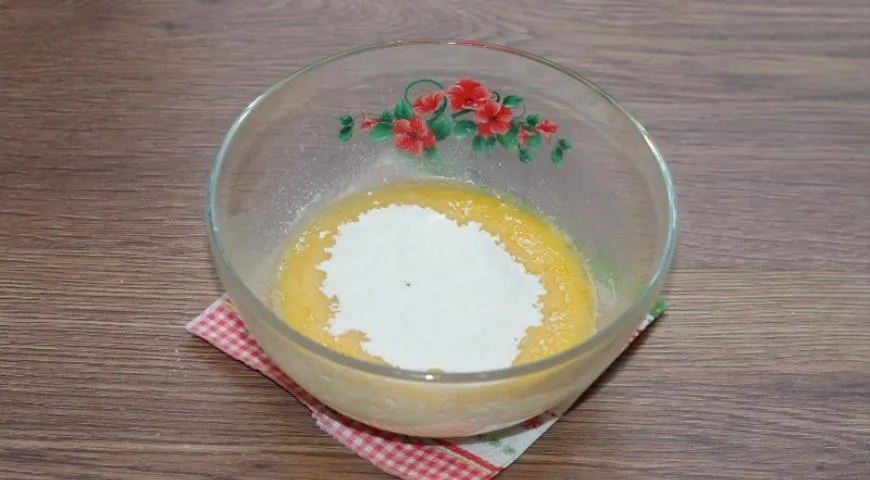
2. Combine Wet Ingredients
Add salt and sour cream to the warm milk-butter mixture, then whisk until smooth.

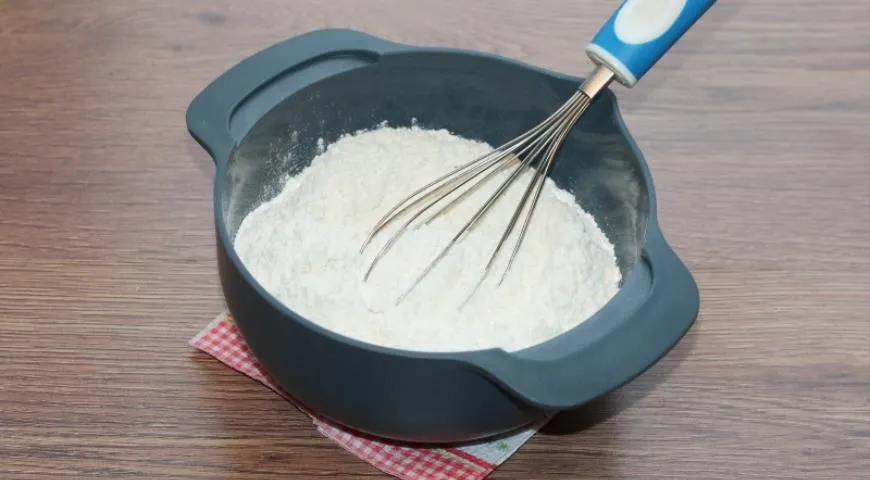
3. Mix Dry Ingredients
In a separate bowl, stir the flour with the baking powder.
4. Knead the Dough
Sift the dry mixture into the wet ingredients. Mix until a soft, smooth, non-sticky dough forms. You can use a planetary mixer for ease.
5. Rest the Dough
Cover the dough with plastic wrap or an inverted bowl to prevent drying. Set it aside away from the stove.

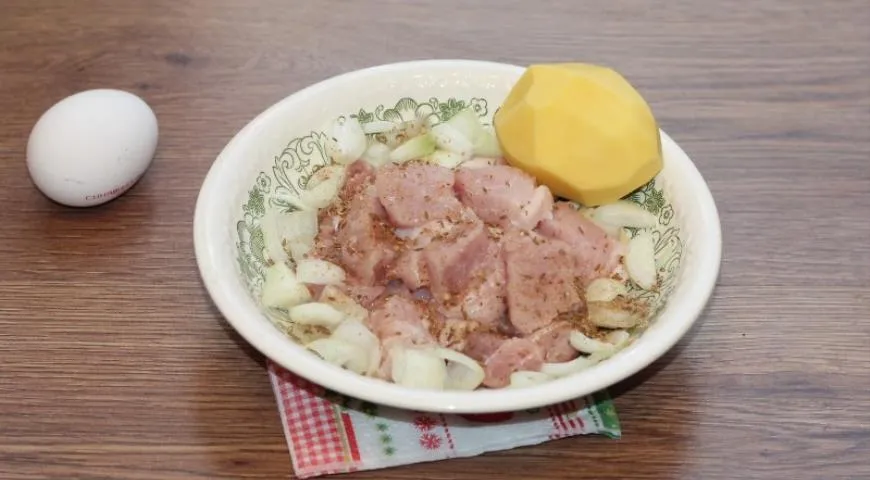
6. Prepare the Meat Filling: Cut Ingredients
Cut the pork into small pieces. Peel and dice the potato, onion, and garlic.
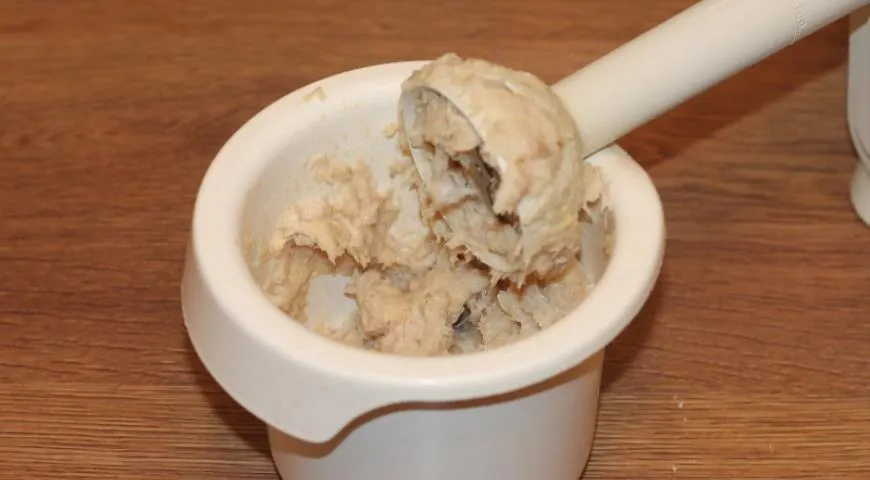
7. Blend the Filling
Place all the cut ingredients into a food processor or blender. Add the egg white, salt, and your chosen spice. Purée until smooth. A quality food processor works perfectly for this.
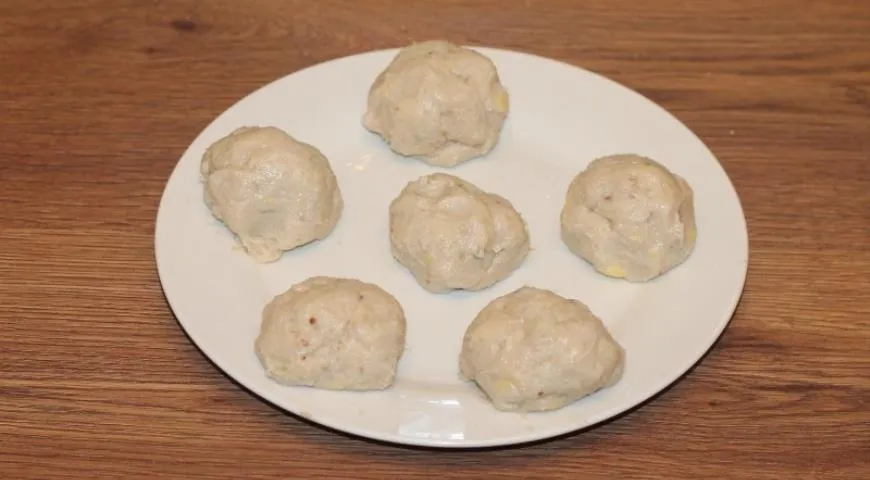
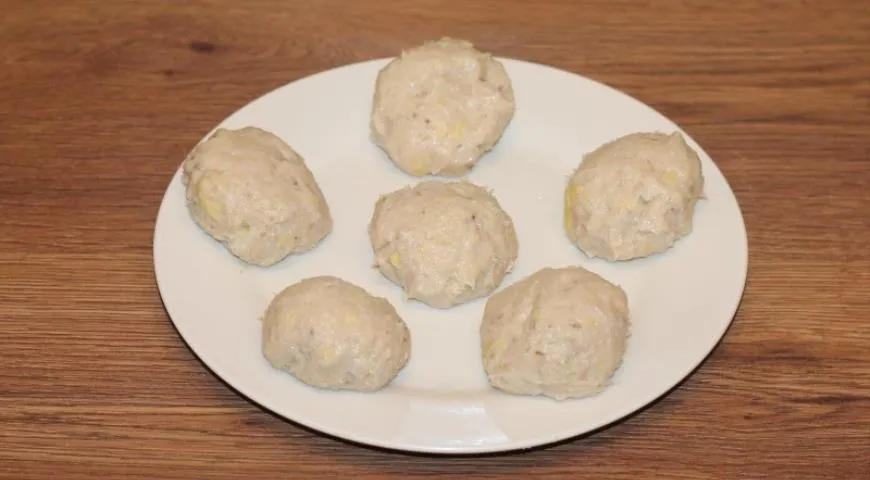
8. Divide the Filling
Transfer the blended mixture to a bowl and divide into 6 equal portions.
9. Form a Filling Patty with a Cheese Center
Take one portion of filling and shape it into a flat patty. Place 1 teaspoon of cream cheese in the center.
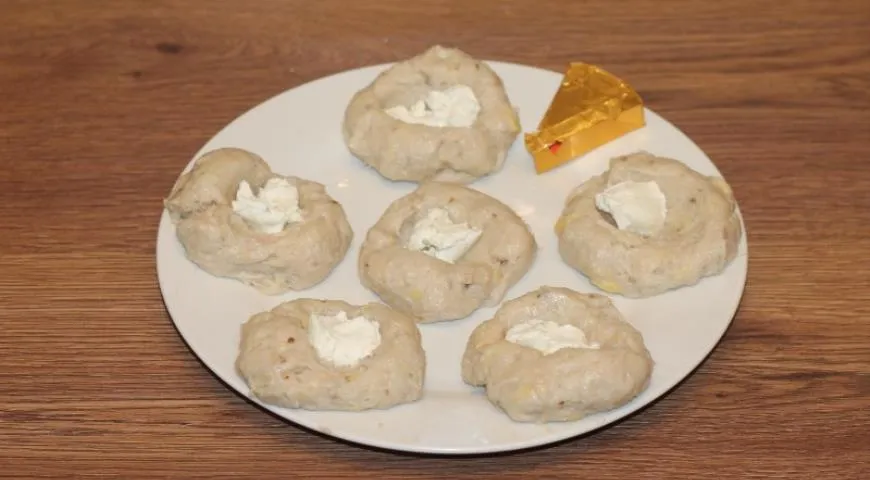
10. Seal the Cheese Inside
Fold the meat around the cheese to form a ball, completely encasing the cheese. Repeat for all portions, then refrigerate the filled balls.
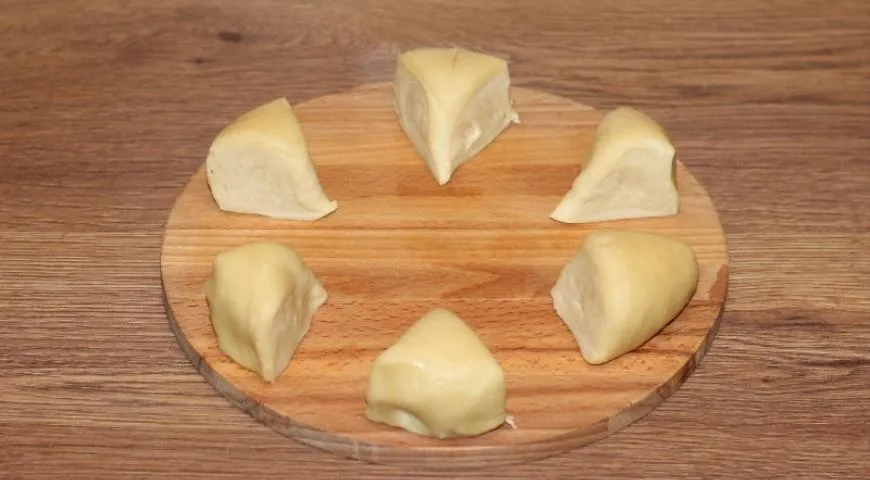
11. Divide the Dough
After resting, divide the dough into 6 equal pieces.
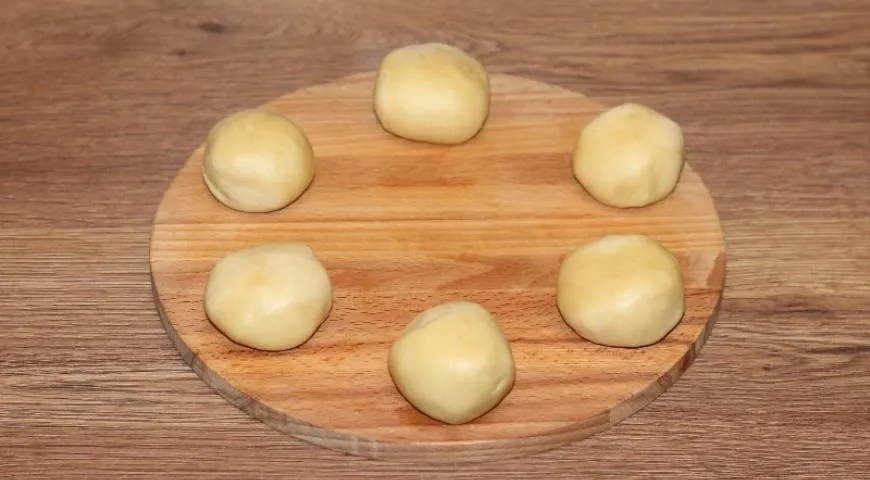
12. Roll into Balls
Roll each piece into a smooth ball.
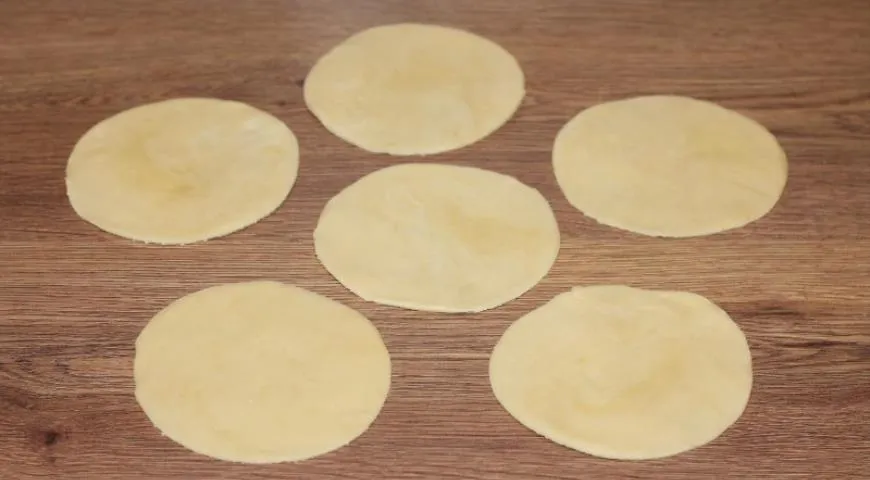
13. Roll Out Circles
On a lightly floured surface, roll each ball into a circle about the size of a tea saucer (approx. 15 cm diameter).
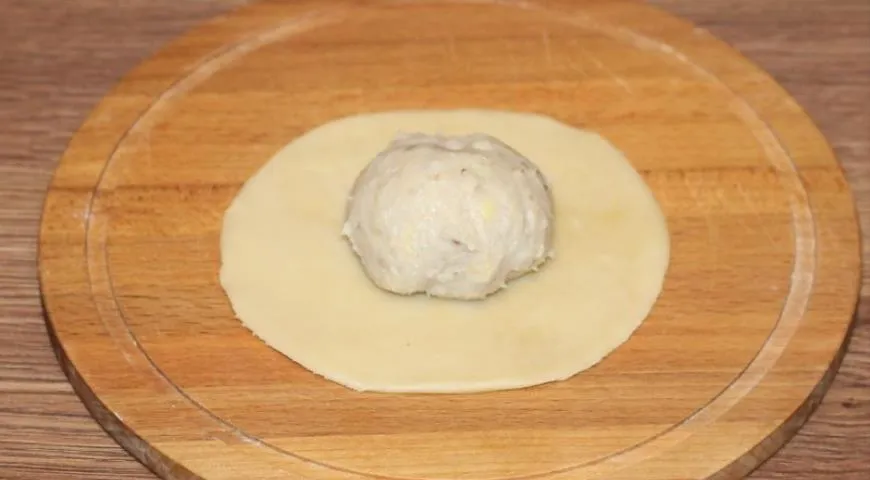
14. Place Filling
Place one chilled meat-cheese ball in the center of each dough circle.
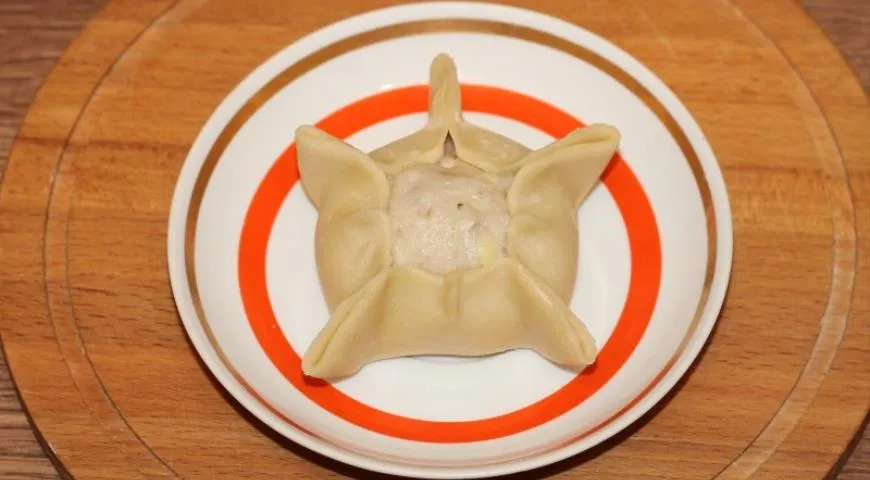
15. Shape the Snowflake
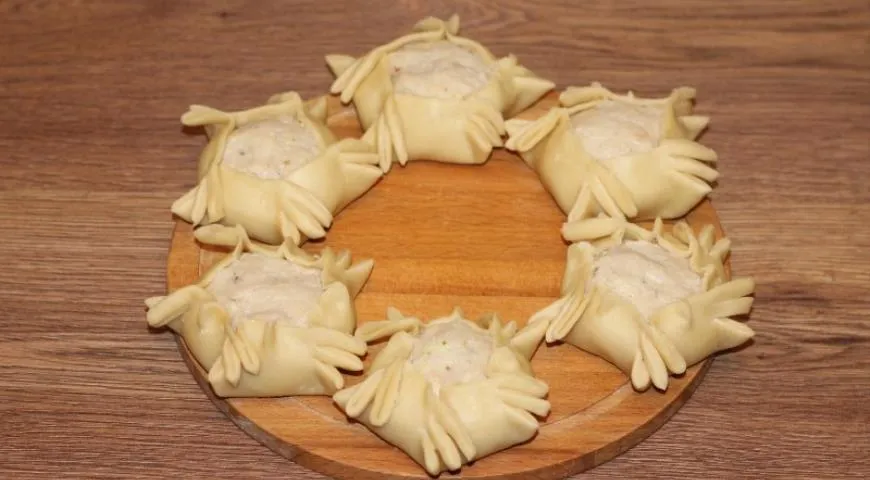
Fold the dough over the filling and pinch firmly to seal, forming a half-moon. Then, using scissors, make 5 cuts along the sealed edge at equal intervals to create the snowflake points. Gently pinch each point to define the star shape. You should have 6 pies in total.
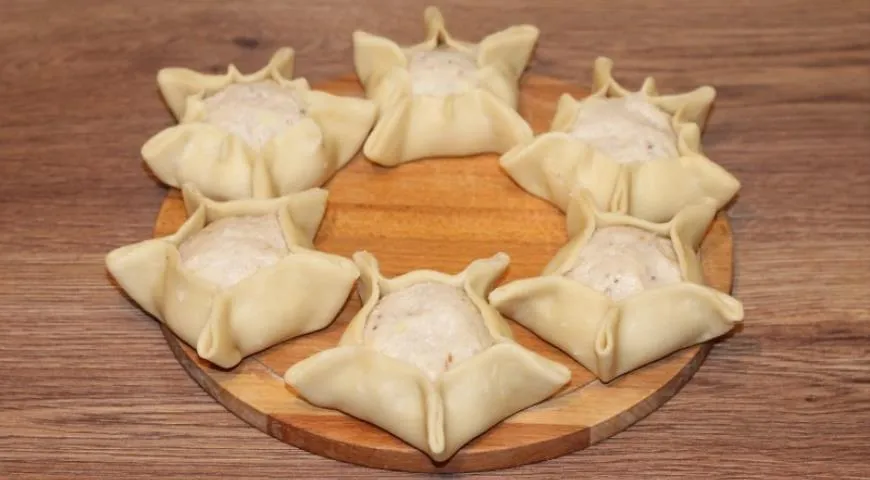
16. All Six Snowflakes
Repeat for all dough rounds. Place the formed snowflakes on a parchment-lined baking sheet greased with a little oil.
17. First Bake
Brush the pies with sour cream or milk. Bake in a preheated oven at 180°C for about 40 minutes, or until golden. A countertop convection oven ensures even browning.
18. Egg Wash and Finish
After 40 minutes, remove from oven and brush the pies with beaten egg yolk. Return to oven and bake for another 5 minutes until deep golden brown.
19. Optional Garnish
If desired, place slices of processed cheese on the hot pies—they will melt within 1 minute. Sprinkle with toasted sesame seeds. Serve with a spicy sauce and fresh herbs.
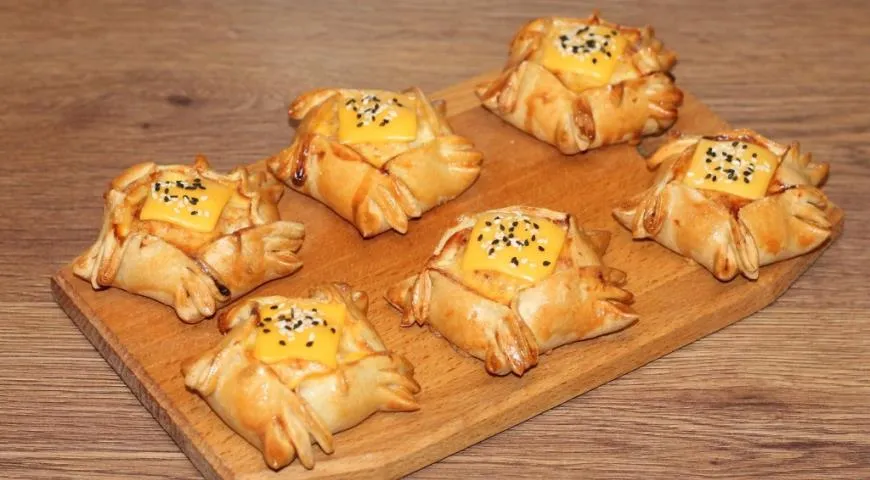
20. Final Presentation
Arrange the snowflake pies on a platter. The contrast of the flaky, star-shaped crust against the creamy, savory interior is simply irresistible.

Tips for Perfect Snowflake Pies
- Chill the filling: Keeping the meat-cheese balls cold makes them easier to enclose in the dough without tearing.
- Don't overwork the dough: Knead just until smooth; over-kneading can make it tough. A non-toxic immersion blender is great for blending the filling without heating it.
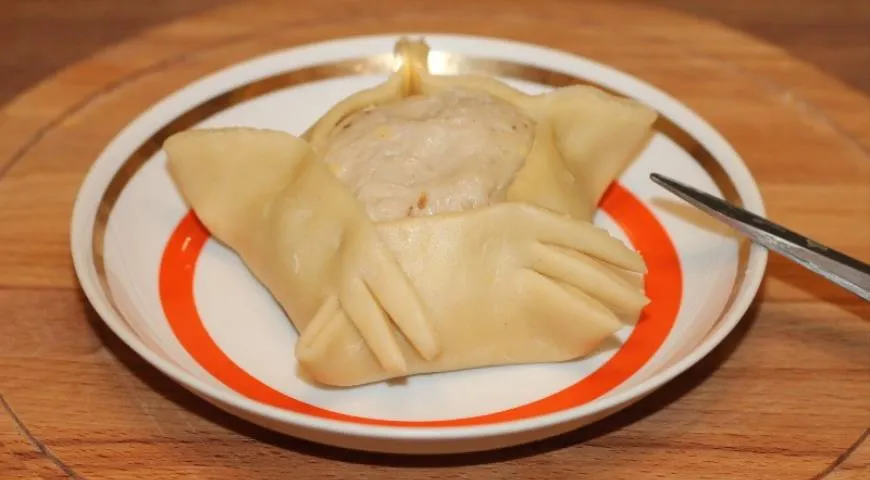
- Scissor technique: Use sharp kitchen scissors and make confident cuts—about 1.5 cm deep—to achieve clear star points.
- Egg wash timing: Brushing with egg yolk only at the end gives a deep, glossy color without burning the milk wash earlier.
- Cheese choice: Use a cream cheese that is firm enough to hold its shape at room temperature before baking, but melts beautifully in the oven.
Variations to Inspire
While the classic pork-potato filling is divine, you can experiment with ground chicken or beef for a lighter taste. For a vegetarian version, replace the meat with finely chopped mushrooms and lentils, still keeping the cream cheese core. The dough can also be enriched with a teaspoon of honey for a subtly sweet note that complements spicy fillings. For an extra-crispy finish, sprinkle the pies with flaky sea salt just before serving.
FAQ
Can I freeze these snowflake pies?
Yes! Freeze the unbaked shaped pies on a tray, then transfer to a freezer bag. Bake directly from frozen, adding 10–15 minutes to the baking time. Alternatively, freeze after baking and reheat in an air fryer for a crisp exterior.
What if I don't have a food processor?
You can mince the meat and vegetables by hand or use a meat grinder. For an ultra-smooth filling, a high-quality juicer isn't necessary—just a sharp knife or a box grater for the potato.
Why did my dough tear when folding?
If the dough tears, it may be too dry or overworked. Ensure you've used enough butter and sour cream, and let it rest adequately. Dusting your work surface with minimal flour helps maintain moisture. A good oil sprayer can also help grease the baking sheet without adding excess flour.
Can I use a different cheese for the core?
Absolutely. Soft goat cheese, ricotta, or even a small cube of mozzarella works wonderfully. Just avoid very hard cheeses that won't soften into a creamy center.
How do I get the snowflake shape perfect?
Practice makes perfect. After sealing the half-moon, use scissors to make five evenly spaced cuts from the sealed edge toward the center, stopping about 1 cm from the filling. Then twist each point slightly to open them like petals. The pies will look even more festive if you brush them with a light sweet wine glaze for shine.
Can I make these gluten-free?
Yes, substitute the all-purpose flour with a 1:1 gluten-free baking blend that contains xanthan gum. The dough may be slightly more delicate, so handle it gently and chill it well before rolling. A refrigerant leak detector might help you ensure your fridge is at the right temperature for chilling!
Conclusion
Snowflake Pies with Meat and Cream Cheese are more than a recipe—they are a winter ritual that brings warmth, creativity, and joy to the table. Whether you're an experienced baker or a curious beginner, the process of shaping each star and watching it turn golden in the oven is deeply satisfying. Serve these beauties at your next holiday gathering, or simply as a weekend treat, and watch them disappear within minutes. For more inspiration, explore our Catalan sponge cake recipe or our guide to the best undercounter ice maker for pairing with chilled drinks. Happy baking!


