


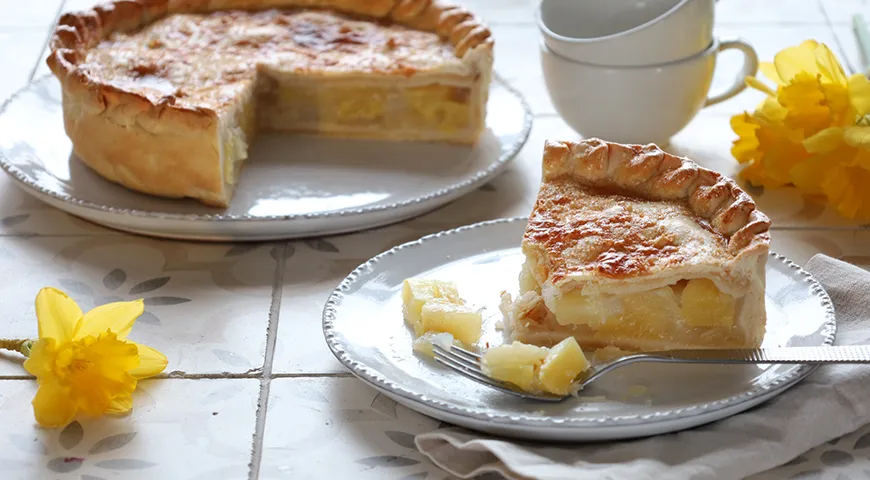
There is something deeply comforting about a homemade fruit pie—the golden crust, the bubbling filling, the aroma that fills the kitchen. This classic Russian pineapple pie, made with canned pineapples, is a beloved dessert that marries a tender, buttery shortcrust with a lusciously sweet and tangy pineapple filling. Canned pineapples are a pantry staple in many Russian homes, and this recipe elevates them into a show-stopping treat. Whether you are a seasoned baker or a curious novice, this pie is surprisingly simple yet impressively elegant. The key lies in the contrast between the crisp, crumbly pastry and the glossy, jammy interior. Serve it warm with a dollop of crème fraîche or a scoop of vanilla ice cream for an unforgettable finish.
About This Classic Russian Pineapple Pie
Traditional Russian pirogs are often filled with fruit, jam, or sweetened cottage cheese. This version uses canned pineapple rings, which are drained and chopped, then cooked with sugar, lemon juice, and cornstarch to create a thick, concentrated filling. The pastry is a simple planetary mixer or hand-mixed shortcrust made with cold butter, flour, and a touch of sugar. The dough is divided into two parts: one for the base and one for the lattice or full top crust. After a brief chill in the refrigerator, the pie is assembled, baked until golden, and cooled before slicing. The result is a dessert that is both rustic and refined—perfect for a family Sunday dinner or a festive gathering.

Ingredients You’ll Need
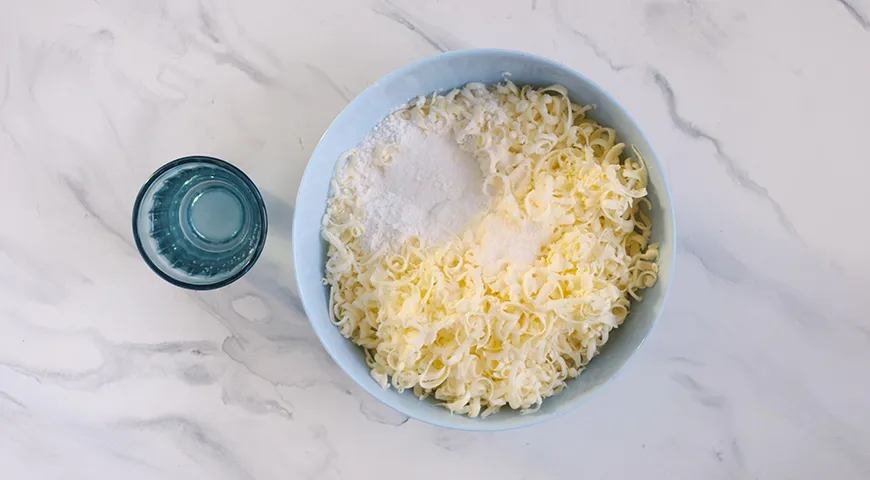
For the pastry, you will need 500 g plain flour, 250 g cold unsalted butter, 1 tablespoon sugar, and ½ teaspoon salt. A few tablespoons of ice water bind the dough. For the filling, use one 400 g can of pineapple rings (in syrup), 1 tablespoon lemon juice, 3 tablespoons cornstarch, and 3 tablespoons sugar. Finally, for the finish, you need 1 egg and 1–2 tablespoons sugar for sprinkling. All ingredients should be at room temperature except the butter, which must remain cold for a flaky texture.
Step-by-Step Instructions
Step 1: Prepare the Pastry
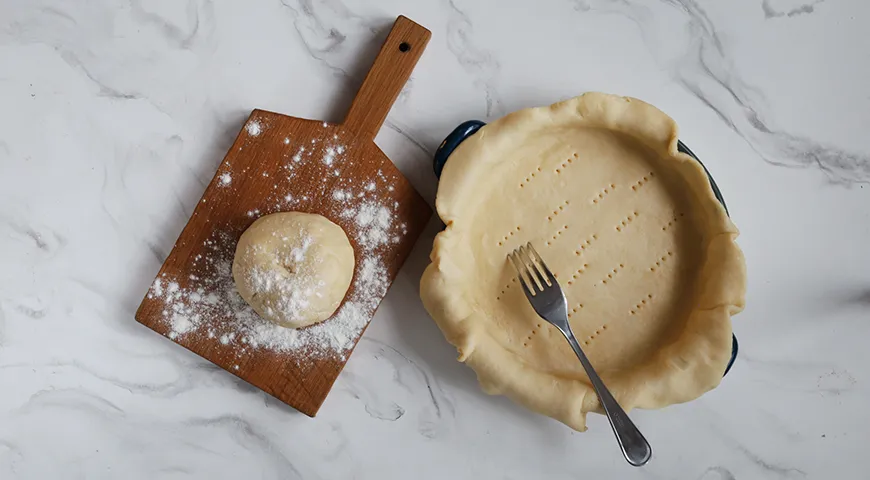
Grate the cold butter using a box grater or a glass food processor fitted with a grating disc. Combine the grated butter with the flour, sugar, and salt in a large bowl. Using your fingertips or a pastry cutter, rub the butter into the flour until the mixture resembles coarse breadcrumbs. Add 3–4 tablespoons of ice water and quickly bring the dough together with your hands. If the dough feels dry, add another tablespoon of water. Do not overwork it. Divide the dough into two unequal parts—one slightly larger for the base, the smaller for the top. Wrap the smaller piece in plastic wrap and refrigerate. Roll the larger piece out on a lightly floured surface to a thickness of about 3 mm. Line a greased 23 cm tart or pie tin with the rolled dough, pressing it into the corners and creating a high edge. Prick the base all over with a fork. Refrigerate the lined tin for 1 hour.
Step 2: Make the Pineapple Filling
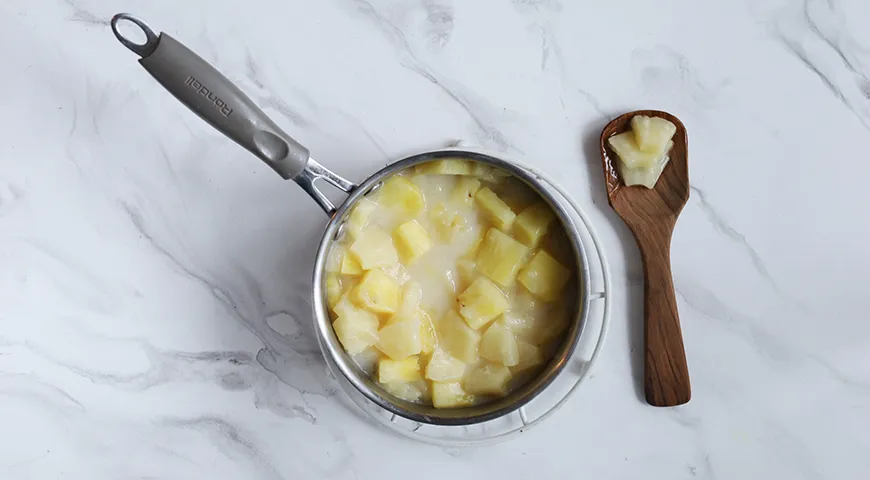
Drain the pineapple can, reserving the syrup. In a small bowl, whisk together the pineapple syrup with the cornstarch, lemon juice, and sugar until smooth. Finely chop the pineapple rings into small pieces and place them in a medium saucepan. Pour the syrup mixture over the chopped pineapple and stir. Bring to a boil over medium heat, then reduce the heat and cook, stirring constantly, until the mixture thickens and becomes glossy—about 3 to 5 minutes. Remove from the heat and let cool completely. For a smoother texture, you can pulse the filling in a non-toxic immersion blender or a food processor briefly.
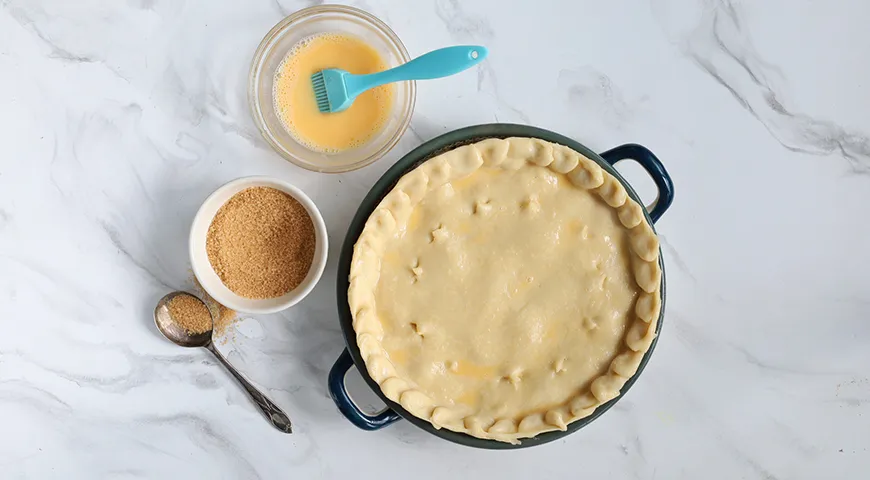
Step 3: Assemble the Pie
Preheat your oven to 180 °C. Remove the chilled pie base from the refrigerator. Spread the cooled pineapple filling evenly over the base. Take the reserved smaller dough piece from the refrigerator and roll it out on a floured surface to a thickness of about 2 mm. Carefully drape it over the filling. Press the edges together to seal, then crimp or flute decoratively. Beat the egg with a fork and brush the top crust generously. Sprinkle with 1–2 tablespoons of sugar for a crackly finish. Using a sharp knife or kitchen scissors, cut several small slits in the top crust to allow steam to escape.
Step 4: Bake and Cool
Place the pie on a baking sheet to catch any drips. Bake in the preheated oven for 45–50 minutes, or until the crust is deep golden brown and the filling is bubbling through the slits. If using a commercial countertop convection oven, check at 40 minutes as convection circulates heat more efficiently. Once baked, allow the pie to cool in the tin for 15–20 minutes, then transfer to a wire rack to cool completely. This step is essential for the filling to set properly.
Tips for Perfect Results
For the flakiest pastry, keep all ingredients cold and work quickly. Chilling the dough eliminates gluten development and ensures a tender crust. Use a best oil sprayer to lightly grease your pie tin instead of butter to prevent sticking without adding extra fat. If you have a spacious refrigerator, you can prepare the dough a day ahead and wrap it tightly. When rolling, use minimal flour to avoid a dry crust. For a particularly glossy top, brush the pie again with egg wash halfway through baking.
Delicious Variations
This pineapple pie is versatile. Replace the cornstarch with arrowroot or tapioca starch for a gluten-free version. Add a teaspoon of vanilla extract or rum to the filling for depth. For a tropical twist, stir in a handful of chopped chocolate-covered raisins before baking. If you prefer an open-face lattice top, braid strips of dough and lay them over the filling instead of a full crust. The pie pairs beautifully with a sweet dessert wine like a late-harvest Riesling or a chilled glass of organic vodka for a truly Russian after-dinner ritual. For a breakfast twist, serve slices alongside a freshly brewed cup from a best coffee maker for Airbnb—your guests will be impressed.
Frequently Asked Questions
Can I use fresh pineapple instead of canned?
Fresh pineapple works, but it must be diced and cooked with extra sugar because it is less sweet and contains more moisture. Simmer the fresh pineapple with sugar and lemon juice until reduced. You may need to add more cornstarch to achieve the same thickness.
How do I prevent the bottom crust from becoming soggy?
Pre-baking the base for 10 minutes at 180 °C before adding the filling can help. Also, make sure the filling is completely cooled and has thickened properly—a runny filling is the main culprit. Using a microwave pressure cooker to quickly cook down the filling can reduce moisture.
Can I freeze this pineapple pie?
Yes, this pie freezes beautifully. Baked and completely cooled, wrap it tightly in plastic wrap and foil, then freeze for up to 3 months. Reheat in a 160 °C oven until warmed through. Best undercounter ice maker enthusiasts will appreciate serving the pie with ice cream made from your own ice.
What if I don’t have a tart tin with removable bottom?
A standard 23 cm pie dish or a springform pan works fine. Just line the pan with parchment paper for easy removal. If using a springform, ensure the dough comes up high enough to contain the filling—about 4 cm sides.
How can I make this recipe dairy-free?
Substitute the butter with a high-quality vegan butter stick, and use a plant-based egg wash (such as aquafaba or non-dairy milk). The filling remains naturally dairy-free. Pair with a best espresso machine under 2000 for a dairy-free cappuccino alongside.


