


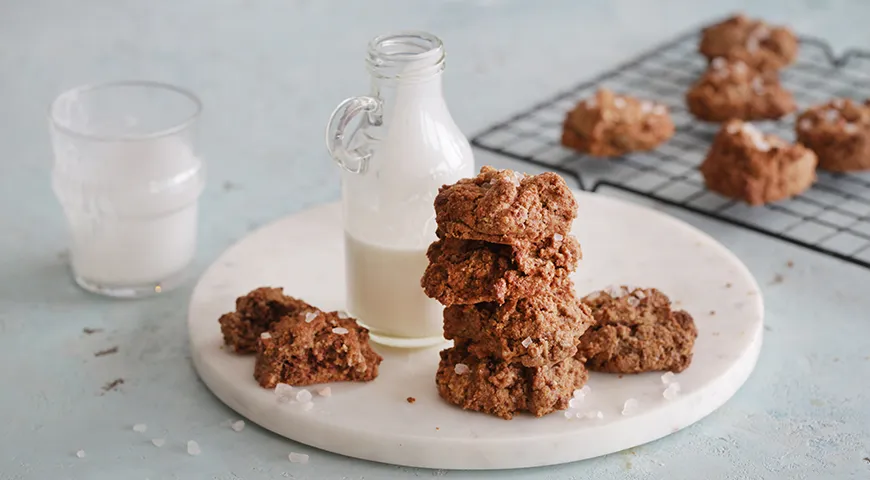
For those who navigate the world of gluten intolerance or simply seek a more diverse pantry, these Gluten-Free Chocolate Cookies are nothing short of a revelation. They prove that eliminating gluten does not mean sacrificing texture, flavor, or indulgence. This recipe masterfully blends alternative flours—chosen from corn, rice, flax, buckwheat, or any gluten-free variety—with rich cocoa and a medley of sugars to create a confection that is crisp on the edges and tenderly chewy at the center. Whether you are a seasoned gluten-free baker or a curious newcomer, these cookies deliver a universally satisfying experience. The beauty lies in their adaptability: you can customize the flour base to suit your taste and dietary needs while the complementary almond flour adds a subtle nuttiness that elevates the chocolate profile. Perfect for holiday gatherings, casual tea moments, or as a thoughtful gift, these cookies embody the philosophy that dietary restrictions can be a gateway to creativity rather than a limitation.
Why Gluten-Free Baking Matters
Gluten—a protein found in wheat, barley, and rye—provides elasticity and structure to traditional baked goods. However, for individuals with celiac disease, gluten sensitivity, or those pursuing an anti-inflammatory diet, it can be problematic. Fortunately, the modern gluten-free movement has put to rest the myth that such baking is inferior. With the right blend of flours and a few smart techniques, you can produce treats that rival any wheat-based counterpart. This recipe uses a combination of a chosen gluten-free flour (like rice or corn) and almond flour to mimic the soft crumb and stability of classic chocolate cookies. For optimal results, ensure your baking tools are spotless—consider a best oil sprayer to lightly grease your pan if needed, though parchment paper works beautifully.

Ingredients
- 80 g brown sugar
- 80 g unsalted butter
- 1 small egg
- 30 g white sugar
- 20 g almond flour
- 1.5 tbsp unsweetened cocoa powder
- 1 tbsp milk (dairy or plant-based)
- 1 tsp vanilla sugar
- 0.75 tsp baking soda
- Your choice of gluten-free flour (corn, rice, flax, buckwheat, etc.) — enough to bring the dough together (approximately 150–180 g, depending on flour type)
- Flaky sea salt for finishing
Note: The exact amount of gluten-free flour will vary; start with about 150 g and add more if the dough remains too sticky after resting. Using a food processor for nut butters can help you grind fresh almond flour or even make your own nut flour blend.
Step-by-Step Instructions
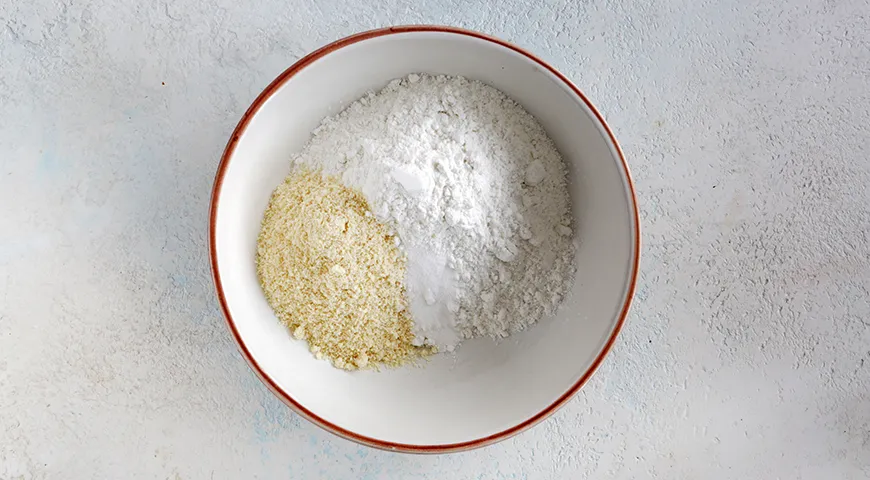
Step 1: Combine Dry Ingredients
In a medium bowl, whisk together your chosen gluten-free flour, almond flour, and baking soda until evenly distributed. This ensures the leavening agent is well incorporated, preventing any bitter pockets. For a more consistent blend, a brief pulse in a planetary mixer on low speed can work wonders, but hand whisking is perfectly fine.
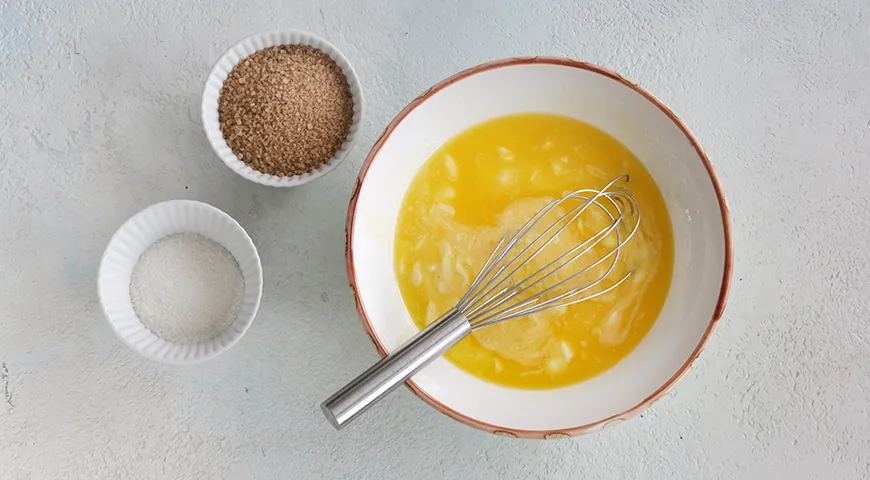
Step 2: Melt Butter and Combine Wet Ingredients
In a separate saucepan or microwave-safe bowl, melt the butter. Add the milk, brown sugar, white sugar, and vanilla sugar. Stir until the sugars begin to dissolve—the mixture will look glossy and warm. Let it cool slightly, then beat in the egg. Whisk vigorously until the emulsion is smooth and creamy. This step is crucial for a tender crumb.
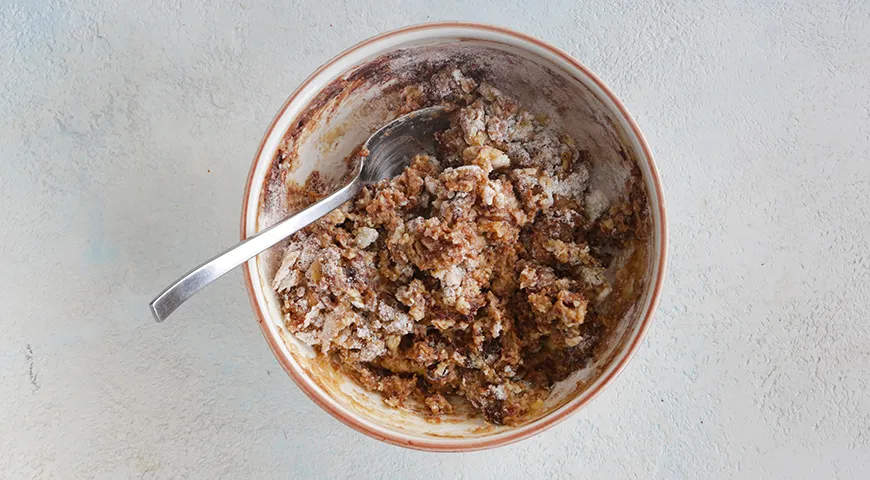
Step 3: Form the Dough
Pour the wet mixture into the bowl of dry ingredients. Stir with a spatula until just combined—overmixing can develop toughness, especially with gluten-free flours. The dough will be soft and somewhat sticky. Cover the bowl with plastic wrap and refrigerate for at least 30 minutes. This resting period allows the flours to hydrate and the flavors to meld, resulting in a more cohesive cookie.
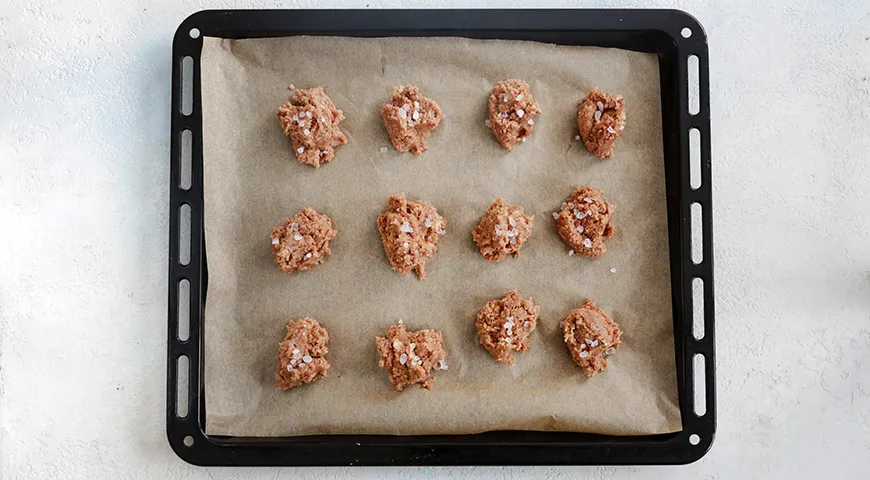
Step 4: Shape and Prepare for Baking
Preheat your oven to 180 °C (350 °F). Line a large baking sheet with parchment paper. Using a spoon or small cookie scoop, portion out about 2 tablespoons of dough per cookie, placing them at least 5 cm apart—they spread significantly. Lightly press each mound and sprinkle a pinch of flaky sea salt on top. The salt heightens the chocolate flavor and adds a sophisticated contrast.
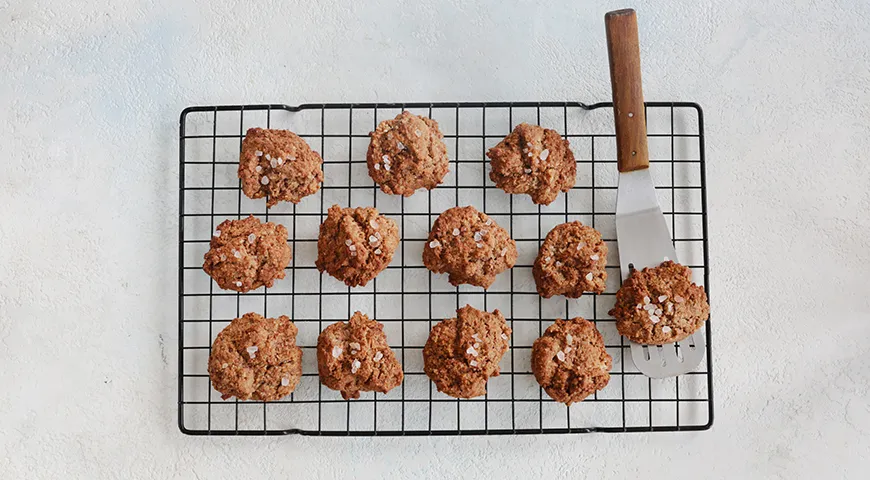
Step 5: Bake and Cool
Bake for 10–12 minutes, until the edges are set and the tops look dry but the centers still appear slightly soft. They will continue to firm up as they cool. Transfer the sheet to a wire rack and let the cookies rest for 5 minutes before moving them directly onto the rack to cool completely. This step ensures a crisp exterior and a fudgy interior.
Tips for Perfect Gluten-Free Cookies
- Weigh your flour: Gluten-free flours vary in density; using a kitchen scale ensures consistency. A microwave pressure cooker isn't needed here, but precise measuring tools are invaluable.
- Chill thoroughly: Don't skip the 30-minute rest—the dough becomes easier to handle and spreads less.
- Experiment with flour blends: A mix of rice flour and almond flour yields a tender crumb; for a nuttier flavor, try buckwheat or oat flour (ensure certified gluten-free).
- Use room-temperature egg: If your egg is cold, it can shock the butter mixture; bring it to room temperature quickly by placing it in warm water for 5 minutes.
- Rotate the pan: Midway through baking, rotate the sheet for even browning.
Variations and Adaptations
These cookies are a canvas for creativity. Swap the milk for buttermilk or a dairy-free alternative like oat milk. Add 50 g of dark chocolate chips for extra richness. For a festive twist, roll the dough balls in cocoa powder or crushed nuts before baking. If you prefer a softer cookie, reduce baking time by 1 minute; for extra crunch, bake 1 minute longer. The base recipe also works well with a non-toxic air fryer—preheat to 170 °C and bake in batches, checking at 8 minutes.
Frequently Asked Questions
Can I use all-purpose gluten-free flour blend?
Absolutely. A standard 1:1 gluten-free flour blend (e.g., containing rice flour, potato starch, and xanthan gum) works perfectly. Reduce the amount by about 10 g compared to single flours because blends often contain starches that absorb less moisture.
Why did my cookies turn out too flat?
Several factors: The dough may not have been chilled long enough, or your butter was too hot when mixed. Also, ensure your baking soda is fresh—test it by adding a drop of vinegar; it should fizz vigorously. For more on leavening agents, see this guide on best chocolate-covered raisins (though not directly related, baking chemistry is fun).
Can I substitute butter with coconut oil?
Yes, use an equal weight of refined coconut oil (80 g) for a dairy-free version. The cookies will be slightly firmer when cool and have a mild coconut aroma.
How should I store these cookies?
Keep them in an airtight container at room temperature for up to 5 days. To restore crispness, reheat in a 150 °C oven for 3 minutes. For longer storage, freeze baked cookies for up to 3 months.
Can I make the dough ahead of time?
Certainly. After mixing, cover and refrigerate for up to 48 hours. You can also freeze scooped dough balls on a tray, then transfer to a bag—bake directly from frozen, adding 2 minutes to the baking time.
These cookies embody the joy of inclusive baking—proof that a gluten-free kitchen can still produce desserts of unrivaled decadence. Serve them with a glass of cold milk or alongside a cup of artisanal coffee. For more inspiration on pairing, explore our curated coffee recommendations such as best George Howell coffee to complement the chocolate notes. Happy baking!


