


When winter refuses to deliver its promised blanket of snow, the kitchen becomes the last bastion of frosty magic. These Snowman Buns (булочки Снеговики) are a beloved Russian Christmas tradition that transforms simple yeast dough into edible winter wonderlands. Each bun is a miniature snowman, complete with a carrot nose, pepper eyes, and a coat of white chocolate that glistens like fresh snowfall. Whether you are hosting a festive gathering or seeking a playful weekend baking project, these charming buns deliver double joy: the delight of shaping a snowman and the pleasure of devouring it.
About Snowman Buns: A Tradition of Edible Sculpture
Russian festive baking is steeped in whimsy, and these buns are no exception. The idea is simple – create a two-tiered bun resembling a snowman – but the execution invites creativity. The dough is a classic enriched yeast mixture, yielding a pillowy crumb that pairs beautifully with the crisp shell of white chocolate. Historically, snowman buns appeared on holiday tables as a playful twist on traditional European sweet breads, but they quickly became a staple of New Year's celebrations across Russia. Their charm lies in the contrast between the soft, warm bun and the cool, creamy coating, a sensory experience that delights children and adults alike.

Ingredients for the Perfect Dough
To create the base for your snowmen, you will need a standard enriched yeast dough. The exact proportions are flexible, but a reliable starting point includes:
- 500 g all-purpose or bread flour
- 250 ml warm milk (about 40°C)
- 7 g active dry yeast (or 15 g fresh yeast)
- 50 g unsalted butter, softened
- 50 g granulated sugar
- 2 large eggs (one reserved for glaze)
- 5 g salt
For decoration: 150 g white chocolate, a small carrot, a handful of black peppercorns, assorted colorful candies or dragées, and wooden toothpicks for arms. A quality glass food processor bowl can make mixing the dough effortless, but hand-kneading is equally rewarding.
Step-by-Step: Crafting Your Snowman Buns
Follow these steps to bring your snowy creations to life. Each step builds on the last, so take your time and enjoy the tactile pleasure of working with dough.
Step 1: Prepare the Dough
In a large mixing bowl, combine the warm milk, yeast, and a pinch of sugar. Let it stand for 5–10 minutes until frothy. Add the flour, remaining sugar, softened butter, 1 egg, and salt. Mix until a soft dough forms, then turn it out onto a lightly floured surface and knead for 8–10 minutes until smooth and elastic. If you prefer a hands-free approach, a planetary mixer with a dough hook works beautifully here. Place the dough in a greased bowl, cover with plastic wrap or a damp towel, and let it rise in a warm spot for 1.5–2 hours, until doubled in size.
Step 2: Divide and Shape
Punch down the risen dough and turn it onto a floured surface. Divide it into 4 equal portions (about 100 g each). Further divide each portion into two-thirds and one-third. Roll the larger piece into a ball for the snowman’s body, and the smaller piece into a ball for the head. Stack them gently, pressing the head onto the body to adhere. Repeat to form four complete snowmen.
Step 3: Apply the Egg Wash
Whisk the reserved egg yolk with a tablespoon of milk. Brush this mixture generously over each assembled bun. This golden wash will give your snowmen a beautiful, glossy sheen during baking. A fine-mist oil sprayer can also be used to add a final touch of shine if desired.
Step 4: Bake to a Golden Finish
Preheat your oven to 180°C (conventional) or 160°C (fan). Place the buns on a parchment-lined baking sheet, leaving generous space between them. Bake for 25–30 minutes, until the tops are deep golden brown and the buns sound hollow when tapped. If you own a wall oven microwave combo with an air fryer function, you can use the air fryer setting for a lighter, crispier crust – just reduce the temperature to 160°C and check at 20 minutes.
Step 5: Cool and Decorate
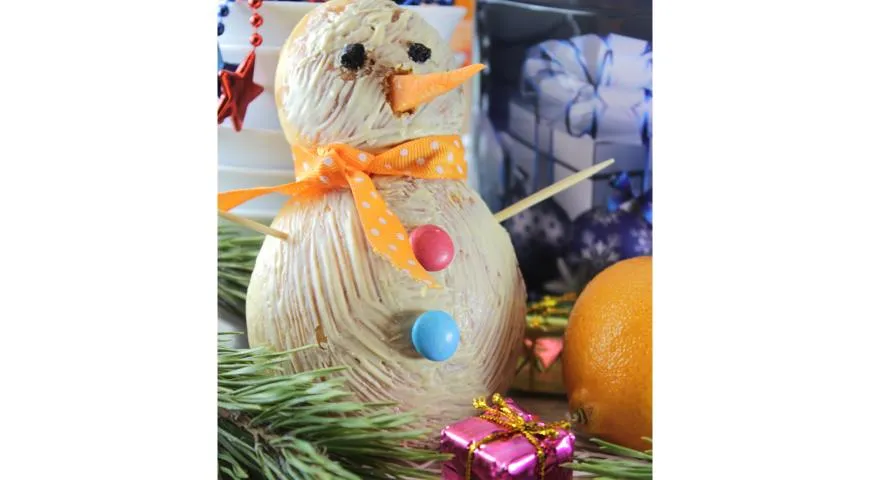
Let the buns cool completely on a wire rack before decorating. Melt the white chocolate in a heatproof bowl set over simmering water (or in short bursts in the microwave). Drizzle or spoon the melted chocolate over the top halves of the snowmen to resemble snow caps. While the chocolate is still tacky, press in peppercorns for eyes, a sliver of carrot for the nose, and colorful candies for buttons. Insert two short toothpicks into the sides of the body for arms.
Tips for Flawless Snowman Buns
- Dough consistency: If the dough feels too sticky, add flour one tablespoon at a time. Too dry? Add a splash of milk.
- Even rising: Keep the dough in a draft-free area. A commercial countertop convection oven with a proofing setting can provide ideal humidity and temperature.
- Chocolate coating: For a smooth finish, temper the white chocolate or use a store-bought melting variety. Avoid overheating, as white chocolate seizes easily.
- Make ahead: The baked, undecorated buns can be frozen for up to a month. Thaw, reheat briefly, then add the decorations.
Variations to Suit Every Palate
While the classic version is pure pleasure, feel free to adapt. Stuff the dough with a spoonful of chocolate-covered raisins or a dollop of vanilla pastry cream before shaping. For a savory twist, omit the chocolate and decorate with cream cheese and smoked paprika “buttons.” If you are working with a gluten-free diet, substitute a high-quality all-purpose gluten-free flour blend and increase the liquid slightly. A food processor for nut butter can also be used to grind almond flour for a richer dough.
Frequently Asked Questions
Can I use a bread machine for the dough?
Absolutely. Combine all dough ingredients in your bread machine and run the dough cycle. Then proceed with shaping and baking as described. If your machine has a delay timer, you can even set it to finish just before you start shaping.
How do I prevent the chocolate from cracking?
Make sure the buns are completely cool before applying chocolate. If you want a thicker coating, apply two thin layers, letting the first set partially before adding the second. A non-toxic immersion blender can help you achieve a perfectly smooth melted chocolate consistency.
Can I use a different type of chocolate?
Yes. Dark or milk chocolate work wonderfully, though the visual contrast with the snowman theme is lost. For a vibrant white “snow” look, stick with white chocolate or a white candy coating.
How long do the buns stay fresh?
Undecorated buns keep for 2–3 days in an airtight container at room temperature. After adding chocolate, store in a cool, dry place for up to 2 days. Do not refrigerate, as the chocolate may bloom.
Is it necessary to use peppercorns for the eyes?
No. You can substitute with small chocolate chips, edible googly eyes, or even tiny dots of black icing. The peppercorns add a subtle, spicy kick when bitten into, which some people love.
Final Thoughts: Bringing Snow to Your Table
In a world that often rushes forward, these Snowman Buns invite you to pause, create, and savor. They remind us that winter magic does not depend on weather – it lives in the warmth of an oven, the smile of a child, and the simple joy of sharing something made by hand. Serve them with a cup of artisan coffee or a glass of sweet high-alcohol wine for a complete festive experience. Happy baking, and may your kitchen always be a place of holiday cheer.


