


Few desserts evoke the warmth of a Russian kitchen quite like Medovik—the legendary honey cake with a tender, custard-filled soul. This iconic tort layers thin, caramel-hued honey biscuits with a silky planetary mixer-smooth custard cream, resulting in a symphony of texture and nostalgia. Our version honors tradition while embracing modern precision, perfect for festive tables or an indulgent weekend project. Ready to bake a masterpiece that yields 8 dreamy layers? Let the honey and patience guide you.
About This Classic Russian Honey Cake
Medovik, or ''Honey Cake,'' has been a staple of post-Soviet celebration since the early 19th century. Legend has it that a young pastry chef created the first batch for Empress Elizabeth I, using honey to mask a burned cake base—and a beloved dessert was born. Today, it remains a symbol of hospitality and skill, requiring only humble ingredients but demanding technique. The magic lies in the water bath method, which transforms simple honey, eggs, and flour into ethereal layers that soften overnight in the fridge. For the best results, a non-toxic immersion blender helps achieve lump-free custard, while a reliable stand mixer streamlines dough preparation.

Ingredients
For the Honey Cake Layers (Dough)
- 600–640 g all-purpose flour, plus extra for dusting
- 180 g granulated sugar
- 50 g unsalted butter
- 4 large eggs (C1 size)
- 70 g honey (preferably light floral honey)
- 1 tsp baking soda
- Pinch of salt
For the Custard Cream
- 1 liter whole milk
- 4 large eggs (C1 size)
- 180 g granulated sugar
- 40 g all-purpose flour
- 50 g unsalted butter, softened
Step-by-Step Instructions
1. Prepare the Honey Base
Place the honey in a medium saucepan. Add the baking soda and set the pan over a hot water bath (a bain-marie). Heat, stirring occasionally, until the mixture doubles in volume and turns a deep amber. This step activates the honey’s sugars and builds the cake’s signature caramelized flavor. Use a heatproof spatula to avoid burns.

2. Combine Wet Ingredients
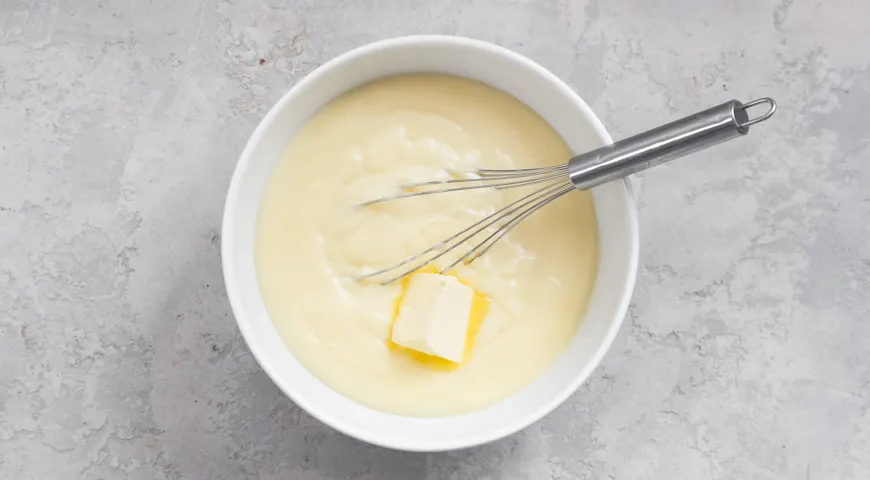
In a separate bowl, whisk the eggs with the sugar and salt until pale and foamy. Stir in the softened butter and the hot honey mixture. Return the bowl to the water bath and cook, whisking constantly, for 5 minutes. Remove from heat and let cool for 10 minutes—this tempers the eggs and stabilizes the dough.
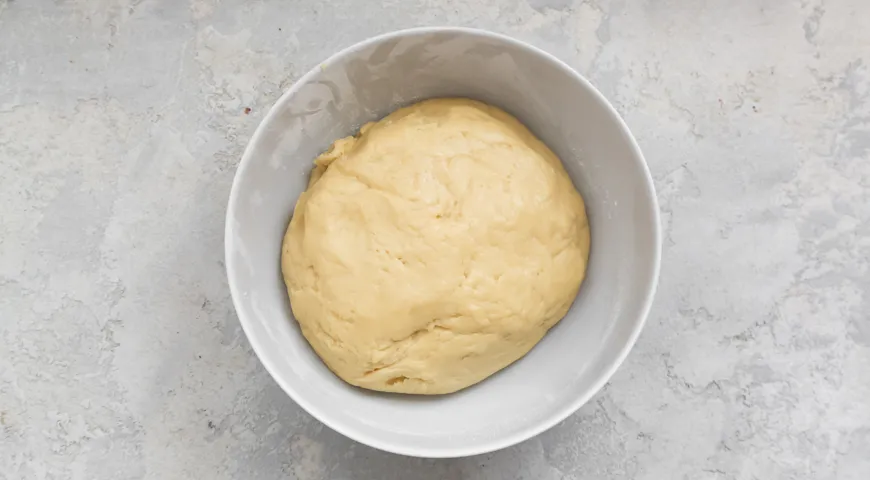
3. Form the Dough
Gradually sift the flour into the cooled honey mixture, stirring with a sturdy spoon until a stiff dough forms. Turn out onto a lightly floured surface and knead briefly until smooth. Wrap in plastic and refrigerate for at least 1 hour. Chilling relaxes the gluten and makes the dough easier to roll into gossamer-thin layers. A glass food processor can help if you prefer a hands-off approach, but hand-kneading gives you better control.
4. Make the Custard Cream
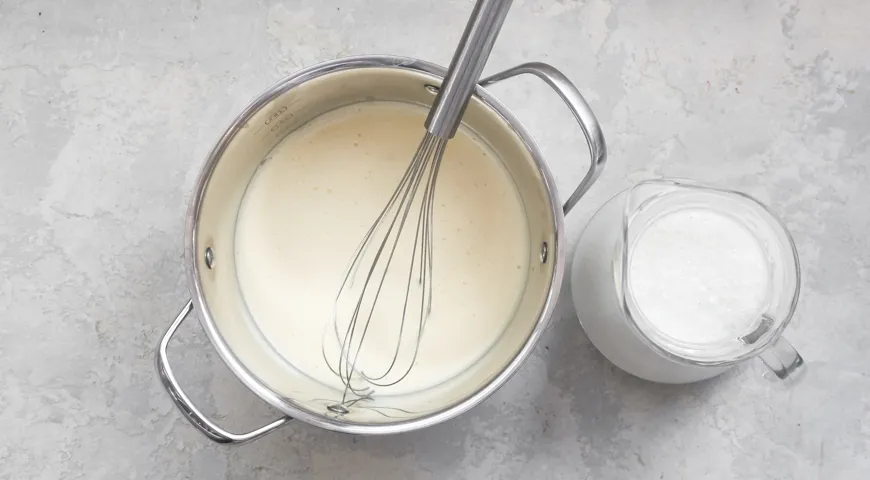
Cut the butter into small cubes and leave at room temperature to soften. In a saucepan, whisk the eggs with sugar and flour until smooth. Gradually pour in the cold milk, whisking continuously to prevent lumps. Place over low heat and stir constantly with a whisk or heatproof spatula until the mixture thickens and comes to a gentle boil (about 10 minutes). Remove from heat and let cool until just warm. Pass through a fine-mesh sieve to ensure a silky finish. Stir in the softened butter until fully incorporated. For a perfectly lump-free custard, a fine-mesh strainer is a must.
5. Roll and Bake the Layers
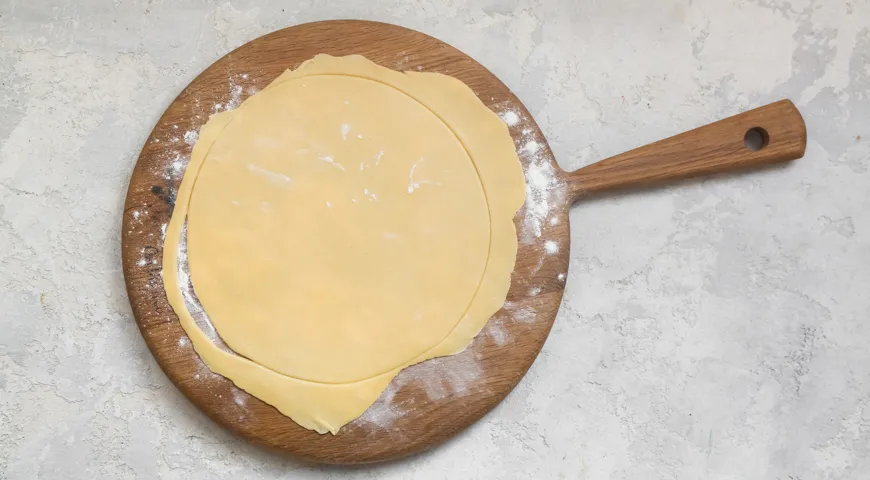
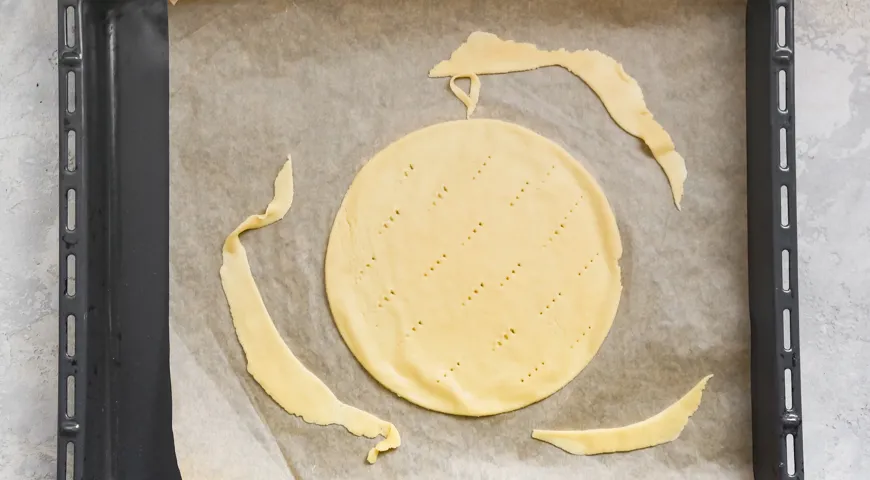
Divide the chilled dough into 8 equal portions. On a floured surface, roll one piece into a very thin circle (about 3 mm thick). Use a large plate or cardboard template as a guide and trim the edges with a sharp knife. Transfer the circle to a parchment-lined baking sheet. Prick all over with a fork to prevent doming. Collect the trimmings and place them beside the circle. Bake at 190°C for about 3 minutes, or until golden brown. Transfer the layer to a wire rack to cool. Repeat with the remaining dough.
6. Bake All Layers
Repeat the rolling and baking process until all 8 layers are cooked. Keep the baked layers stacked flat on the wire rack—they will be crisp but will soften once assembled.
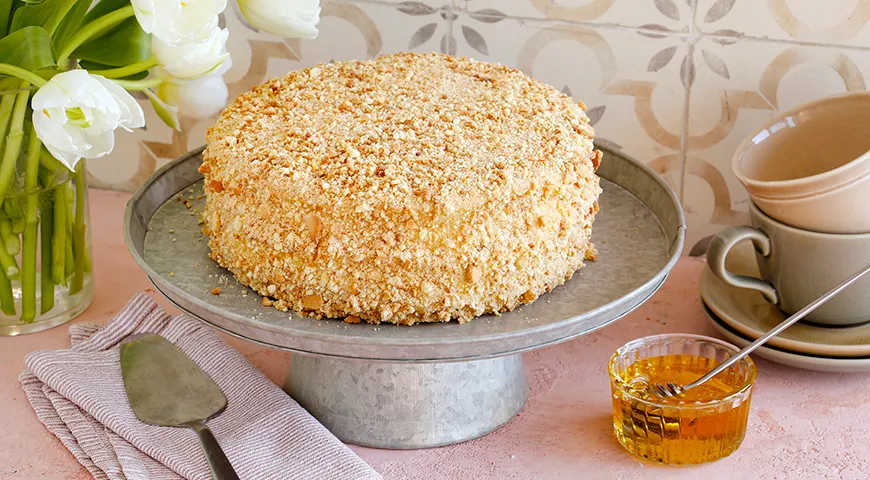
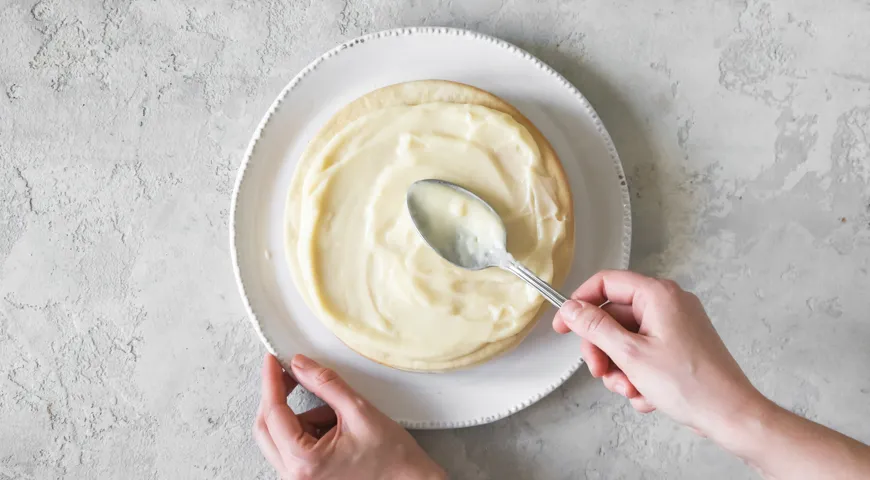
7. Assemble the Medovik
Place one cooled layer on a serving plate. Spread a generous layer of custard cream over it. Repeat with the remaining layers, finishing with cream on top. Crush the baked trimmings into fine crumbs and press them over the top and sides of the cake. Let the assembled cake rest at room temperature for 1 hour, then refrigerate for at least 3 hours—preferably overnight. The rest time allows the custard to soak into the layers, creating the characteristic tender texture. For even absorption, use an air fryer to quickly dry out trimmings for superior crumbs.
Tips for Perfect Medovik
- Water bath discipline: Always use a hot water bath for the honey mixture—it prevents scorching and builds the caramelized depth. A microwave pressure cooker can speed up the initial heating, but the bain-marie is essential for the full flavor.
- Roll as thinly as possible: Layers should be almost translucent. Uniform thickness ensures even baking and a delicate bite.
- Cool completely before assembling: Hot layers will melt the custard. Patience yields a pristine slice.
- Chill overnight: The cake improves drastically after 12–24 hours in the fridge. The layers absorb moisture and become cutting-perfect.
- Crumb coating: Save all trimmings—they become the iconic crumb exterior. A food processor grinds them to a fine, even texture.
Variations
- Chocolate Medovik: Replace 20 g of flour with cocoa powder in the dough and add a pinch of cinnamon. Fold melted dark chocolate into half the custard for a marbled effect.
- Nutty Crunch: Stir in 50 g of finely chopped walnuts or hazelnuts into the crumb coating. Toasting the nuts first enhances flavor—use a countertop convection oven for even toasting.
- Lemon-Honey Twist: Add the zest of one lemon to the custard and a tablespoon of lemon juice to the dough for a bright counterpoint.
- Vegan Adaptation: Use aquafaba (3 tbsp per egg) and coconut cream in place of dairy. The texture will be softer but still delightful. A high-quality non-dairy butter works well here.
Frequently Asked Questions
Can I use a different type of honey?
Yes, but the flavor profile changes. Darker honeys (e.g., buckwheat) yield a more intense, almost molasses-like cake, while mild acacia honey keeps it delicate. Always use raw honey for best results. Storing leftover honey in a sealed container preserves its quality.
How long does Medovik keep?
Stored in the refrigerator, the cake stays fresh for up to 5 days. The texture actually improves after day two as the layers continue to soften. For longer storage, freeze the assembled cake (without crumb coating) for up to 3 months. Thaw overnight in the fridge, then coat with fresh crumbs.
Why did my custard turn out grainy?
Grainy custard usually results from overheating or cooking at too high a temperature. Always use low heat and whisk constantly. If lumps form, strain through a fine sieve. A precision thermometer can help you keep the custard at 80–85°C, just below boiling.
Can I make the dough in advance?
Absolutely. The dough can be refrigerated for up to 3 days before rolling and baking. Wrap tightly in plastic to prevent drying. You can also freeze the baked layers (stack with parchment between) for up to 2 months. Thaw at room temperature before assembling.
What should I do if my layers crack?
Cracking is common with thin layers. Don't worry—the cream and crumbs will hide imperfections. To minimize cracking, roll the dough between two sheets of parchment paper. This eliminates the need for flour and reduces stress on the dough. A silicon baking mat also helps.
Is Medovik very sweet?
The honey and sugar create a rich sweetness, but the custard cream balances it with creamy depth. If you prefer less sweetness, reduce the sugar in the dough to 150 g and the custard to 160 g. For a sophisticated twist, serve with a dollop of sour cream or a sprinkle of flaky sea salt.
Can I bake the layers in a convection oven?
Yes, but reduce the temperature slightly (180°C) and watch closely—the thin layers brown quickly. A convection oven with even heat distribution like the ones we review delivers consistent results. Rotate the pans halfway through if your oven has hot spots.
Conclusion
Medovik is more than a cake; it's a labor of love that rewards patience with extraordinary flavor. Whether served at a family gathering or as a personal treat, each honeyed forkful carries history and heart. With these detailed steps and tips, you'll master the art of the Russian honey cake. Pair it with a robust tea or a glass of George Howell coffee for a truly memorable experience. Happy baking!


